Parts of the mr-1, Front and side panels – KORG MR-1 User Manual
Page 7
7
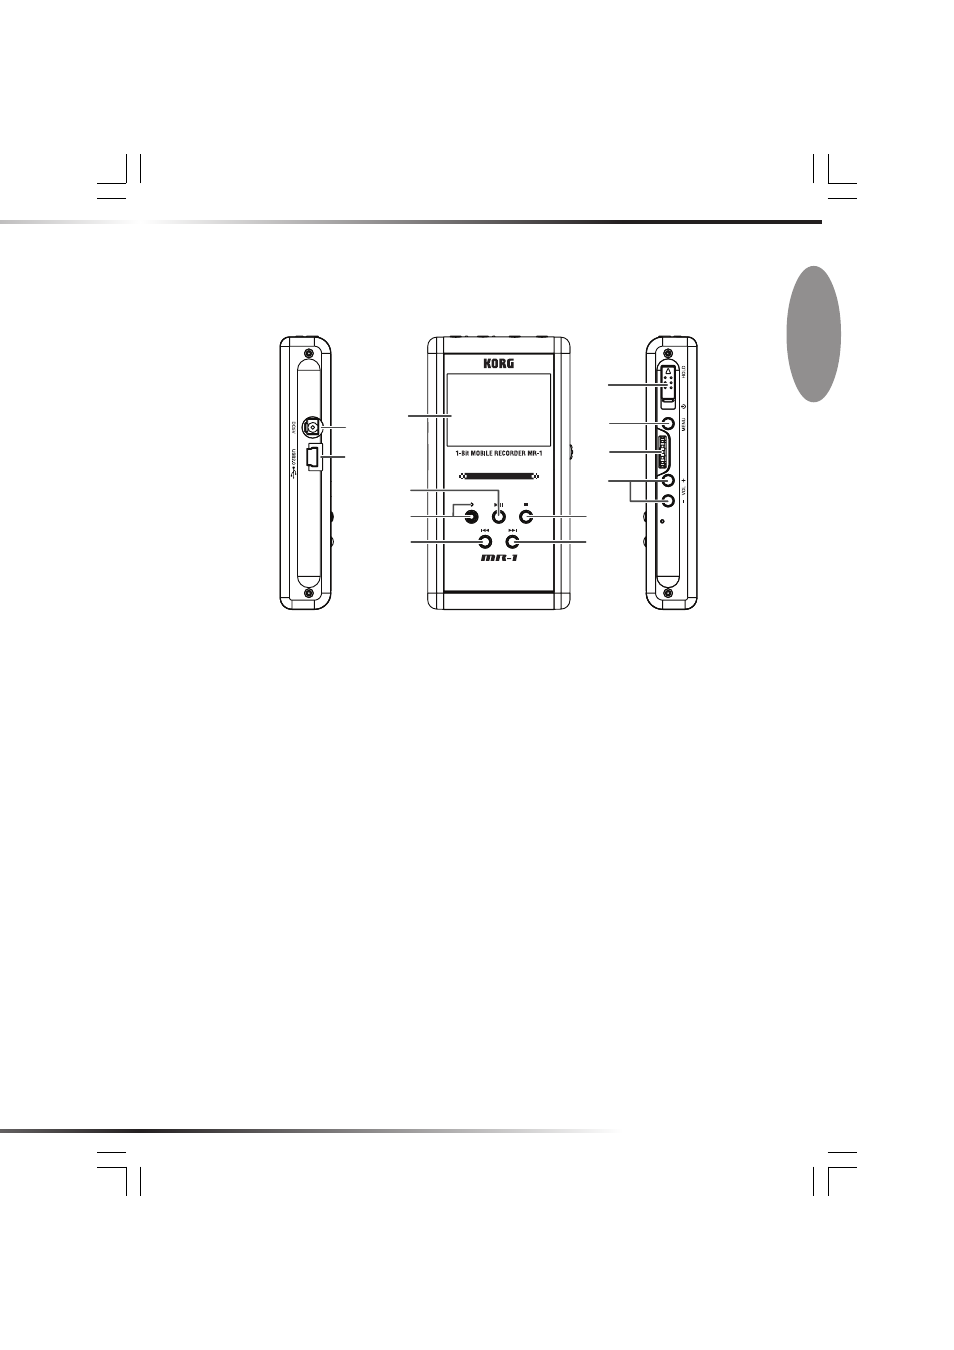
Parts of the MR-1
Front and side panels
1
2
4
5
6
7
8
9
10
11
12
3
1. DC 5V connector
Connect the included AC adaptor here (also used for charging the battery).
2. USB connector
This lets you use a USB cable to connect the MR-1 to your computer.
3. Display
The display shows the level meters and counter during recording and playback, and can
also show information about the project (
→p.13) or file, and parameter settings.
4. Playback/Pause button
This button starts recording or playback. During recording or playback, you can press this
button to pause (temporarily halt).
5. Record button / Record LED
Press this button to enter record-ready mode; the record LED will blink slowly. During
recording, the record LED will blink rapidly.
6. Rewind button
Use this button to select a project (
→p.13) or file, or to rewind.
7. Stop button
This button stops recording or playback.
8. Fast-forward button
Use this button to select a project (
→p.13) or file, or to fast-forward.
MR1_Text1_E.p65
06.11.22, 11:59 AM
7