Fig. 3 – Kicker QS60.2 User Manual
Page 7
7
WOOFER MOUNTING
The KICKER QS components are designed for free-air applications and do not require a sealed enclosure
for optimum performance. It is important to isolate the sound coming from the front of the speaker from
the sound radiating from the back of the speaker. This is most easily accomplished by mounting the
speakers in a vehicle’s factory locations or in a location with a semi-isolated rear chamber (like the rear
deck of a car behind the rear seats).
If you are replacing factory speakers in their original locations, you may have to enlarge the speaker
cut-outs and pre-drill new screw holes using a 7/64” (2.5mm) bit. Custom mounting locations will require
more preparation and work. Make sure that the speaker will not interfere with trunk and door opening and
closing mechanisms and that the enclosed screws will not puncture the fuel tank, puncture wiring, or
interfere with any other mechanical parts on the underside of the mounting surface. Cycle the windows all
the way down and up.
If the speaker cut-out locations require you to cut metal, avoid structural metal and braces. If the door
body and panel cannot support the weight of the speaker, an optional reinforcing ring (thin piece of wood
or Medium Density Fiberboard) may be fastened or adhered to the door body. Mount the speaker to the
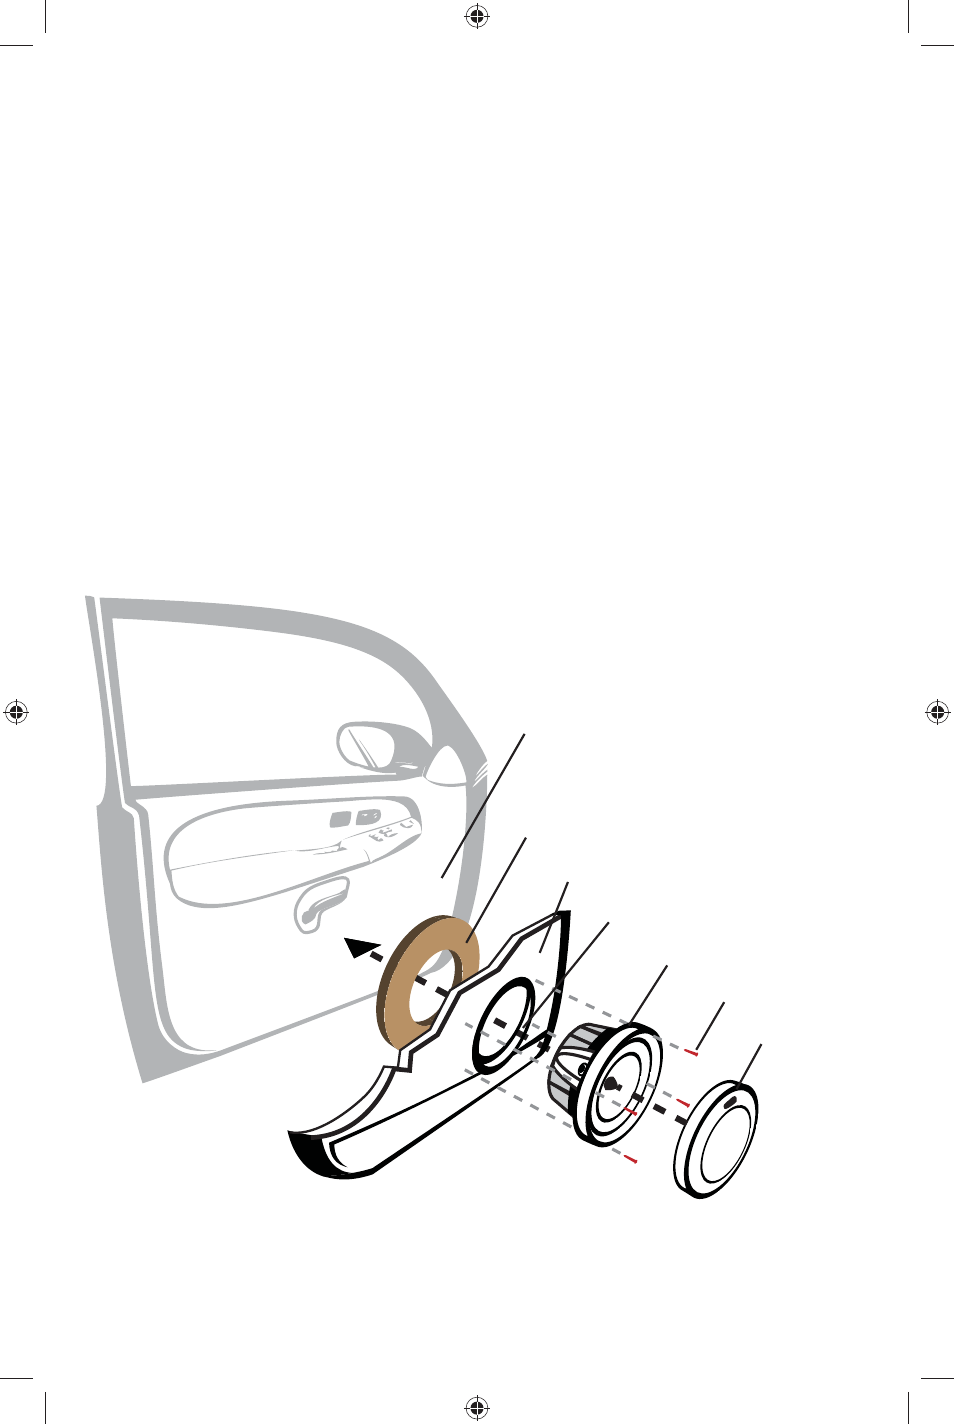
vehicle as outlined in Fig. 3.
door body
door panel
speaker cut-out
QS woofer
speaker grille
screws
reinforcing ring (optional)
Fig. 3
2009 QS Multilingual h01.indd 7
2009 QS Multilingual h01.indd 7
11/21/2008 10:54:30 AM
11/21/2008 10:54:30 AM