2) connecting the probe – Konica Minolta Oxegen Saturation Monitor PULSOX-300 User Manual
Page 15
13
Preparations
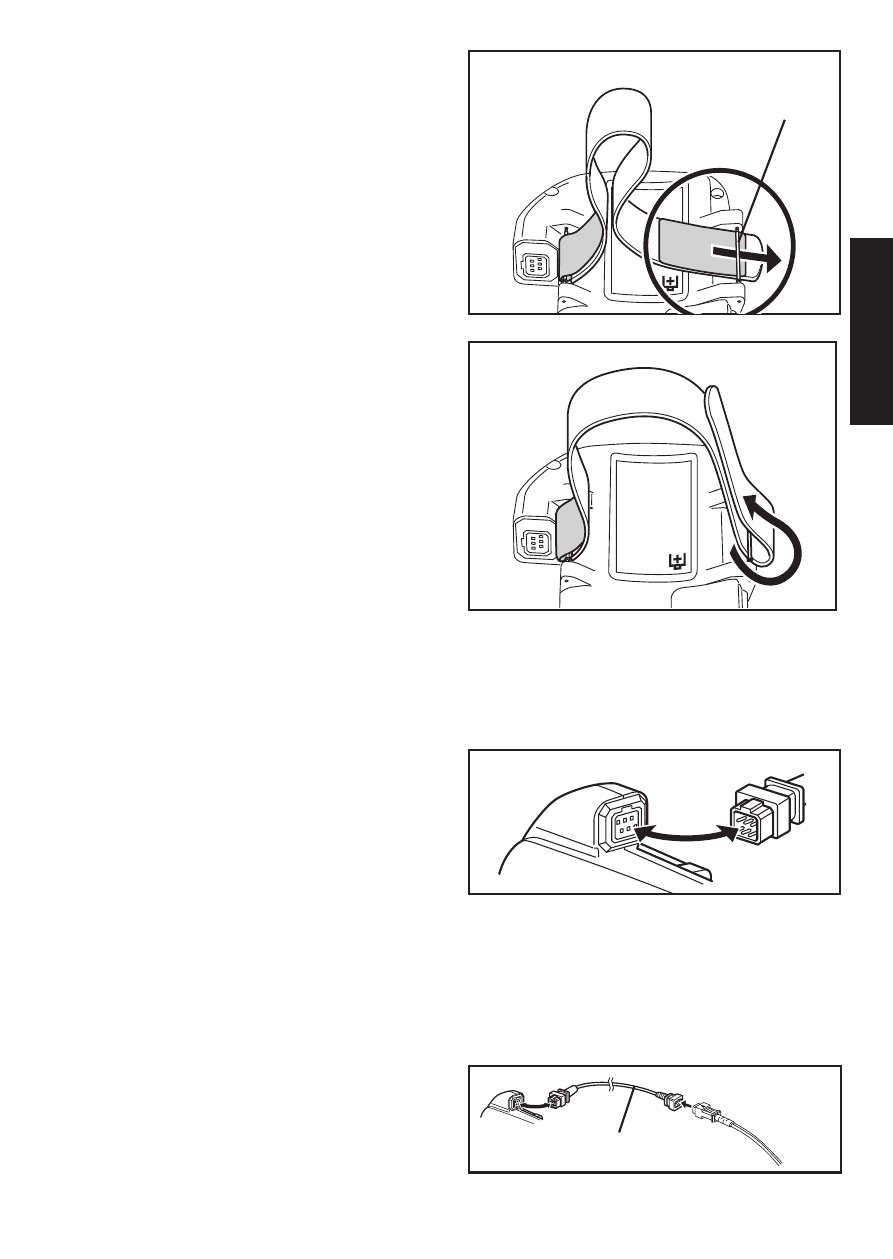
4
Pass the other end of the
band outward through
band fixture B.
◆
Take care not to twist
the band.
2) Connecting the probe
Connect the probe’s connector
plug into the Probe Connector
on the instrument.
◆
M a k e s u r e t h a t p r o b e ’s
connector plug is oriented
correctly.
◆
Do not connect it in with
excessive force. Doing so may
damage the connector.
◆
Do not touch the connector
terminals by hand. Contact
failure may occur.
Band fixture B
5
Fold back and secure
the band with the hook-
and-loop tape section.
◆
When attaching the
instrument to an arm,
adjust the band length
and fitting at this hook-
and-loop tape section.
Extension Cable EC-300 (1m)
*Connecting the extension cable
EC-300 between the PULSOX-300
and the probe extends the probe cable
to a total length of 1m.