Assembly – Kawasaki NINJA B9272 User Manual
Page 10
Assembly
10
• Turn the vehicle upright.
Note: The left and right grips are not interchangeable!
The hole in the left grip is smaller than the hole in
the right grip.
• Fit the left grip on the end of the left handlebar.
• Fit the right grip on the end of the right handlebar.
Hint: If it is difficult to slide the grip onto the handlebar,
moisten the inside of the grip with water.
14
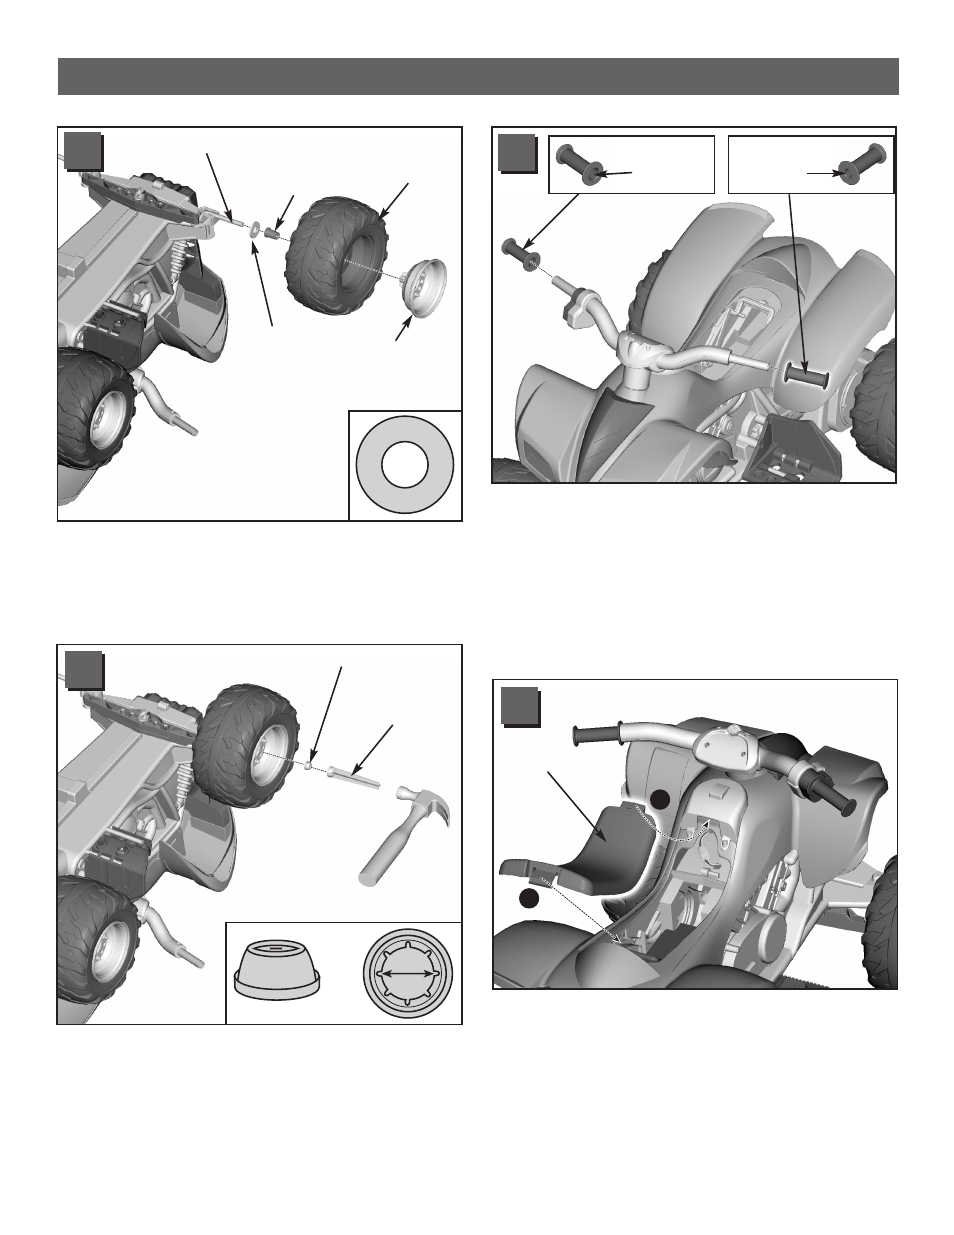
• Fit the tab at the front of the seat into the slot in the
vehicle near the handlebars.
• “Snap” the tab at the back of the seat into the slot near
the rear of the vehicle.
15
Seat
11
1
11
2
Left Grip
Small Hole
Right Grip
Large Hole
• Fit a cap nut on the end of the front axle.
• Fit the cap nut assembly tool over the cap nut. Tap the
end of the cap nut assembly tool with a hammer to
secure the cap nut on the end of the axle. Pull on the
front wheel to be sure it is secure.
• Repeat steps 11 and 12 to assemble a washer, bushing,
front wheel, hubcap and cap nut to the other front axle.
13
Cap Nut
Cap Nut
Assembly
Tool
.437"
• Slide a washer onto a front axle.
• Slide a bushing, ring end first, onto the front axle.
• Slide a front wheel, flat side first, onto the front axle.
• Slide a hubcap, indented side out, onto the front axle.
12
Front Axle
Bushing
(Ring End
First)
Front Wheel
(Flat Side
First)
Hubcap
(Indented
Side Out)
Washer