Warning – Kirby Morgan 37 User Manual
Page 2
69
Kirby Morgan 37 & 57
© Copyright 1970-2008 Kirby Morgan Dive Systems, Inc. All rights reserved. Document # 080508001
seat. Thread the seat into the valve body.
4) Tighten the seat to 150 inch lbs. (17 Newton me-
ters) with a torque wrench while holding the body
in a soft jaw vice or wrench.
5) If the adapter has been removed, it must be cleaned
and wrapped with Teflon tape.
poppet and the poppet O-ring usually come out in
the seat being followed by the spring.
The only functional part remaining in the valve body
is a non-moving, pressed-in cage. The function of the
cage is to prevent the poppet O-ring from blowing out
of place during high flows. Do not remove the pressed
in cage. This can only be done at the factory.
3) Inspect the body interior for foreign matter of any
type and clean, if necessary. Clean in accordance with
the cleaning instructions in Chapter 6. If corrosion is
present, clean using the acidic solution as outlined
in Chapter 6.
4) Inspect the seat, wiper, O-ring, poppet O-ring and
poppet for wear, replace if necessary. Be sure each
part is clean and all components are lightly lubricated
with the appropriate lubricant. A repair kit is available
for replacement parts. (Part #525-330)
5) Be careful to wipe the poppet and poppet O-ring
thoroughly, removing nearly all silicone to prevent
foreign materials from sticking to these compo-
nents.
6) Replace the spring.
7.2.2 Reassembly of the One Way Valve
1) Slide the new O-ring over the poppet.
2) Insert the new spring into the valve body, followed
by the poppet.
3) Next, install the new O-ring and new wiper on the
Tighten to 150 inch lbs. (17 Newton Meters) with a
torque wrench.
Do not allow any Teflon tape to cover the
end of the adapter, or to enter the one-
way valve. Loose pieces of Teflon tape
can interfere with the performance of the
one-way valve or the regulator and may
block the diver’s air supply. This could
lead to death through suffocation.
WARNING
6) Test the operation of the valve.
7) Place the new O-ring on the end of the one way
valve assembly and reinstall the valve assembly in
the side block. Tighten to 150 inch lbs. (270 kg.cm.)
with a torque wrench.
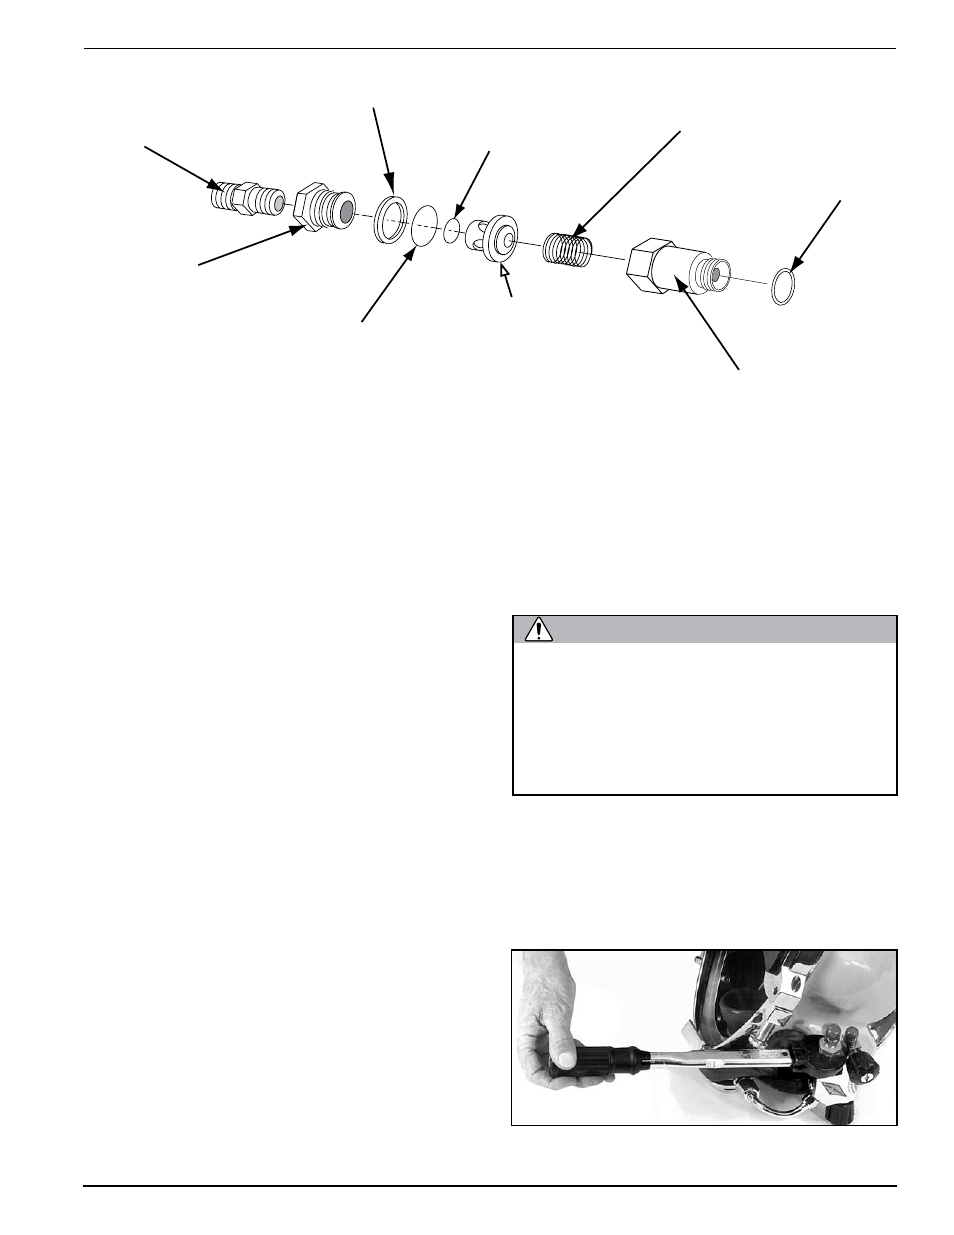
Correct assembly order of the one way valve.
Adapter
Seat
Wiper
O-ring
O-ring
Poppet
Spring
Body
O-ring