Kawasaki 691225 User Manual
Page 6
F
FU
UN
NC
CT
TIIO
ON
NA
AL
L D
DE
ES
SC
CR
RIIP
PT
TIIO
ON
N
C
CO
ON
NT
TR
RO
OL
LS
S A
AN
ND
D C
CO
OM
MP
PO
ON
NE
EN
NT
TS
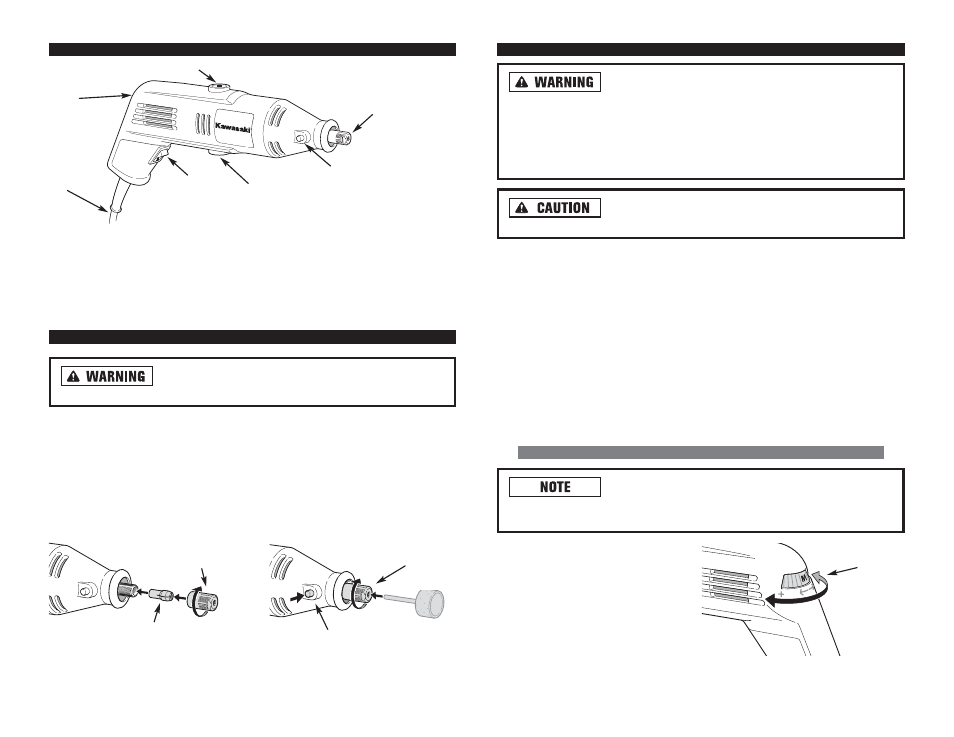
S::
1. Trigger Switch
2. Lock-On Button
3. Collet
A
AS
SS
SE
EM
MB
BL
LY
Y
Always unplug power tool before changing accessories,
changing collets or servicing.
• To loosen collet nut, press the shaft lock button and rotate the shaft by hand
until the lock engages the shaft preventing further rotation.
• D
DO
O N
NO
OT
T E
EN
NG
GA
AG
GE
E L
LO
OC
CK
K W
WH
HIIL
LE
E T
TH
HE
E R
RO
OT
TA
AR
RY
Y T
TO
OO
OL
L IIS
S R
RU
UN
NN
NIIN
NG
G..
• Never force a larger diameter shank into a collet. Always match the collet nut to
the shank size of the accessory you plan to use.
• Avoid excessive tightening of the collet nut when there is no bit inserted.
O
OP
PE
ER
RA
AT
TIIN
NG
G IIN
NS
ST
TR
RU
UC
CT
TIIO
ON
NS
S
D
Diisscco
on
nn
ne
ecctt tth
he
e p
po
ow
we
err p
pllu
ug
g ffrro
om
m tth
he
e A
AC
C p
po
ow
we
err sso
ou
urrcce
e
b
be
effo
orre
e a
an
nyy a
asssse
em
mb
bllyy,, a
ad
djju
ussttm
me
en
nttss,, o
orr a
ad
dd
diin
ng
g//rre
em
mo
ovviin
ng
g a
acccce
esssso
orriie
ess..
Following this preventative step reduces the risk of the saw coming on acciden-
tally and the risk of damage to the workpiece and injury to the operator.
Never hold the tool near your face. Accessories like wire brushes or grinding
wheels may come apart during use.
B
Be
e cca
arre
effu
ull n
no
ott tto
o cco
ovve
err tth
he
e a
aiirr vve
en
nttss w
wiitth
h yyo
ou
urr h
ha
an
nd
d.. T
Th
hiiss
w
wiillll cca
au
usse
e tth
he
e m
mo
otto
orr tto
o o
ovve
errh
he
ea
att..
This rotary tool is a multipurpose power tool. It is a drill, polisher, power brush,
grinder, cutter, and sander all in one. This high-speed, low torque tool is easy to
handle and accepts a wide range of accessories from polishers to router bits to wire
brushes and grinding wheels. The high speed allows it to do jobs that low speed
tools can't handle like engraving glass or cutting hardened steel.
Hold the tool in your hand and find your best grip.
Never push on the tool. The high speed and the accessory, not the pressure on the
tool, do the work.
Practice by making passes on a scrap piece of material. This tool works best if you
do the work in small increments, moving back and forth until you reach the desired
result.
O
OP
PE
ER
RA
AT
TIIN
NG
G S
SP
PE
EE
ED
DS
S
Speed is affected by voltage changes. If the incoming volt-
age is reduced, it will slow the RPM of the tool, especially at the lowest setting.
If the tool appears to be running slowly, increase the setting accordingly.
The operating speed will vary depend-
ing on the material and type of acces-
sory you are using.
To find the right speed for your job,
use a test piece of the material. Try
various speeds until you find the one
that is best for your project.
10
1
2
3
4
4. Cord
5. Brushes
6. Speed Control Dial
6
5
5
COLLET
SHAFT LOCK
BUTTON
KEYLESS
CHUCK
ASSEMBLY
COLLET NUT
9
SPEED
CONTROL
DIAL