Optional ev-11ls single-gang mounting plate, Specifications: parts list, Optional ev-11lr round junction box – SECO-LARM USA 84-IR LED Bullet Cameras EV-1826-PKGQ User Manual
Page 2
ENFORCER Zeta Series 84-IR LED Bullet Cameras
2
SECO-LARM U.S.A., Inc.
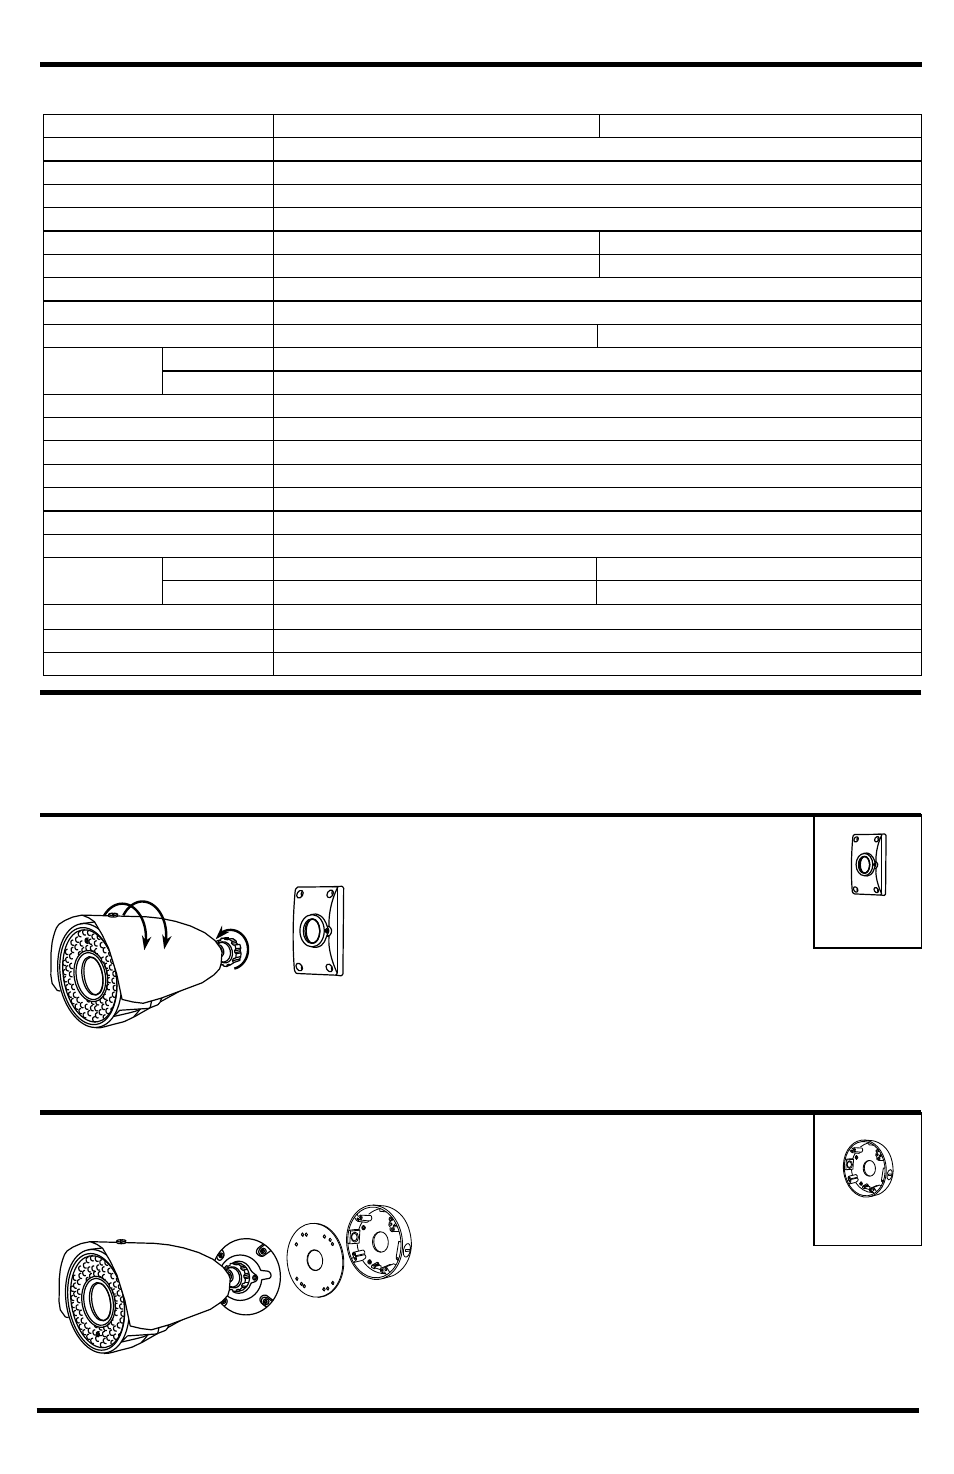
Optional EV-11LS Single-Gang Mounting Plate
(Sold separately)
:
Model #
EV-1826-NKGQ
EV-1826-PKGQ
Type
IR LED Bullet Camera
CCD
1
/
3
” Sony Super HAD II
# of infrared LEDs
84
Lens
2.8~12mm
Resolution
600 TV lines
600 TV Lines
Pickup elements
768x494 pixels
752x582 pixels
Sync
Internal
Video output
1.0Vp-p Composite video, 75Ω
Video output format
NTSC
PAL
Minimum
illumination
LEDs OFF
0.1 Lux
LEDs ON
0 Lux
Gamma correction
0.45
S/N ratio
>45dB
Shutter control
Auto Electric Shutter (AES)
Gain control
Auto
IP rating
IP66
LED range
Up to 210ft (64m)
Operating voltage
12VDC
Current
draw
LEDs OFF
130mA
130mA
LEDs ON
660mA
660mA
Operating temperature
14 ~122 F (-10 ~50 C)
Dimensions
10
13
/
16
” x 4
5
/
16
” x 4
5
/
8
” (275 x 116 x 118 mm)
Weight
2-lb 7-oz (1.1kg)
1 x IR camera
1 x Hex wrench
Specifications:
Parts List:
1 x Sunshield
1 x Manual
1 x DC plug with
terminal block
Optional EV-11LR Round Junction Box
(Sold separately)
:
ENFORCER 84-IR LED Bullet Cameras can
mount to an optional single-gang mounting plate.
1. Run the camera’s wires through the plate.
2. Use the 4 included mounting screws to mount
the EV-11LS single-gang plate to the wall.
3. Remove the base from the camera by twisting
4. Twist the camera into the plate until it is tight.
5. Screw the mounting arm into the plate until it is tight.
6. Tighten the adjustment nut on the camera.
7. Tighten the secure screw on the plate.
ENFORCER 84-IR LED Bullet Cameras can
mount to an optional round junction box.
1. Use the mounting template (included with the
EV-11LR) to mark and drill into the wall, if necessary.
2. Use 4 mounting screws (included with the EV-11LR) to mount
the junction box to the wall.
3. Mount the camera through the foam pad (included with the
EV-11LR) to the junction box.
4. Wire can either be run through the large opening in the center
of the EV-11LR or through the conduit fittings on the side.
EV-11LS
EV-11LR
4 x Mounting screws
4 x Screw anchors