Adjust the tilt of the arms – Sony SU-LW1 User Manual
Page 12
12
(GB)
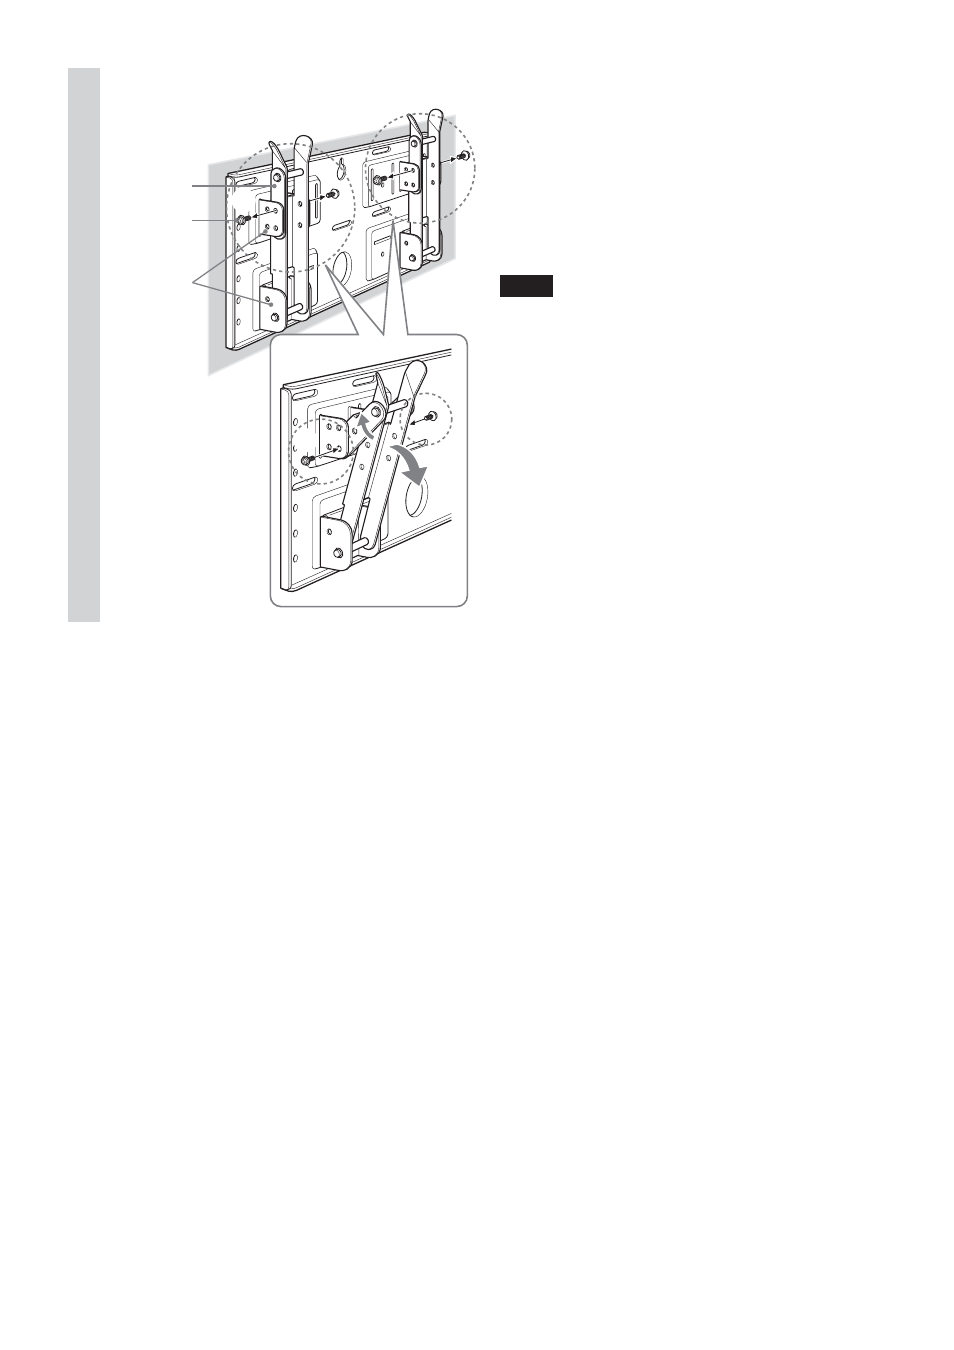
Adjust the tilt of the arms.
If you want to install the display vertically, flush with
the wall (0°), skip 1 and 2 below. Check that the
arms are securely attached to the Plate Unit.
1
Remove all four tilt adjusters.
2
Put them into the screw holes corresponding to the
desired angle (5°, 10°, 15°, or 20°) and tighten them
firmly.
Notes
• The angle of the left and right arms must be the
same.
• Be careful not to catch your fingers when adjusting
the angle of the arms.
• When using an electric screwdriver to tighten the
screws, the torque must be approx. 2 N
•
m.
• Check that the arm bases are securely attached to
the Plate Unit.
2
1
Arm
Arm bases
A
and B
Tilt adjuster
3
See also other documents in the category Sony Furniture:
- SU-W210 (148 pages)
- SU-W210 (1 page)
- SU-W210 (40 pages)
- SU-WL500 (1 page)
- SU-WL700 (6 pages)
- SU-WL700 (68 pages)
- SU-WL700 (7 pages)
- SU-RG11MA (2 pages)
- SUWH500 (2 pages)
- SU-WL500 (7 pages)
- SU-WL500 (204 pages)
- SU-GW3 (2 pages)
- SU-GW3 (1 page)
- PSS-610 (24 pages)
- SU-PW2 (32 pages)
- SU-PW2 (1 page)
- SU-PW2 (44 pages)
- SU-P42T1 (32 pages)
- SU-WTS1 (68 pages)
- SU-P42T2 (36 pages)
- SU-P42T2 (1 page)
- SUB463S (35 pages)
- SU-B461S (60 pages)
- SU-36HX1 (16 pages)
- SU-FL300L (292 pages)
- SU-FL300L (36 pages)
- SU-PF1L (36 pages)
- SU-FL61 (211 pages)
- SU-W100 (28 pages)
- SU-W100 (1 page)
- SU-32HX1 (16 pages)
- SU-RS51U (64 pages)
- WSX10FB (2 pages)
- SU-LW1 (64 pages)
- SU-B461S (255 pages)
- RHTG2000 (36 pages)
- HVL-HL1 (2 pages)
- HVL-LBP (2 pages)
- SU-30HX1 (16 pages)
- SPM-TRI/C (6 pages)
- SU-PF2 (40 pages)