Host cable, Antenna, Power cable – Sierra Wireless 350 User Manual
Page 7: Install the cdpd device cabling and connector, More, Install cdpd cabling and connector, Installing the antenna, cable, and connector, Connecting power to the airbooster 350 amplifier
Use the four mounting screws supplied to secure the booster through
the holes along the base of the booster case.
4.
o
o Host Cable
o
Install CDPD Cabling and Connector
Due to the variation in required cable lengths and connector types that may be
needed between the booster and the host CDPD device, there is no host cable
in the AirBooster 350 RF amplifier package. These cables are ordered
The steps involved in the connection are:
Determine a suitable location for the host end connection.
1.
Thread the cable through the vehicle so that the SMA connector is
available for connection to the booster.
2.
Connect the SMA connector to the AirBooster 350 MODEM
connector. Tighten firmly by hand; do not use tools.
3.
o
o Antenna
o
Installing the Antenna, Cable, and Connector
Variation in the installation requirements for antenna type and cable lengths
prevent inclusion of these components in the product package. Antennas and
The requirements for the antenna are:
Standard cellular frequencies.
●
50 Ohm impedance.
●
TNC connector (for the booster end).
●
(recommended but not required)
Approved Manufacturer and Model
The steps involved in the installation and connection are:
Determine a suitable location for the antenna
(open air exposure). Mount it according to the instructions
provided with it.
1.
Thread the cable through the vehicle so that the TNC connector is
available for connection to the booster.
2.
Connect the TNC connector to the AirBooster 350 ANTENNA
connector. Tighten firmly by hand; do not use tools.
3.
o
o Power Cable
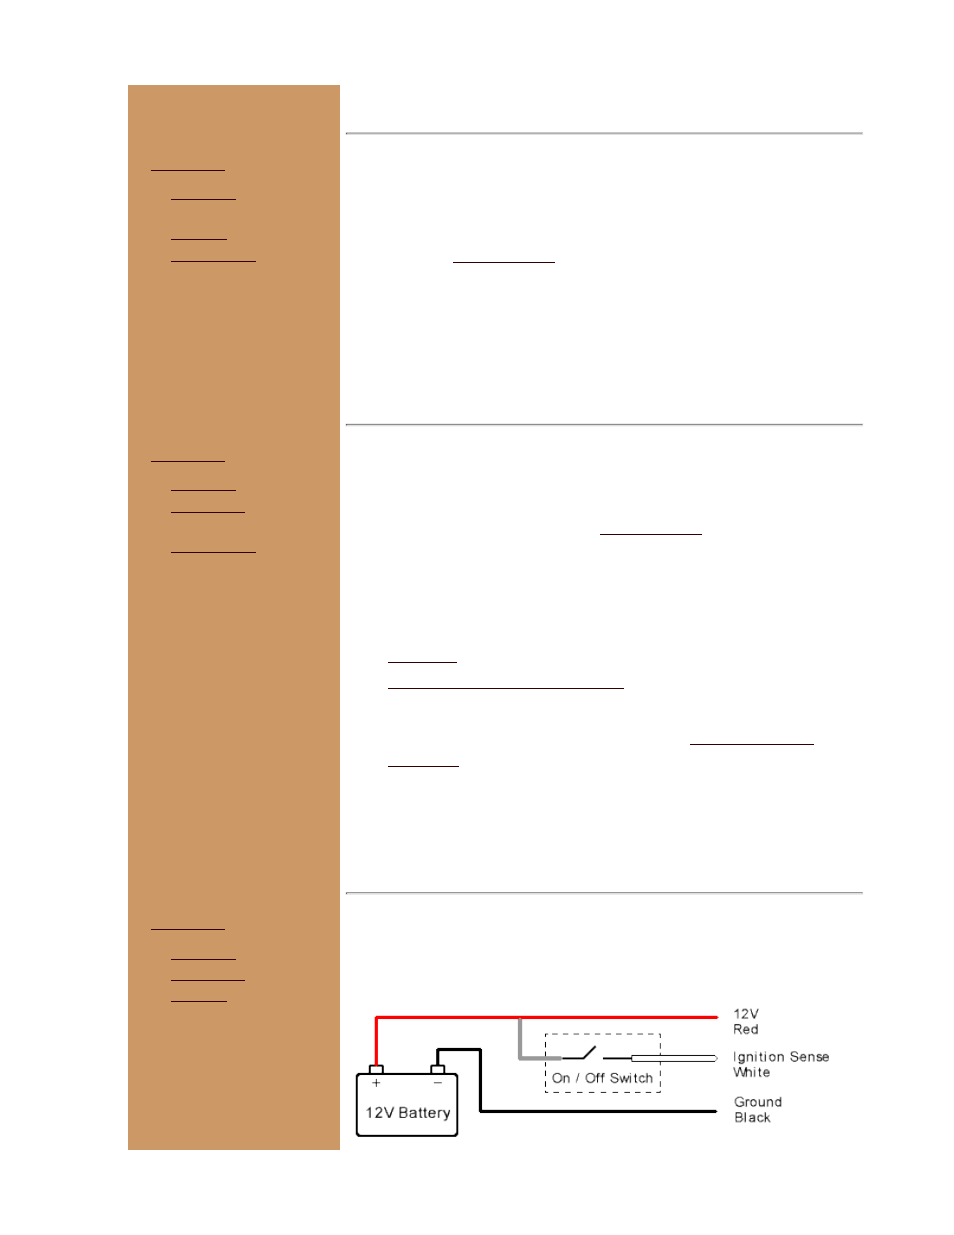
Connecting Power to the AirBooster 350 Amplifier
A power cable is provided in the AirBooster 350 package. The recommended
connection is illustrated below.