V-belt replacement – Woodstock SHOP FOX W1755 User Manual
Page 40
-38-
W1755 6" Parallelogram Jointer
SE
RV
IC
E
V-Belt Replacement
Inspect the V-belt closely; if you notice fraying, cracking,
glazing, or any other damage, replace the belt. A worn or
damaged V-belt will not provide optimum power transmis-
sion from the motor to the cutterhead.
Overly loose V-belts can slip on the pulleys and burn up
or cause poor machine performance. Overly tight V-belts
cause unecessary wear on the motor and pully bearings,
leading to a shortened lifespan.
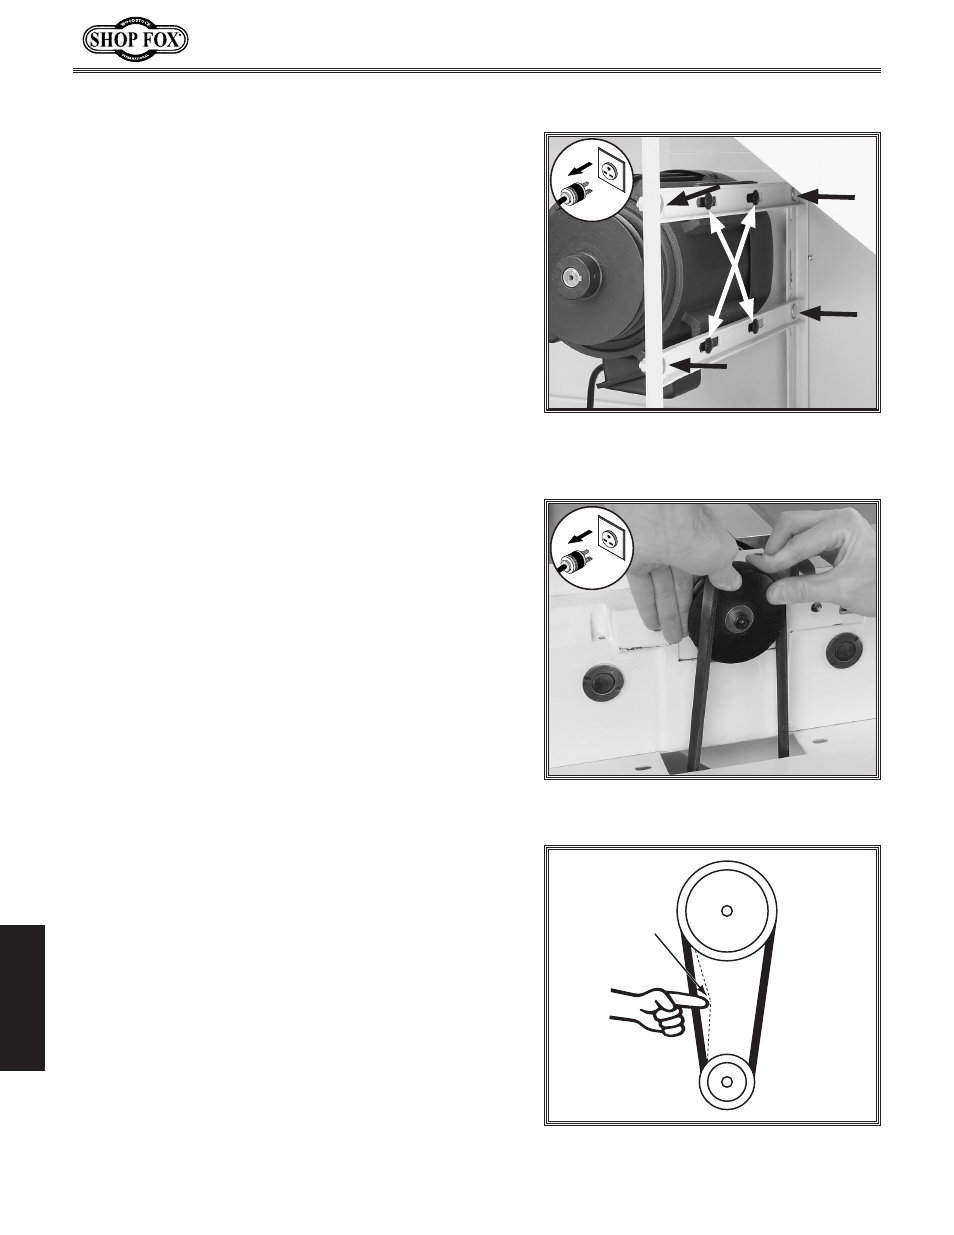
To replace the V-belts, do these steps:
1. DISCONNECT JOINTER FROM POWER SOURCE!
2. Open the back cover.
3. Loosen the motor bracket bolts shown by the black
arrows in
Figure 64.
4. Roll off the old V-belt and roll on the new V-belt, as
shown in
Figure 65.
5. Check the alignment of the pulleys to make sure the
V-belt is straight up and down.
— If the pulleys are aligned, skip to
Step 9.
— If the pulleys are NOT aligned, refer to
Pully
Alignment on Page 39 and align the pulleys.
6. Pull down on the motor with one hand to keep ten-
sion on the V-belt, and tighten the motor bracket
bolts with your other hand.
7. Push the center of the V-belt as illustrated in Figure
66, using moderate force. When tensioned correctly,
the deflection should be approximately
1
⁄
4
".
— If the deflection is not correct, loosen the motor
bracket bolts and repeat
Steps 9–10.
8. Reinstall the belt guard.
9. Replace the cover on the back of the jointer stand.
Figure 65. Rolling the V-belt onto the
cutterhead pulley.
Figure 64. Motor bracket bolts (black
arrows) and motor mount bolts (white
arrows).
������
����������
������
Figure 66. Checking belt deflection.