Star Tech Development SV211KUSB User Manual
Page 6
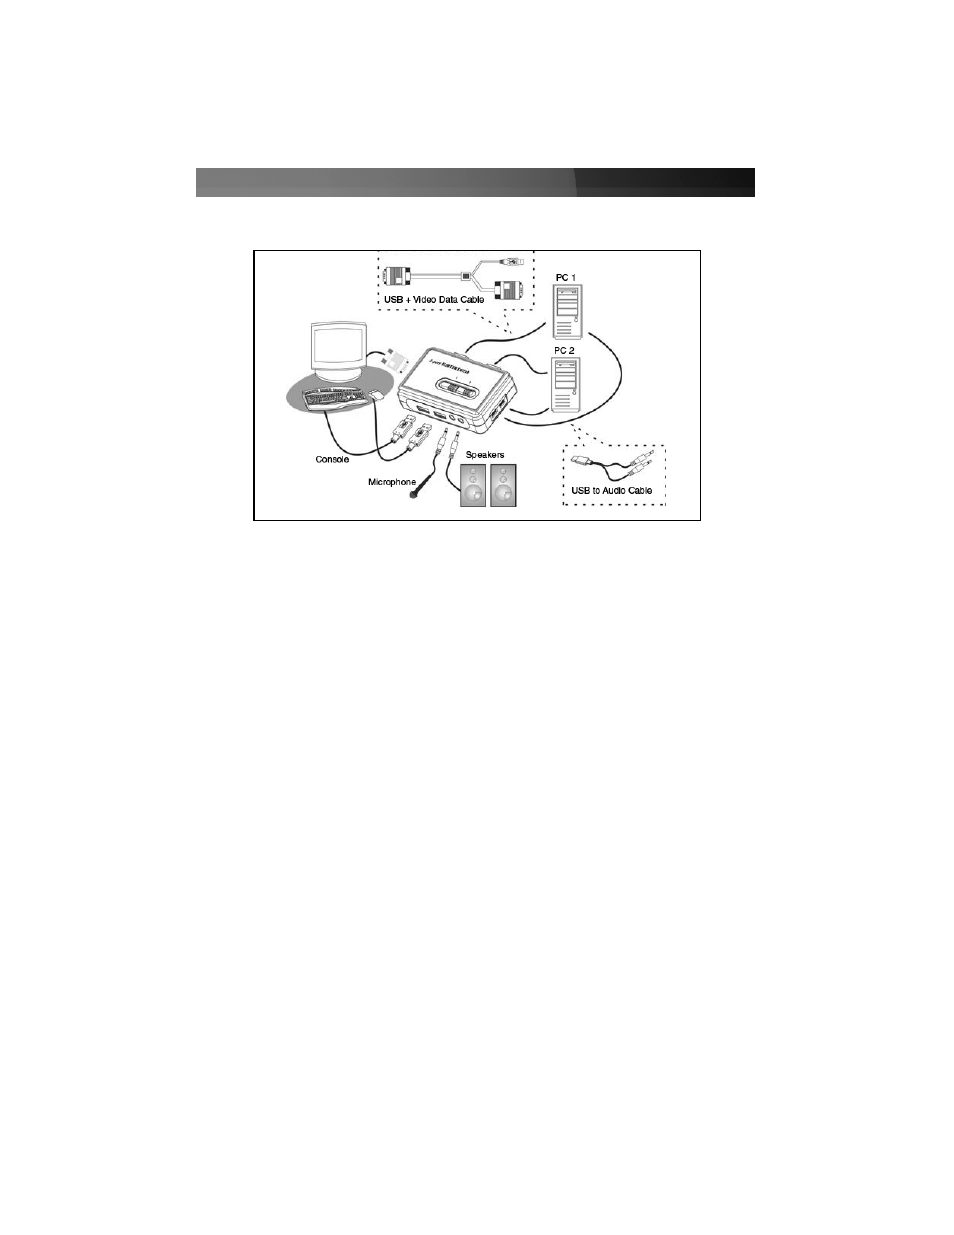
2. Using a USB + Video Data Cable, connect one end (blue) to the video
out connector on computer 1. (This will be the same connector from which you
disconnected the monitor in step 1, if applicable.) Connect the opposite end to the
VGA port on the back of the KVM Switch.
3. Plug the USB portion of the USB + Video Data Cable into an available USB port on
computer 1.
4. Optional: If you wish to use audio, plug the slim 3-in-1 KVM combo cable into the mic
and speaker out ports. Insert the opposite end of the cable (USB mini-B) into the
port located on the side of the switch denoted as PC1.
5. Repeat the above process to connect the second computer.
U
Us
siin
ng
g tth
he
e K
KV
VM
M S
Sw
wiittc
ch
h
There are three methods of controlling your KVM Switch for PC and Audio/Mic channel
selection:
(1) Using the face-panel buttons: The face-panel button allows you to have direct
control over KVM switching operation. Simply pressing the button will switch to the
corresponding PC port ans audio/mic channel (if enabled). By default, PC port
switching and audio/mic port switching are bound together.
(2) Using predefined hotkeys: SV211KUSB features Universal hotkeys for PC toggle-
switching. Please note: that each keystroke within a hotkey sequence should be
pressed within 2 seconds. Otherwise, the hotkey sequence will not be validated.
Also, please note that hotkeys are only functional after the PCs have fully booted into
the Operating System. If you want to switch PCs prior to fully booting, please switch
manually, using the face-panel buttons to switch. The following table illustrates
Instruction Manual
3