Schutt Sports C2000 User Manual
Page 15
C1000 & C2000 Assembly Instructions
15
www.schuttsports.com
800-426-9784
Base Assembly - C2000 (continued)
Backboard, Rim, and Extension Post Assembly
CAUTION:
Without ballast material,
unit is unstable and can tip easily.
To prevent serious injury, do not
proceed past next step until unit
compartment is filled with ballast
material.
CAUTION:
Unit is not designed for
dunking in goal or hanging on goal.
To prevent serious injury, do not
overload unit with excessive ballast
to permit improper goal use.
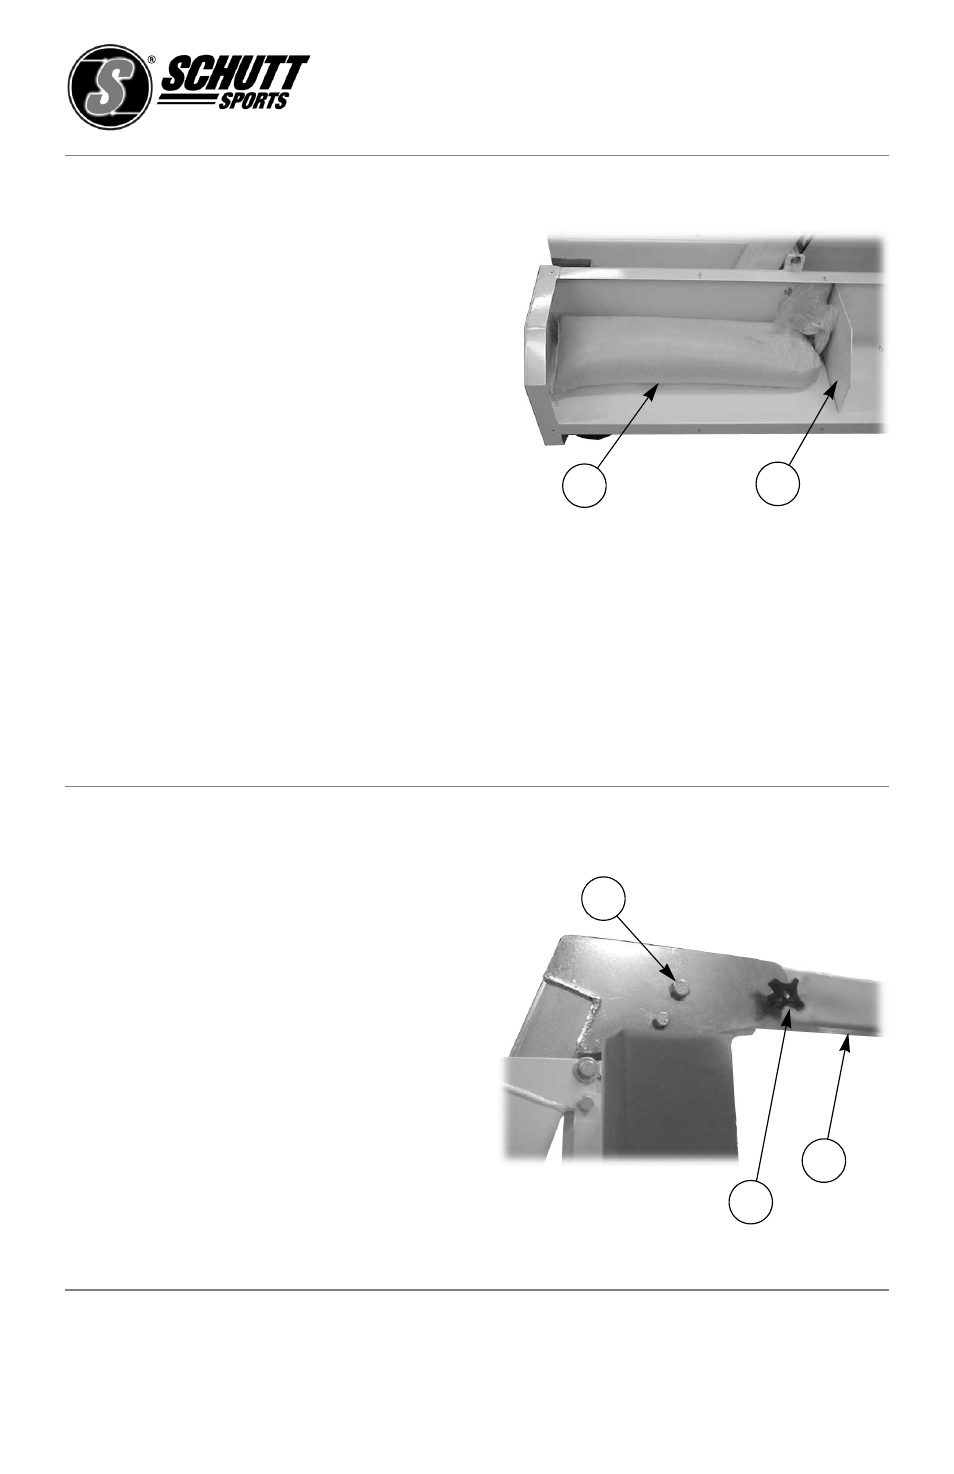
Step 6:
Remove left and right-hand
base unit side covers by removing
eight screws per side (16 screws total).
Step 7:
Place 350 lbs (160 kg) of ballast
material (1) into compartments behind
bulkheads (2). Arrange material so that it
does not shift when moving or using unit.
Step 8:
Attach covers using 16 screws.
NOTE:
DO NOT fully tighten hardware
during assembly. Hardware will be fully
tightened during Backboard and Rim
Leveling.
Step 1:
Remove the 1/2" bolt (1) and
nut that is holding the extension post in
place on the unit, and the 1/2" bolt,
washer, and black knob (2) from slider
post. Hardware will be used in
Backboard Attachment.
Step 2:
Remove extension post (3) from
slider post.
Step 3:
Position backboard vertically on
floor with slots toward bottom.
1
2
1
2
3