Performing auto calibration, Set up the optimizer microphone, Press amp menu – Sony 3-284-083-41(1) User Manual
Page 27: Press v / v repeatedly to select “7-a. cal, Press or b to enter the menu, Press or b to enter the parameter, Press v / v repeatedly to select “a.cal yes
27
GB
Getting Star
ted
Notes
• The Auto Calibration function does not work when
headphones are connected.
• If you activate the muting function during Auto
Calibration, the muting function will automatically
be set to off.
1
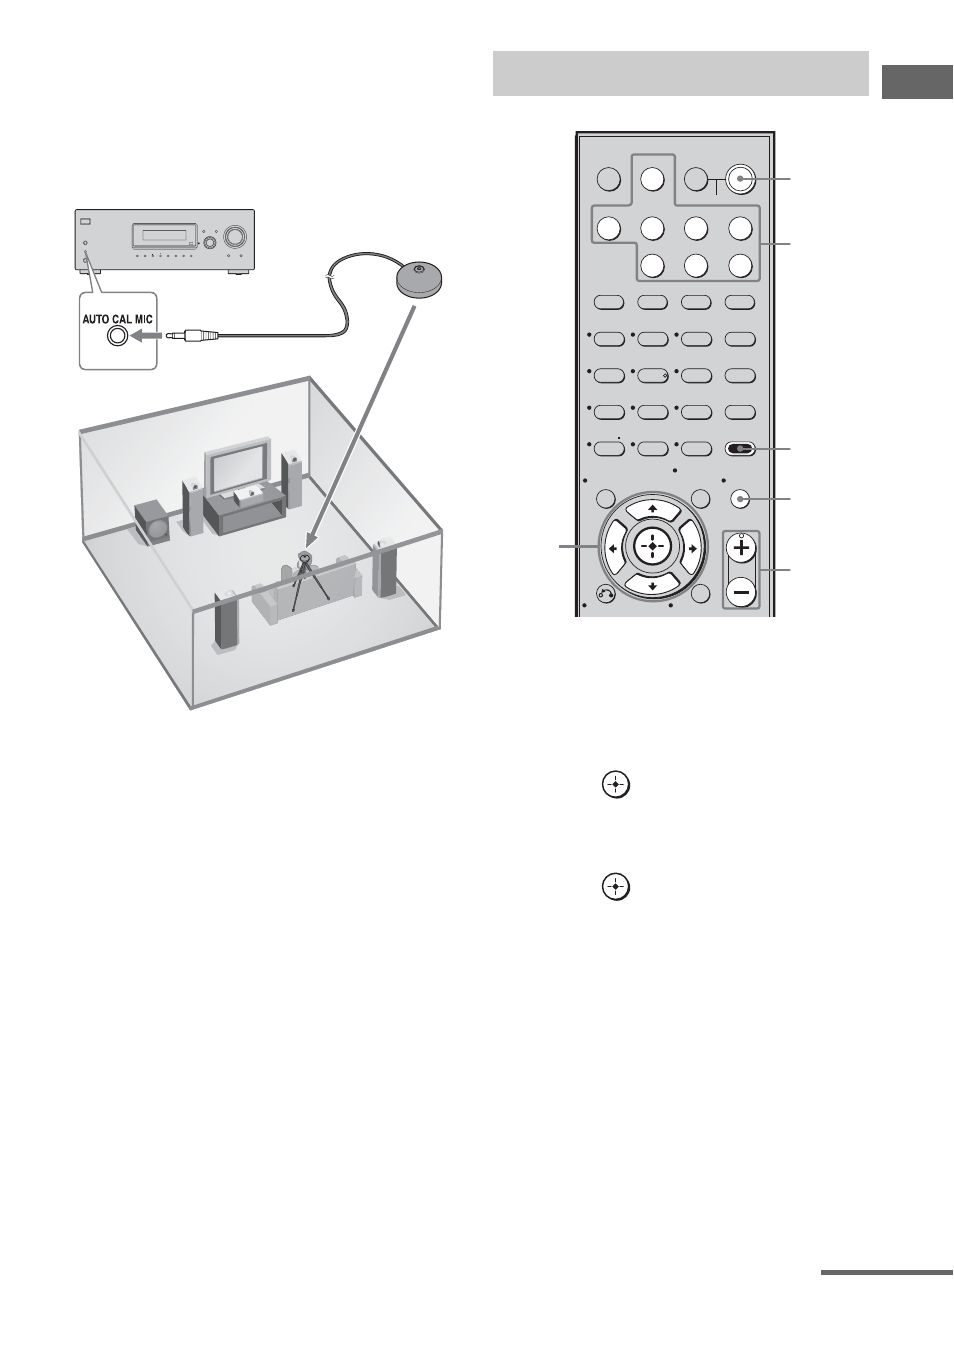
Connect the supplied optimizer
microphone to the AUTO CAL
MIC jack.
2
Set up the optimizer
microphone.
Place the optimizer microphone at your
listening position.You can also use a stool
or tripod so that the optimizer
microphone remains at the same height as
your ears.
Tip
When you face the speaker towards the optimizer
microphone, you will get a more accurate
measurement.
1
Press AMP MENU.
2
Press
V/v repeatedly to select
“7-A. CAL”.
3
Press
or
b to enter the
menu.
“AUTO CAL” appears on the display.
4
Press
or
b to enter the
parameter.
5
Press
V/v repeatedly to select
“A.CAL YES”.
Measurement starts in 5 seconds and the
display changes as follows:
A.CAL [5]
t A.CAL [4] t A.CAL [3]
t A.CAL [2] t A.CAL [1]
While the time is counting down, stand
away from the measurement area to avoid
measurement error.
The measurement process will take a few
minutes to complete.
?/1
SPEAKERS
(ON/OFF)
PHONES
MEMORY/
ENTER
TUNING
MODE
TUNING
2CH
A.F.D.
MOVIE
MUSIC
ANALOG
DIRECT
MUTING
INPUT SELECTOR
AUTO CAL MIC
DISPLAY
INPUT MODE
MASTER VOLUME
Optimizer microphone
Performing Auto Calibration
1
2
3
4
6
7
8
0/10
ENTER
9
SYSTEM STANDBY
TV INPUT
SLEEP
DMPORT
TV ?/1
AV ?/1
VIDEO
BD
DVD
SAT
2CH
A.F.D.
RETURN/EXIT
MENU/HOME
MOVIE
MUSIC
MEMORY AMP MENU
CLEAR
TOOLS/
OPTIONS
DISPLAY
MUTING
MASTER VOL
TV VOL
D.SKIP
D.TUNING
DVD/BD
MENU
SA-CD/CD
TV
TUNER
?/1
-
5
>10/
2-5
Input
buttons
?/1
switch
MUTING
MASTER
VOL +/–
1
continued