Maintenance (continued) – Shindaiwa AH254 User Manual
Page 15
15
Lubricate cutter assembly and gearcase
Gearcase
grease fitting
B
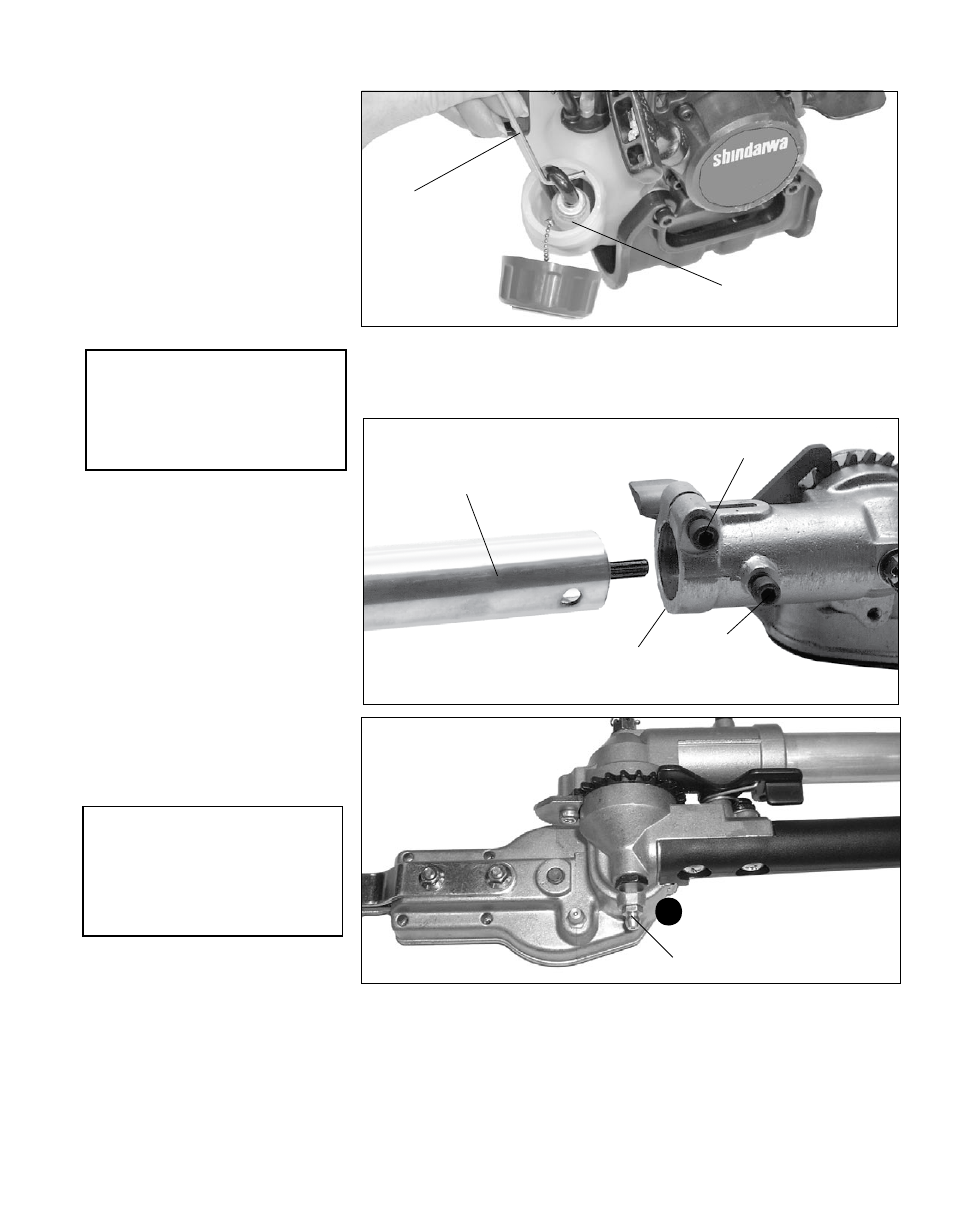
Fuel filter maintenance
Fuel filter element
Hooked wire
Outer tube
Gearcase
Gearcase Clamp bolt
Index bolt
Remove the outer tube from the gearcase
Gearcase lubrication
Maintenance (continued)
CAUTION!
Do not remove the D-shaped shim
washer from the gearcase clamp!
The shim washer prevents damage
from overtightening the tube clamp
bolt.
Slide the gearcase out of the tube.
3.
Using a grease gun, pump lithium-
base grease (about 10 grams)
into the grease fitting (B) on the
gearcase until you see old grease
being purged from the gearcase.
Purged grease will be visible in the
outer tube cavity.
50-hour maintenance
Every 50 hours of operation; more
frequently in dusty conditions:
Remove and clean the cylinder cover
■
and clean dirt and debris from the
cylinder cooling fins.
Remove and replace the fuel filter
element.
Use a hooked wire to extract the fuel
■
filter from inside the fuel tank. Inspect
the fuel filter element. If it shows signs
of contamination, replace with a genu-
ine Shindaiwa replacement fuel filter
element.
CAUTION!
Make sure you do not pierce the fuel
line with the end of the hooked wire.
The line is delicate and can be dam-
aged easily.
Before reinstalling the new filter
element, inspect the condition of all
the fuel system components (fuel
pick-up line, fuel return line, tank vent
line, tank vent, fuel cap and fuel tank).
If damage, splitting or deterioration
is noted, the unit should be removed
from service until it can be inspected
or repaired by a Shindaiwa-trained
service technician.
Gearcase lubrication
To perform this operation, first remove
the gearcase from the outer tube as
follows:
Loosen the gearcase clamp bolt.
1.
Remove the index bolt from the
2.
gearcase.
Clean up excess grease, then reas-
4.
semble the gearcase onto the outer
tube. Make sure the index bolt fits
into the hole on the outer tube.
Securely tighten both bolts.