Safeline Sit'n'Stroll User Manual
Page 26
Con
Con
Con
Con
Conver
ver
ver
ver
verting the Sit’n’Str
ting the Sit’n’Str
ting the Sit’n’Str
ting the Sit’n’Str
ting the Sit’n’Stroll™ fr
oll™ fr
oll™ fr
oll™ fr
oll™ from Str
om Str
om Str
om Str
om Stroller to Car Seat
oller to Car Seat
oller to Car Seat
oller to Car Seat
oller to Car Seat
2.
Align the front wheels by rolling the stroller
back 6 to 12 inches. Place one hand in the slot
handle located between your infant’s feet. With
your other hand, grasp the slider grip located
on the back of the seat. Lift the seat off the
Lift the seat off the
Lift the seat off the
Lift the seat off the
Lift the seat off the
gr
gr
gr
gr
ground.
ound.
ound.
ound.
ound.
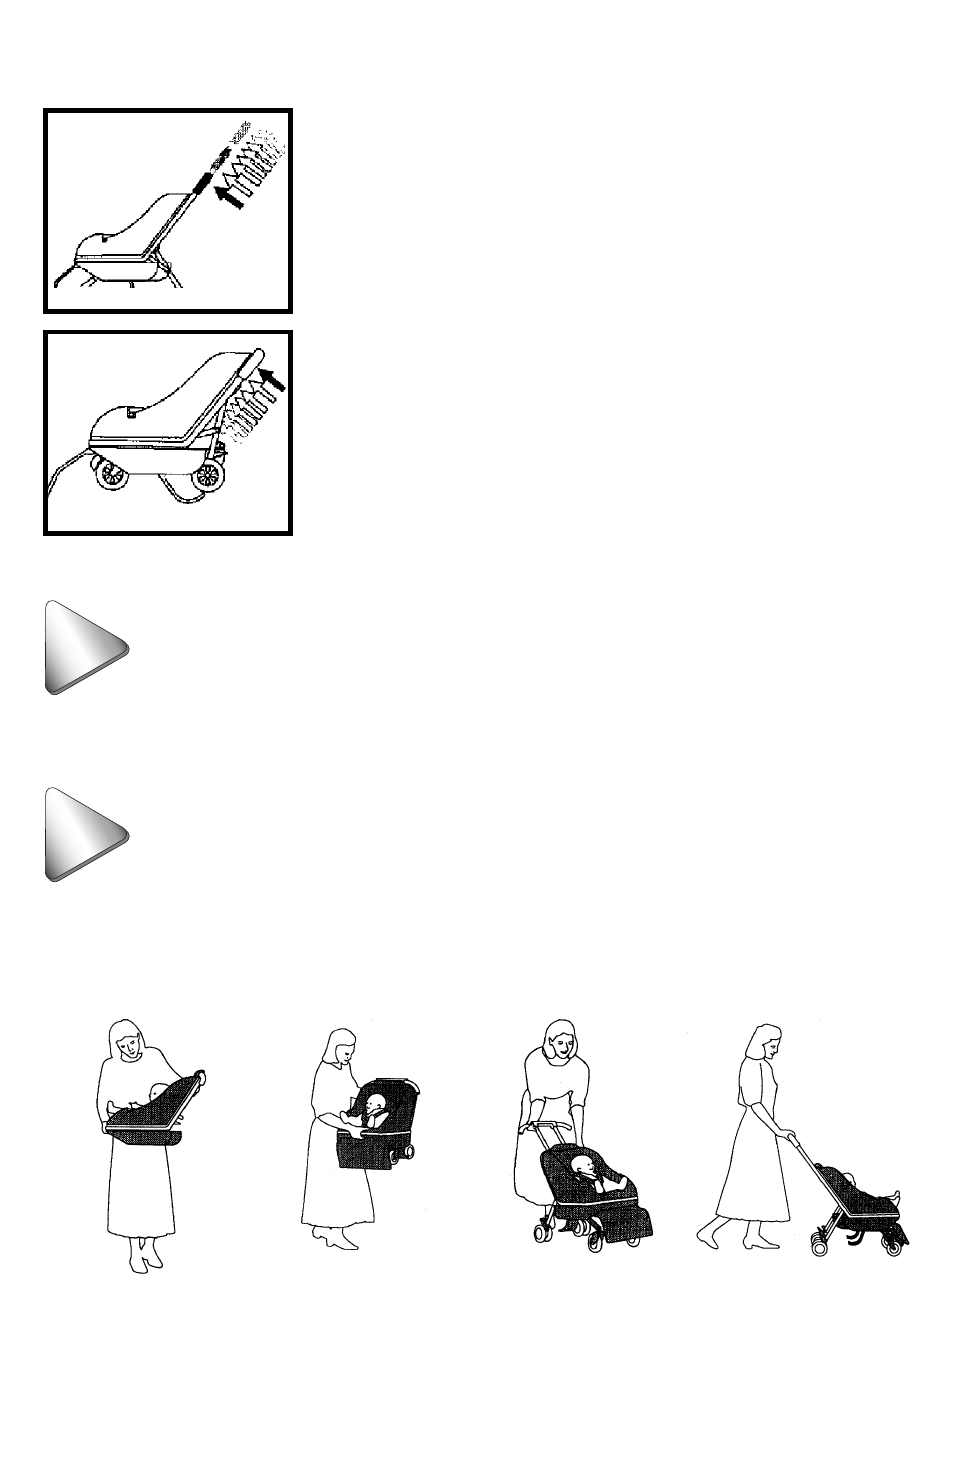
3.
Squeeze the red lock release evenly with your
fingertips and slide the slider grip up to its stop
position. Relax your finger pressure on the red
lock release. Push down on the slider grip to
ensure the wheels are properly locked. The
wheels should now be stored behind their
protective flaps.
Hold the unit in
the air to
convert.
1.
Compress the red handle release tabs and
push the stroller handle down until it locks in its
lowest position.
Maneuvering Over Curbs:
Maneuvering Over Curbs:
Maneuvering Over Curbs:
Maneuvering Over Curbs:
Maneuvering Over Curbs: Always back up to the curb, pull up on the
telescoping handle and lift the rear wheels over the curb. Pull the
stroller backwards and allow the front wheels to ride up over the curb.
Never push down on the telescoping handle to prop the front wheels
on the curb first. The pressure placed on the handle may cause
damage.
Loc
Loc
Loc
Loc
Locking the
king the
king the
king the
king the Wheels:
Wheels:
Wheels:
Wheels:
Wheels: When converting the Sit’n’Stroll™ from stroller
to car seat, the wheels must lock in the uppermost position. To ensure
the wheels lock properly, keep your finger tips on the slider and
sqeeze evenly over the entire surface of the slider button until the
wheels are up. Grab the top of the seat (near the red handle release
tabs) with your thumb and squeeze your thumb and fingers together
until the wheels click into place, indicating the wheels are properly
locked.
T i p s
T i p s
Deploy the
wheels.
Place the Sit’n’Stroll on
the ground and deploy
the handles.
Away you go!
1.
1.
1.
1.
1.
2.
2.
2.
2.
2.
3.
3.
3.
3.
3.
4.
4.
4.
4.
4.
T i p s
T i p s
24
24
24
24
24