Sony PX312F User Manual
Page 69
69
GB
E
d
it
in
g
F
ile
s
3
Press –
.
or
>
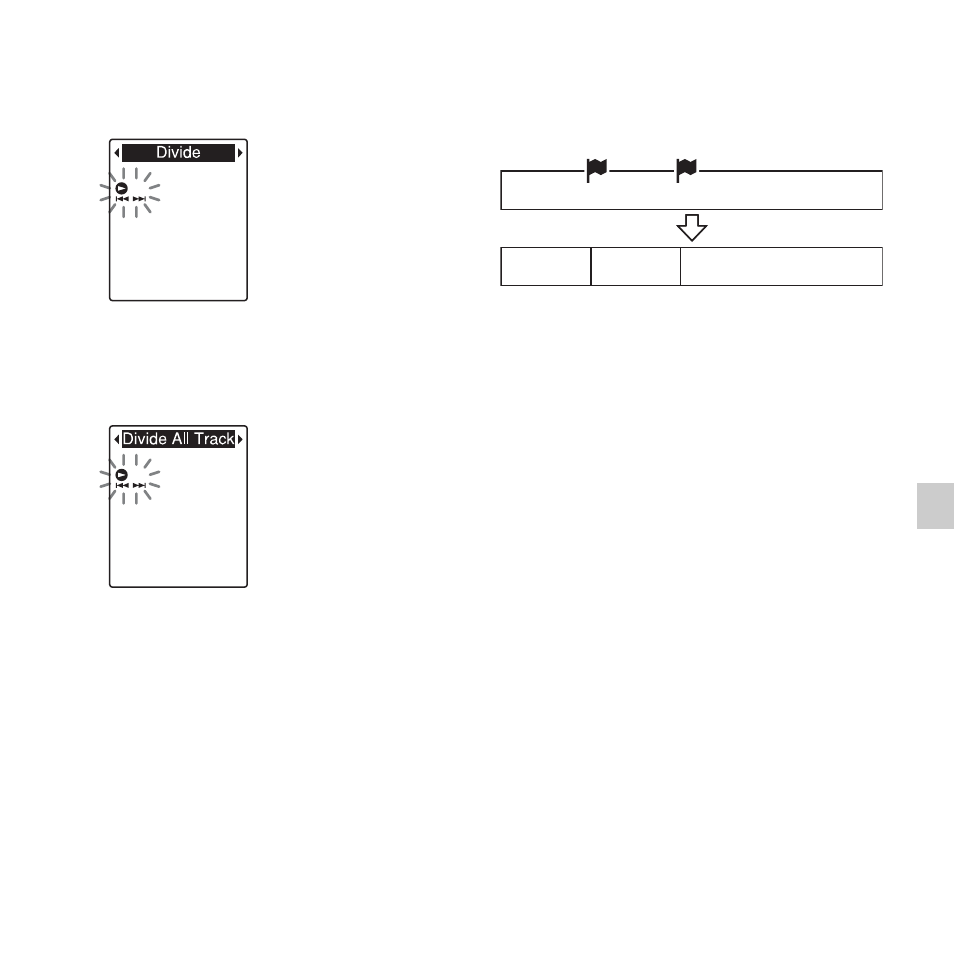
+ to select “Divide,”
and then press
N
PLAY/STOP•ENTER.
4
Press –
.
or
>
+ to select “Divide
All Track Marks,” and then press
N
PLAY/STOP•ENTER.
“Divide All Track Marks?” will be
displayed.
5
Press –
.
or
>
+ to select “YES,”
and then press
N
PLAY/
STOP•ENTER.
The “Dividing...” animation appears, and
the file is divided at all the track mark
positions. All the existing track marks in
the files will be erased.
A suffix made up of a sequential number is
added to each of the divided files.
6
Press
x
(stop) to exit the menu mode.
To cancel dividing
Select “NO” in step 5, and then press
N
PLAY/STOP•ENTER.
z
Tip
To cancel division during the operation at all
the remaining track marks, press
x
(stop)
.
The files that have been divided before the
cancellation remain divided.
P Notes
• You need a certain amount of free space in
the memory media to divide a file.
• When you divide a file with a title and artist
name, the newer part has the same title and
artist name.
• You cannot divide files other than those
recorded using the IC recorder (e.g., a file
transferred from a computer). Moreover,
when you edit files using the supplied Sound
File 1
A file is divided.
File 1_01 File 1_02
File 1_03