Recording on a tape 3 2 4 5, Basic operations 6 – Sony TC-KE240 User Manual
Page 6
Basic Operations
6
GB
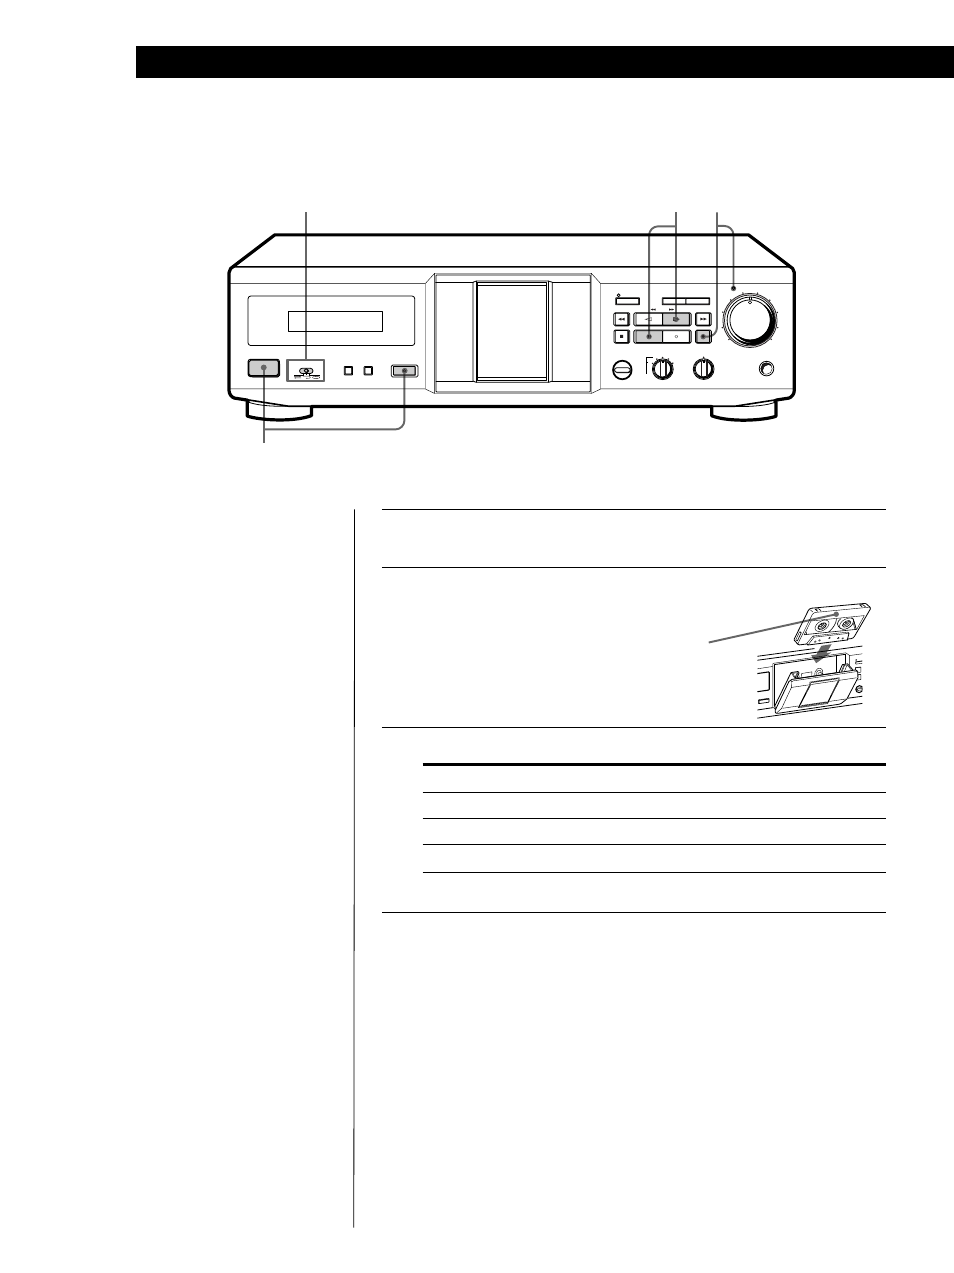
With the side you want
to record facing you
Recording on a Tape
3
2
4
5
OFF
MPX
FILTER
DOLBY NR
BALANCE
AUTO CAL
REC LEVEL
0
1
2
3
4
5
6
7
8
9
10
C
C
B
B
PHONES
L R
AUTO
REC MUTING
REC
PAUSE
RESET
MEMORY
POWER
DIRECTION MODE
EJECT
SYNCHRO
FADER
ARL
AMS
1
Turn on the amplifier and play the program source you want to
record.
2
Press POWER, and press EJECT §
fully to open the cassette holder, then
insert a cassette.
3
Set DIRECTION MODE (TC-RE340 only).
To record on
Set to
One side only
A
Both sides once*
Å
Both sides*
a
* Recording stops when the tape reaches the end of reverse side.
4
Press REC r.
The AUTO indicator flashes and the deck automatically adjusts
the recording level (see page 10). After the AUTO indicator
lights up continuously, stop playing the program source. If you
wish to adjust the recording level manually, see “To adjust the
recording level manually” on page 7.
Do not press POWER or EJECT § while the tape deck is
operating. If you do so, the tape may be damaged.
• See page 4 for hookup
information.
z
When ª lights up in
Step 4 (TC-RE340 only)
Press · once to reverse the
direction before proceeding
to Step 5.