Delete sensors and transmitters, Installation – Skylink AA-433 User Manual
Page 6
–
10
–
DELETE SENSORS AND TRANSMITTERS
You cannot delete one sensor/transmitter from the Audio Alarm at a time. You
must clear all the sensors and transmitters that are currently communicating
with the Audio Alarm, then re-program the ones you want to keep.
Delete All Sensors and Transmitters
1. Turn the Audio Alarm off by
sliding the switch on the
bottom of the Audio Alarm
so that the “ON” light is not
lit.
2. Press and hold the learn
button found on the bottom
of the Audio Alarm.
3. While holding the learn
button, turn on the Audio
Alarm by sliding the switch
on the bottom.
4. You will hear a long beep
followed by a series of
short beeps. When you
hear the short beeps, re-
lease the learn button.
You have now cleared all sensors and transmitters from communicating with
the Audio Alarm.
–
5
–
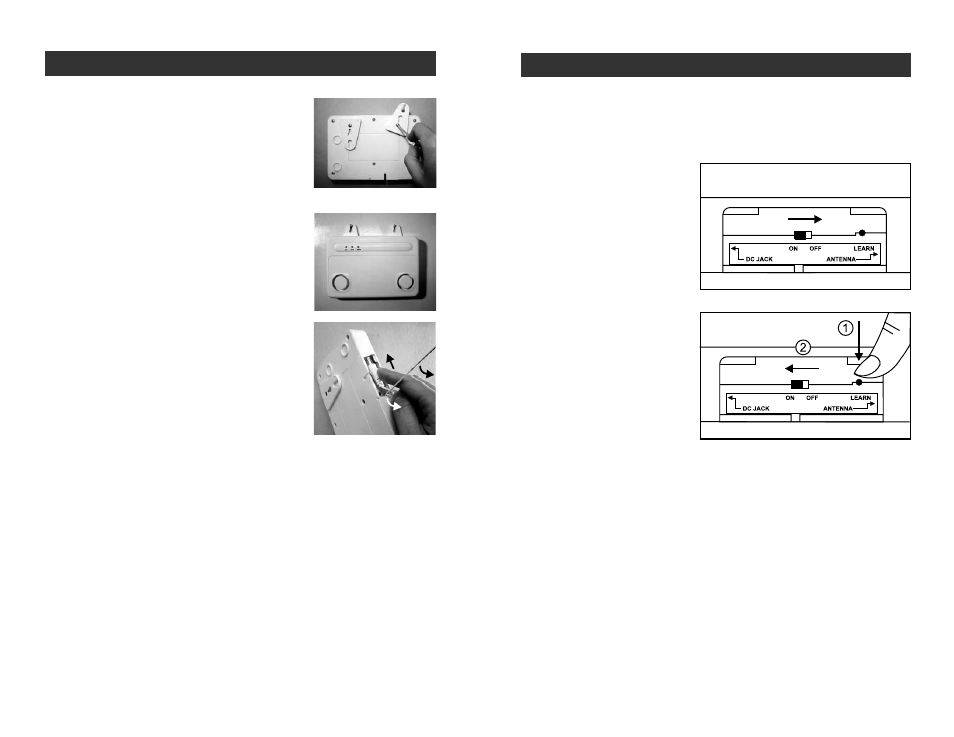
INSTALLATION
Screwing the unit to the wall
1. Unscrew the two triangular hanging tabs
located at the back of the Audio Alarm.
2. Turn them around and slide them back into
place so that the two tabs are pointing up
and the two keyholes are visible from the
front.
3. Position the Audio Alarm on the wall and
insert the two screws in the two keyholes.
Do not insert the screws all the way into the
wall, leave some room on the screw to hang
the Audio Alarm. Use the template if needed.
4. Open the small door on the bottom of the
Audio Alarm.
5. Insert the AC adapter and the antenna in the
appropriate holes.
6. Close the small door so that the AC adapter
and the antenna are running through the
appropriate spaces in the door.