Figure 3-8, Figure 4-2, 1 grass catcher removal instructions – Scag Power Equipment GC-STWC-61V User Manual
Page 6: Figure 4-1
4
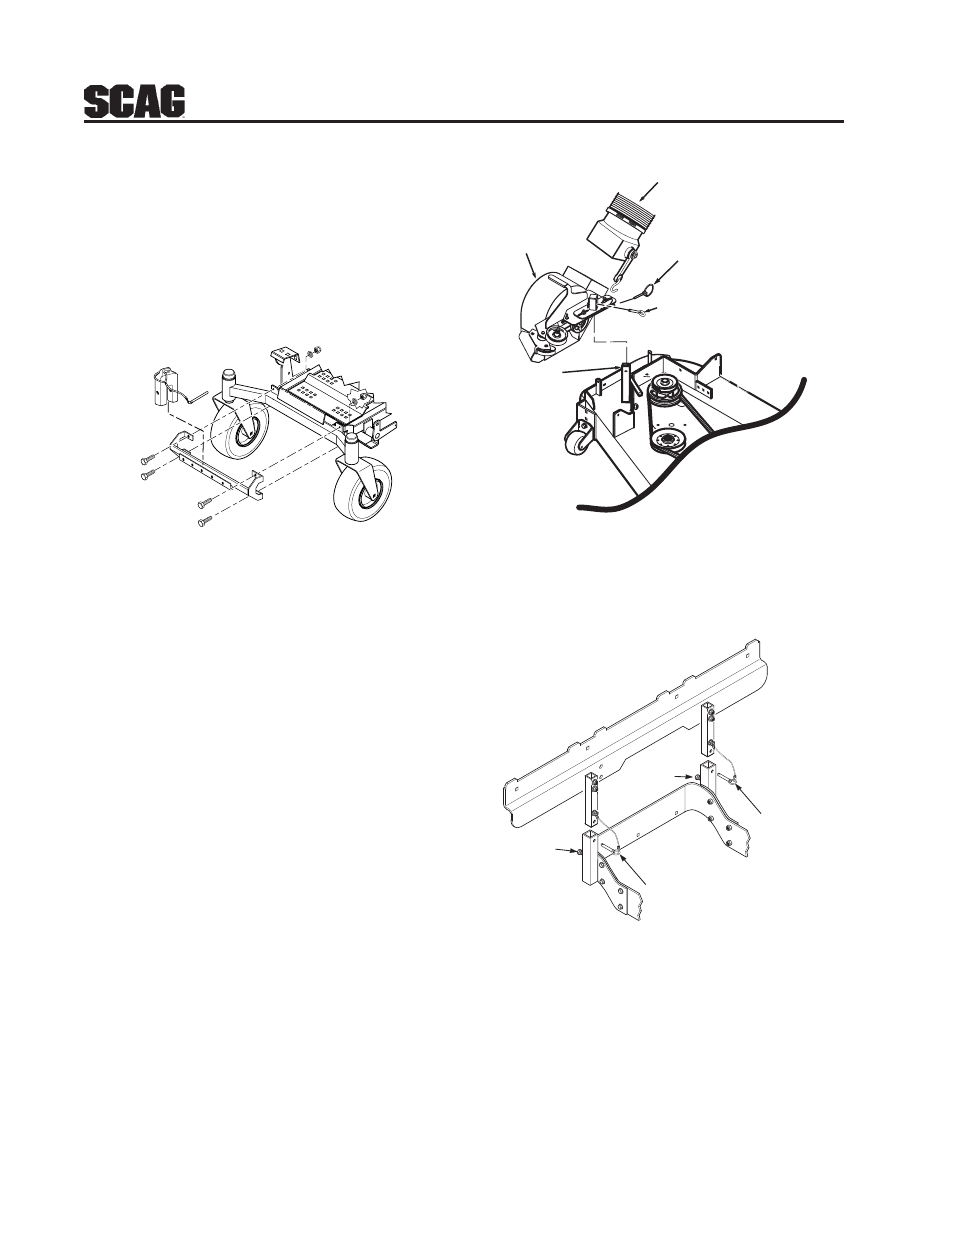
17. Install one 7/16-14 x 1-3/4" hex head bolt into
each of the four mounting holes in the weight
support bar, and through the matching holes in
the caster support weldment. Secure this
assembly to the front of the machine using the
7/16 - 1/2" x 1-1/4" x .083" flatwashers, and the
7/16-14 elastic stop nuts. Torque hardware to
59 ft. lbs. See Figure 3-8.
FIGURE 3-8
18. Operate and test.
FIGURE 4-2
6. With help from an assistant, remove the hood
assembly.
Remove Pins
Remove Pins
Loosen
Locking
Bolts
Loosen
Locking
Bolts
4.1 GRASS CATCHER REMOVAL
INSTRUCTIONS
1. Prepare the machine so there is easy and safe
access to the work area. Remove the key and
maintain all safety related work procedures.
Always wear eye and hand protection.
2. Remove the bag assemblies from the grass
catcher.
3. Remove the rubber strap holding the adapter to
the blower assembly and the large quick pin
securing the blower to the discharge mounting
bracket. See Figure 4-1.
4. Remove the belt, pin, hair pin and large quick pin
securing the blower assembly to the cutter deck
and remove the blower assembly. See Figure 4-
1.
FIGURE 4-1
5. Loosen the locking bolts and remove the two (2)
pins holding the hood assembly to the mounting
posts on the rear of the machine. See Figure
4-2.
BLOWER
ASSEMBLY
MOUNTING
BRACKET
PIN & HAIR PIN
ADAPTER
RIGHT SIDE OF
CUTTER DECK SHOWN
(Note: Some parts not shown for viewing purposes.)
2006 GC-STC-V removal art 1
QUICK PIN