Sears 900.74526 User Manual
Page 5
CAUTION: ALWAYS WEAR EYE
PROTECTION
CAUTION: Inspect area to be trimmed
and remove any wire, cord, or string-like
objects which could become entangled
in the rotating line or spool. Be particularly
careful to avoid any wire which might be
bent outwardly into the path of the tool,
such as barbs at the base of a chain link
fence.
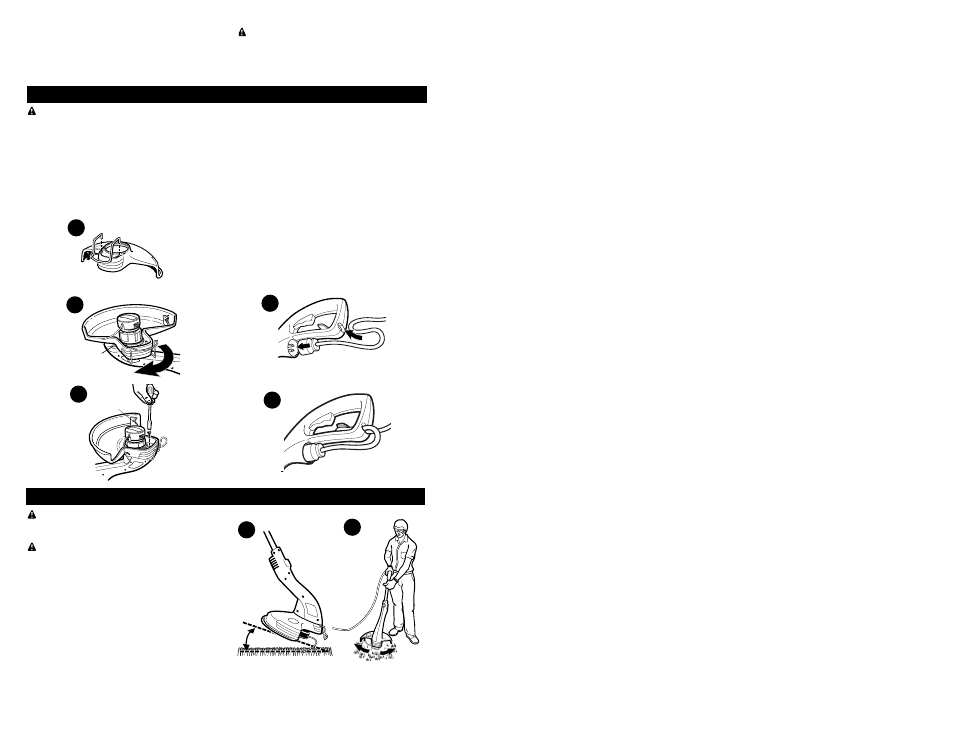
1. Angle unit as shown in Figure 6.
2. Slowly swing trimmer side to side, as
shown in Figure 7.
WARNING: The guard must always be
on the tool to protect the user.
NEVER OPERATE TOOL WITHOUT
GUARD FIRMLY IN PLACE.
Unplug the tool before attempting to
attach the guard.
1. Attach edge guide to guard, as shown
in Figure 1.
2. Press the guard against the motor
housing, as shown in Figure 2 and
WARNING:
This product contains
chemicals, including lead, known to the
State of California to cause cancer, and
birth defects or other reproductive harm.
Wash hands after handling.
equipment such as dust masks that are
specially designed to filter out microscopic
particles.
5
ASSEMBLY INSTRUCTIONS
OPERATING INSTRUCTIONS
Raised Lug
Cut-off Blade
Rotate 90
˚
2
1
3
4
5
5˚ - 10˚
6
7
rotate the guard 90 degrees clockwise
until you hit a stop on the housing.
3. With the guard installed, insert the
screw, (see figure 3) through the hole
in the guard and into the bottom of the
Trimmer housing. Tighten the screw.
The screw will firmly retain the guard
to your trimmer.
4. The guard is not intended to be
removed.
5. Secure the extension cord with cord
retainer as shown in Figures 4 and 5.
6. Adjust the auxiliary handle to a point
on the tube where you can best control
the unit. Loosen the auxiliary handle
knob and position the handle as desired.