Sport recumbent bike assembly and setup, Npacking, Ools – Star Trac UB Sport Upright Bike User Manual
Page 14: Equired, Ssembly, Ncrease, Ndurance, Rogram, Install the front foot
14 STAR
TRAC
SPORT
BIKES
O
WNER
’
S
M
ANUAL
SPORT RECUMBENT BIKE ASSEMBLY AND SETUP
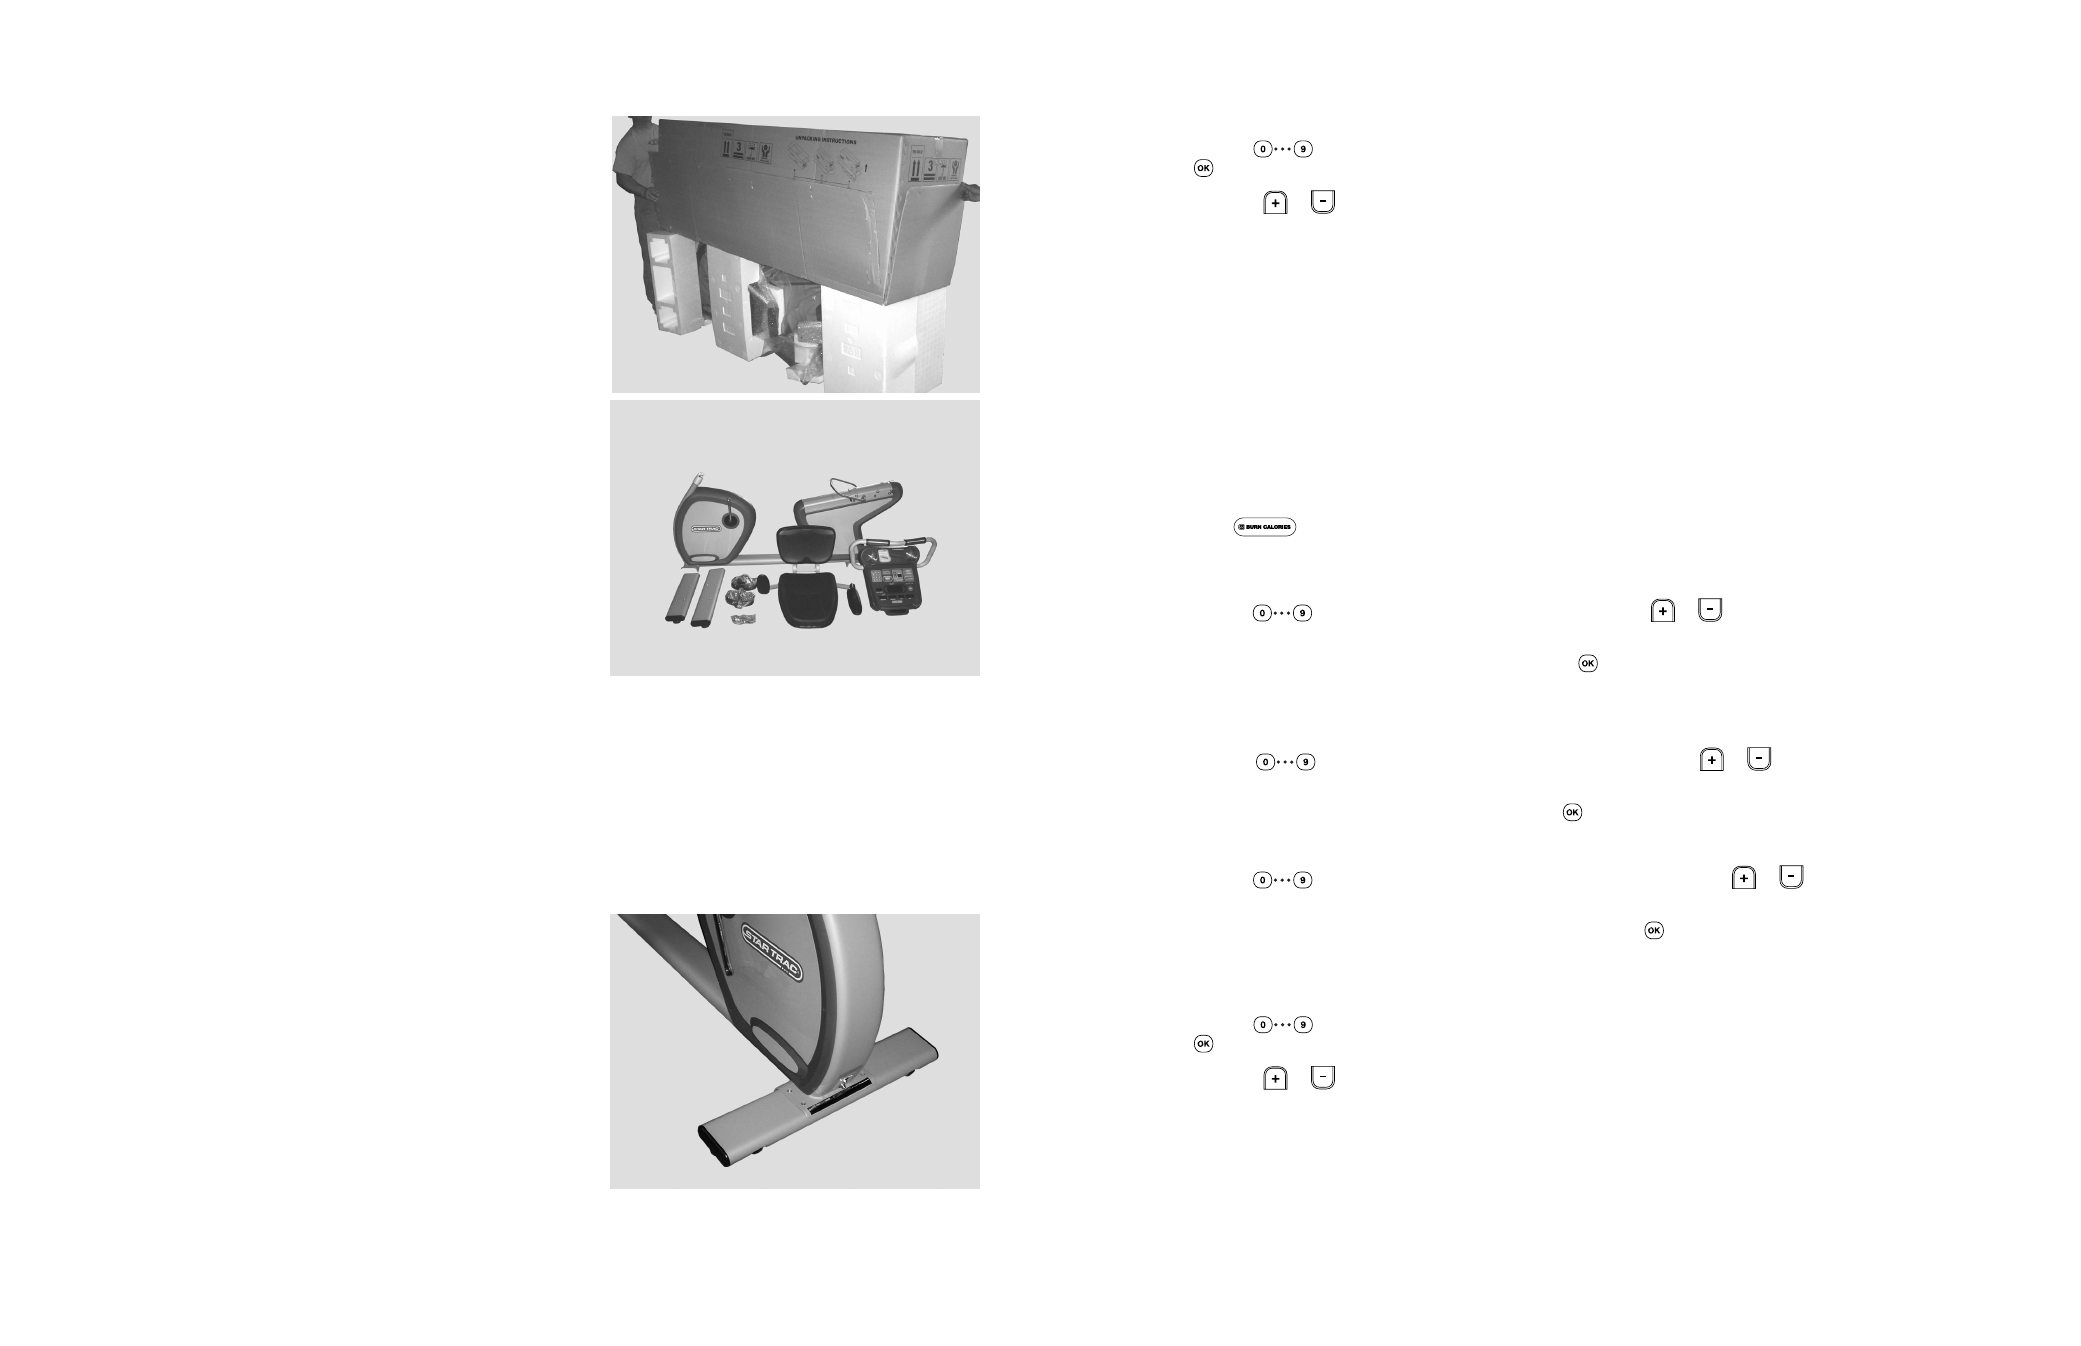
Use the following procedures to unpack and assemble your STAR TRAC
SPORT UB / UBx RECUMBENT BIKE.
U
NPACKING
NOTE: Complete unpacking instructions are printed on the side of
the shipping carton.
Turn the shipping carton upside-down, and fully open all four
flaps on the bottom of the carton.
Turn the shipping carton right-side up, then lift the carton off of
the foam inserts. Remove all parts and foam inserts, and verify
that the following parts are included in your shipment:
Description Qty
Bike Frame
1
Display Console Assembly
1
Seat Frame Assembly
1
Front Foot
1
Rear Foot
1
Pedals (set of two)
1
Screw, Button Head, M10 X 30
8
Screw, Flat Head, M6 X 16
4
Screw, Socket Head, M6 X 20
4
T
OOLS
R
EQUIRED
Most STAR TRAC bikes can be assembled using the following tools:
■
Metric Hex Key Wrenches
■
Metric Open-End Wrenches
■
Metric Ratchet Socket Wrench Set
■
Torque
Wrench
■
Channel
Lock
Pliers
■
Vice Grip Pliers
■
Rubber
Mallet
■
Phillips
Head
Screwdriver
Your STAR TRAC UB / Ubx SPORT RECUMBENT BIKE includes a hex key set and combination open-end wrench.
A
SSEMBLY
1. Install the Front Foot
NOTE: The front foot assembly has wheels attached to the front
edge. Be sure the wheels face forward when installing the front foot
assembly.
Stand the bike frame upright and place the front foot assembly
under the frame, aligning the holes in the foot with the holes in
the frame.
NOTE: It may be necessary to raise the frame slightly to align the
holes in the frame with the mating holes in the front foot.
Using four M10 X 30 button head screws, secure the front foot
assembly to the frame. Tighten all four screws securely.
Step 1
STAR
TRAC
SPORT
BIKES
O
WNER
’
S
M
ANUAL
23
6.
If desired, you can use the personal fan during your workout (see “Using the Personal Fan” for details).
7.
You can adjust the resistance L
EVEL
during the program, using either of the following methods:
■ Use the
keys to enter a resistance level (from 1 to 20). When the desired level has been entered, press the
key to confirm the resistance level.
■ Press the
or
key, as desired, to increase or decrease the resistance L
EVEL
in 1 unit increments.
8.
If you wish to pause the program, stop pedaling. The bike enters pause mode and a “P” flashes in the T
IME
Window.
Resume pedaling within 25 seconds to continue your workout.
9.
When you have reached your workout goal, the bike enters the Cooldown cycle (see “Cooldown Cycle” for details). If you
wish to exit the program before you have reached your workout goal, stop pedaling and allow the Pause timer to expire.
I
NCREASE
E
NDURANCE
P
ROGRAM
The I
NCREASE
E
NDURANCE
program allows the user to pre-program a time goal, user weight and maximum resistance level (from
1 to 20). The program begins at a resistance level of 1, then increases linearly to the specified maximum resistance level.
To operate the I
NCREASE
E
NDURANCE
program:
1.
Mount the bike (refer to “Seat Adjustments” section) and begin pedaling,
■ If necessary, enter the Lockout ID to enable the bike for operation (see “Lockout ID Processing” for details).
2.
Press the
key.
3.
You are prompted to enter your weight. The bike displays a default weight of 155 pounds (70 kg). You may enter any
weight from 0 to 500 pounds (0 to 226 kg).
■ Use the
keys to enter your current weight; or press the
or
key, as necessary, to increase or decrease
the displayed weight in 1 pound (or 1 kg) increments.
■ When your correct weight has been entered, press the
key to accept the displayed value.
4.
You are prompted to enter a time goal.
The default time is 99 minutes. You may enter any time from 1 to 99 minutes.
■ Use the
keys to enter your desired time goal; or press the
or
key, as necessary, to increase or
decrease the displayed value in 1 minute increments.
■ When your desired goal has been entered, press the
key to accept the displayed value.
5.
You are prompted to enter a maximum resistance L
EVEL
.
■ Use the
keys to enter a resistance level (from 1 to 20) or press the
or
key, as desired, to increase or
decrease the resistance L
EVEL
in 1 unit increments.
■ When the desired resistance L
EVEL
has been entered, press the
key to accept the displayed L
EVEL
.
6.
If desired, you can use the personal fan during your workout (see “Using the Personal Fan” for details).
7.
You can adjust the resistance L
EVEL
during the program, using either of the following methods:
■ Use the
keys to enter a resistance level (from 1 to 20). When the desired level has been entered, press the
key to confirm the resistance level.
■ Press the
or
key, as desired, to increase or decrease the resistance L
EVEL
in 1 unit increments.
8.
If you wish to pause the program, stop pedaling. The bike enters pause mode and a “P” flashes in the T
IME
Window.
Resume pedaling within 25 seconds to continue your workout.
9.
When you have reached your workout goal, the bike enters the Cooldown cycle (see “Cooldown Cycle” for details). If you
wish to exit the program before you have reached your workout goal, stop pedaling and allow the Pause timer to expire.