Capturing (avi) video using webcam express – Sakar Spy shot digital camera User Manual
Page 10
0
Capturing (AVI) Video Using Webcam Express
Now that you have your camera installed you can use it to capture short
movies called AVI files. The length of time you can record an AVI file
while the camera is connected to your computer will vary, depending on
how much hard drive space you will use to save the file. Please take note
that these AVI files take up a lot of hard drive space. This is done through
the PhoTags WebCam Express program. This next section will walk you
though capturing an AVI file.
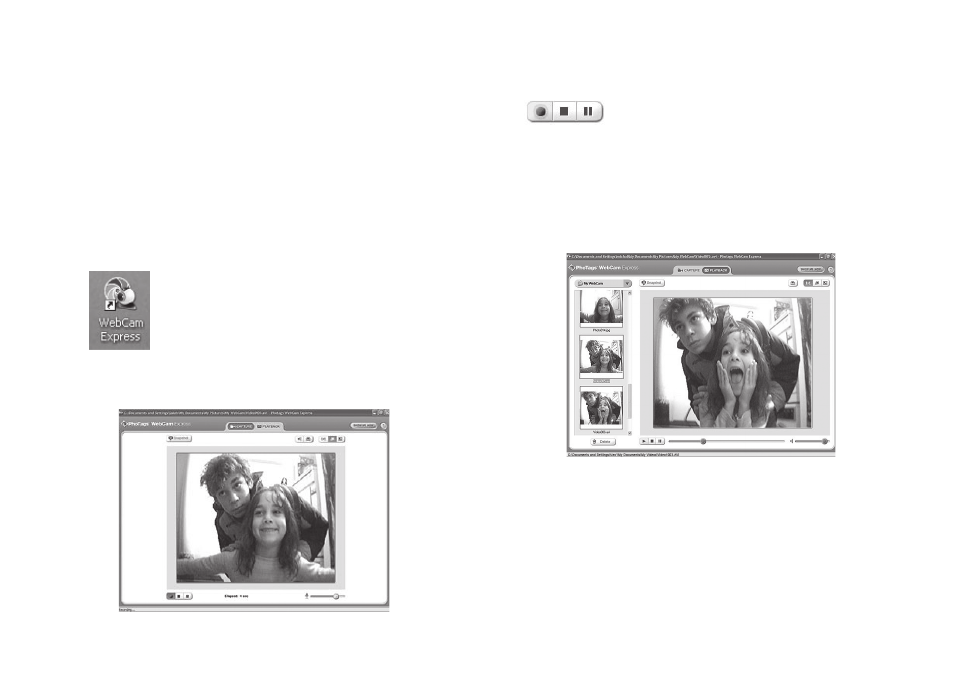
. Double-click the
“WebCam Express” icon that is on your desktop
to launch the “PhoTags WebCam Express” program. Adjust your
WebCam to the desired position. The screen will display what the
WebCam “sees”.
Desktop Icon
. To add audio to your video, plug a microphone into your computer.
3. Click the
“Capture” button to start recording the video.
The elapsed recording time will appear under the video.
4. Click the
“Pause” button to pause recording. To continue recording
click the
“Capture” button again.
5. To finish recording click the
“Stop” button.
6. Videos will automatically be saved in a default directory. You can
view them in the
“Playback” window.
Note:
. Taking snapshots: to learn how to capture JPEG snapshots from
your WebCam or from your existing AVI movies, go to the “Take
Snapshots” section in the Quick Start help.
. To learn how to change the user settings, go to the “Set User
Preferences” section in the Quick Start help.