Sanus Systems SFV49 User Manual
Page 2
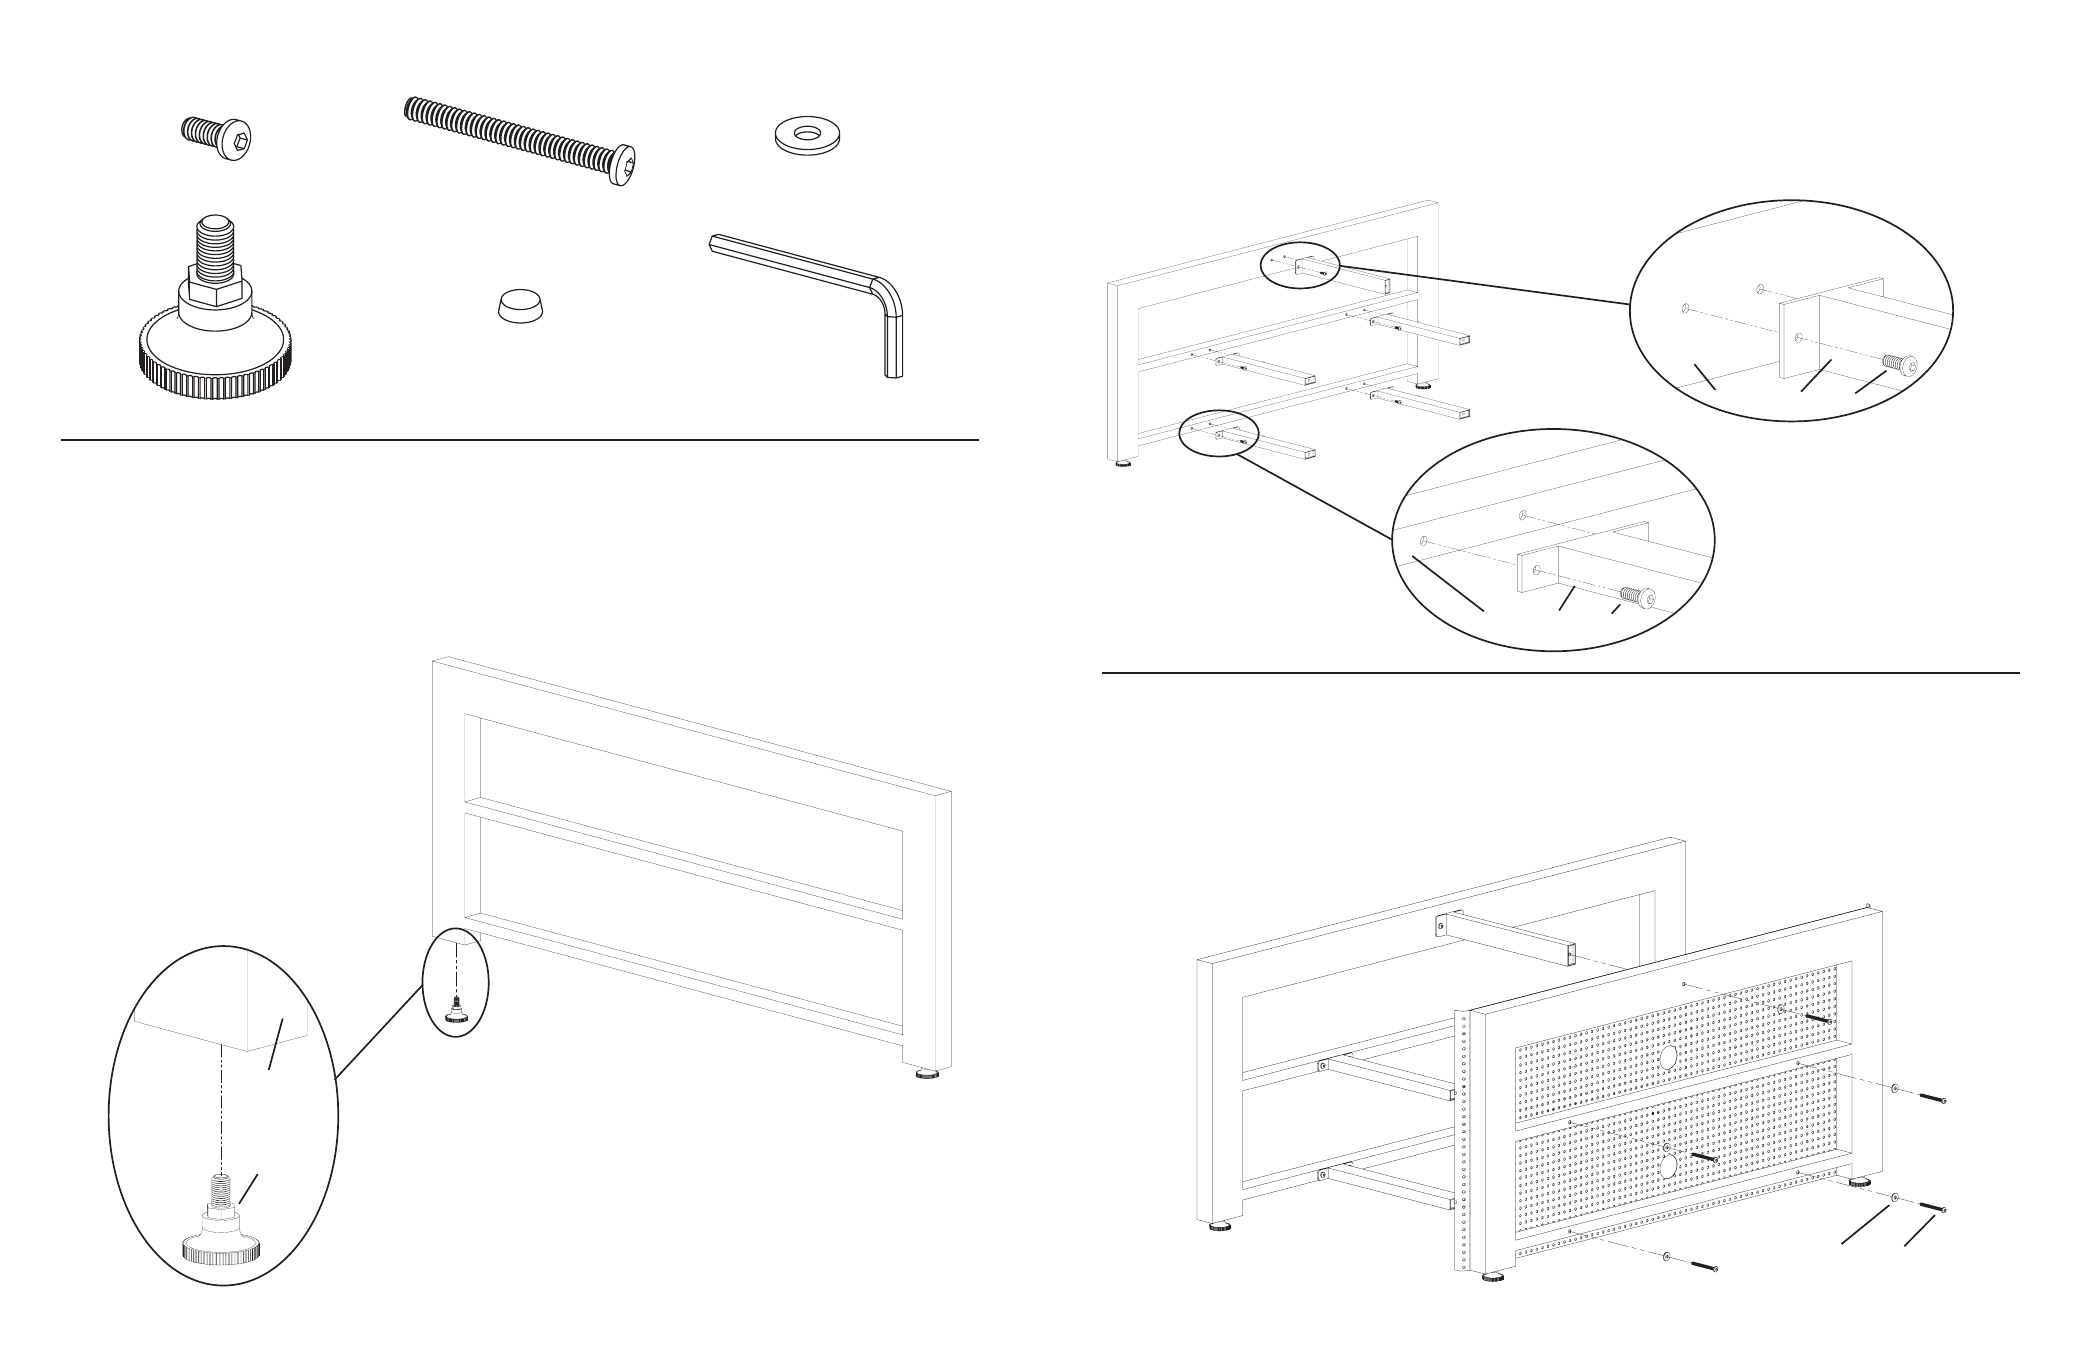
Hardware: Shown at actual size
(10) Short Allen Bolt - g
(5) Long Allen Bolt - h
(5) Washer - i
(4) Foot - j
(18) Glass Protector - k
(1) Allen Key - l
Step 1: Install Feet
Thread 2 Feet (j) into the bottom of the Front Frame (a) as shown in Diagram 1. Thread the remaining two Feet into the bottom of the
Back Frame (b). Thread all 4 feet in until they bottom out in the frame.
Note: Once the stand is assembled, the Feet can be adjusted to level the stand if needed
Diagram 1
Detailed View
a
j
Step 2: Attach Brace Bars to Front Frame
Thread a Short Allen Bolt (g) through each hole in the Upper Brace Bar (e) until the bar is secured to the top of the Front Frame (a).
See Detailed View A of Diagram 2 for assistance. Proceed to thread a Short Allen Bolt through each hole in the Lower Brace Bars (f)
so each bar is secured to the Front Frame. See Detailed View B of Diagram 2 for assistance. Do not fully tighten the Short Allen Bolts
at this time.
Detailed View A
Diagram 2
a
e
g
Detailed View B
a
f g
Step 3: Attach Back Frame
Thread a Long Allen Bolt (h) through a Washer (i), the Back Frame (b), and into the back of the Brace Bar (e,f) as seen in Diagram 3.
Repeat process for each of the four remaining Long Allen Bolts. Make sure the stand is square and level. Once everything is positioned
correctly, proceed to tighten all of the Long Allen Bolts as well as the Short Allen Bolts (g) from Step 2 with the Allen Key (l) until they
are tight.
Diagram 3
i
h