Lamp replacement, Caution, Maintenance and cleaning – Sanyo PLV-55WM1 User Manual
Page 47
47
Maintenance and Cleaning
When the life of the projection lamp of this LCD Projection Monitor
draws to an end, the LAMP REPLACE indicator emits orange light. If
this indicator emits orange light, replace the lamp with a new one
promptly.
LAMP
REPLACE WARNING
N-OFF
This indicator emits orange light
when the life of the projection
lamp draws to an end.
Front Panel
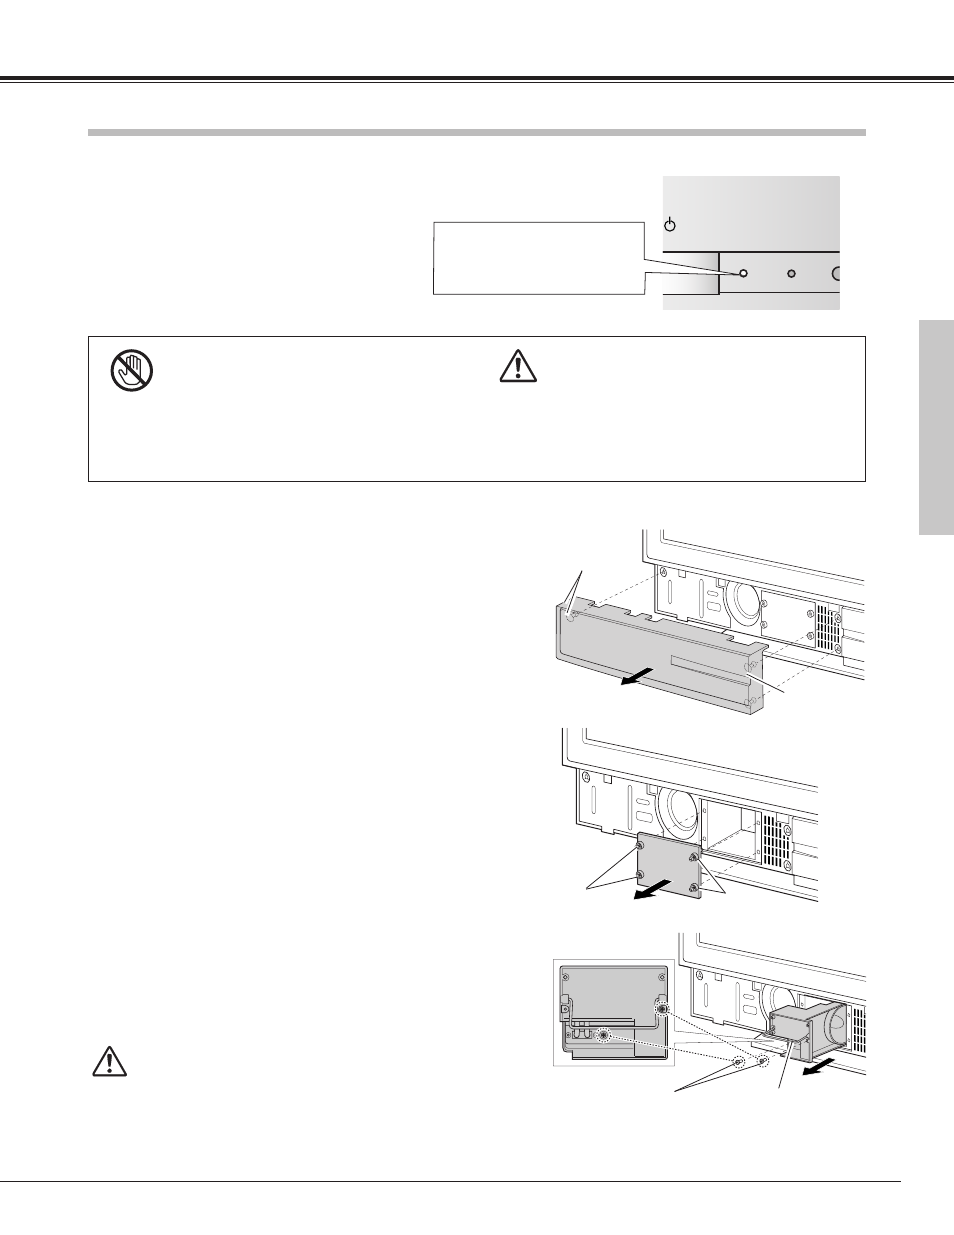
Lamp Replacement
Turn off the LCD Projection Monitor and disconnect the AC plug.
Allow the LCD Projection Monitor to cool for at least 30
minutes.
Loosen 4 screws that secure the Lamp Cover with a
screwdriver and remove the Lamp Cover.
1
3
Loosen the 2 screws that secure the lamp with a screwdriver
and pull out the Lamp by grasping the handle.
4
Replace the Lamp with a new one and tighten the 2 screws.
Make sure that the Lamp is correctly secured into the Lamp
compartment. Refer to p49 for ordering the replacement lamp.
5
Remove the Left front cover of the LCD Projection Monitor.
a. Hold left upper side of the cover and slightly pull forward.
b. Hold both sides of the cover and remove it.
2
Connect the AC Power Cord to the LCD Projection Monitor and
turn on the LCD Projection Monitor.
Follow these steps to replace the lamp assembly.
Put the Lamp Cover back and tighten the 4 screws and then
replace the Left front cover.
6
Reset the Lamp replace counter.
See “Lamp Replace Counter” on the next page .
For continued safety, replace with a lamp of the same
type. Do not drop the lamp or touch the glass bulb! The
glass can shatter and may cause injury.
Allow the LCD Projection Monitor to cool, for at least
30minutes before you open the Lamp cover. The inside
of the LCD Projection Monitor can become very hot.
CAUTION
CAUTION
CAUTION
When installing the new Lamp into the Lamp compartment, make
sure the Lamp socket is securely plugged into the compartment
socket. Improper or loosen socket connection may cause arc
discharge resulting fire hazard.
7
8
Left Front
Cover
Screws
Screws
Lamp Cover
Handle
Screws
Pull this
part first.
Maintenance and Cleaning