JL Audio SB-N-PTHFNDR2/10W3v3/BK User Manual
Page 3
Continued on Next Page
SB-N-PTHFNDR2/10W3v3_INSTR_SKU#011234
SB-N-PTHFNDR2/10W3v3_INSTR_SKU#011234
S T E P 1 5
Place a supplied lock washer and flat washer onto each
hex bolt.
Place each bolt assembly through the holes on the extreme
ends of the flat bar.
Place a flat washer and nut onto the bolt that is exposed on
the backside of the metal, secure.
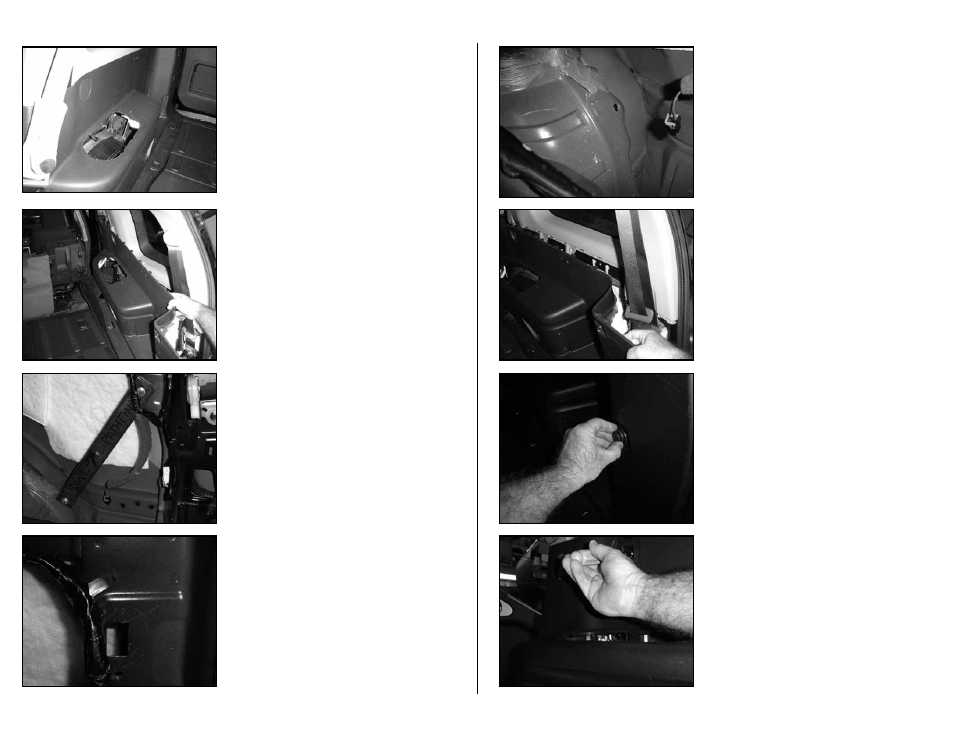
S T E P 1 4
The supplied flat bar needs to be mounted into the area that
is pictured. Follow STEPS 15 - 16.
There is a hole in the mounting bar that is off-set to one end
of the flat bar. The short side of the off-set is to be positioned
downward.
The top side of the mounting bar needs to be behind the
wiring harness, see picture.
S T E P 1 3
Unplug the 12v socket and remove the side panel from the
vehicle.
This 12v plug will be covered by the Stealthbox®, once
installed. If this 12v socket is to be used after the installation
of the Stealthbox®, you will have to modify the wiring and
remount the socket else where.
S T E P 1 2
Remove the pocket from the side panel.
Page 3 • JL Audio, Inc 2007
S T E P 1 7
Place the side panel back into the vehicle that was removed
in STEP 13.
S T E P 1 9
Secure the bolt that was removed in STEP 10.
Replace the cover that was removed in STEP 9.
S T E P 1 8
Mount the cargo net hook that was removed in STEP 11.
S T E P 1 6
Place a supplied lock washer and flat washer onto a hex bolt.
Place this bolt assembly through the bottom end of the
mounting bar and through the hole in the metal.
Place a flat washer and nut onto the bolt that is exposed
behind the metal. Secure.