Copying all files, When “do you want to finalize?” appears – JVC EVERIO GZ-HM550 User Manual
Page 18
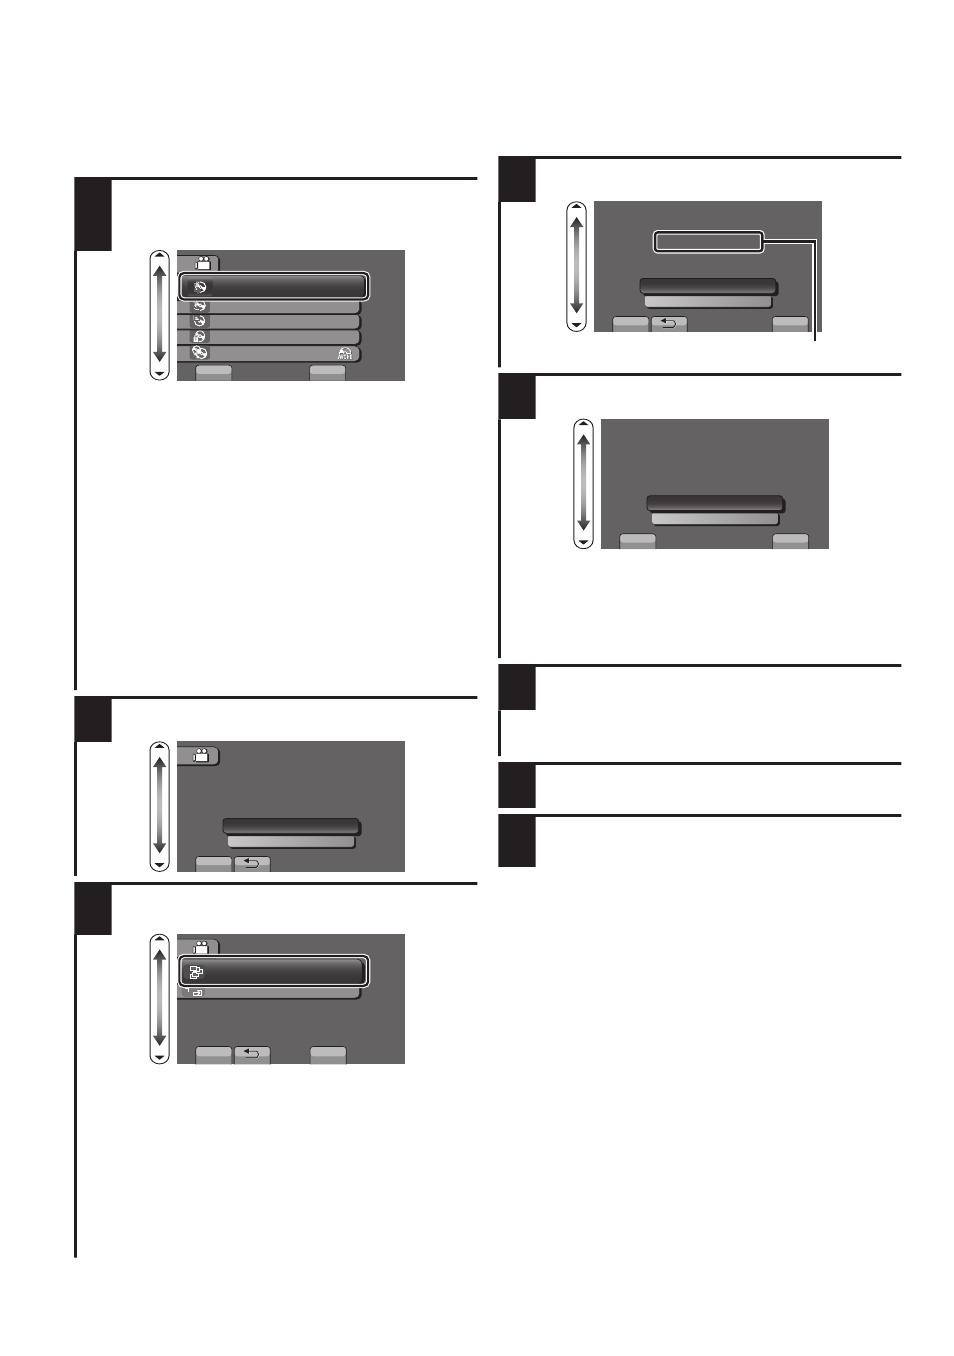
Copying All Files
Select video or still image mode.
1
Select “CREATE FROM ALL” (video)
or “SAVE ALL” (still image), and
touch C.
.
?
VIDEO BACKUP
CREATE FROM ALL
SELECT AND CREATE
PLAYBACK
FINALIZE
CHANGE REC. MEDIA
SET
You can change the media to save to by
selecting “CHANGE REC. MEDIA”. (For
details, refer to the Detailed User
Guide.)
●
Selecting “Blu-ray DISC” enables you
to save videos in a Blu-ray disc in the
high-definition quality. (External Blu-ray
drives only)
●
Selecting “DVD(AVCHD)” enables you
to save videos in a DVD in the high-
definition quality.
●
Selecting “DVD-Video” enables you to
save videos in a DVD after converting
to the standard image quality.
2
Select the media to copy to.
.
SELECT THE MEDIA TO BACK UP
BUILT-IN MEMORY
SD CARD
SET
CREATE FROM ALL
3
Select the desired menu and touch
C
.
.
?
CREATE FROM ALL
ALL SCENES
UNSAVED SCENES
SET
“ALL SCENES” (video)/
“ALL IMAGES” (still image):
All videos and still images in this unit are
copied.
“UNSAVED SCENES” (video)/
“UNSAVED IMAGES” (still image):
Videos and still images that have never
been copied are automatically selected
and copied.
4
Select “EXECUTE” and touch C.
.
Number of discs required
ALL SCENES
REQUIRED DISC SPACE
DVD:1 / DVD(DL):1
PREPARE AN EMPTY DISC
EXECUTE
RETURN
SET
QUIT
5
Select “YES” or “NO”, and touch C.
.
SET
QUIT
ALL SCENES
DO YOU WANT AN AUTOMATIC
HEADLINE ON THE TOP MENU
CREATED?
YES
NO
YES
:Displays the videos with
similar recording dates by
groups.
NO
:Displays the videos by
recording dates.
6
Select “EXECUTE” and touch C.
●
When “INSERT NEXT DISC” appears,
change the disc.
7
After creating, touch C.
8
Close the LCD monitor, then
disconnect the USB cable.
■
When “DO YOU WANT TO
FINALIZE?” appears
This appears when “AUTO FINALIZE” in
the camera settings menu is set to
“OFF”.
●
To play back on other devices, select
“YES” and touch C.
●
To add more files to the DVD later,
select “NO” and touch C.
18
For more information, refer to the Detailed User Guide
http://manual.jvc.co.jp/index.html/