JL Audio Stealthbox SB-T-TDCMAX/13TW5 User Manual
Page 3
Continued on Next Page
SB-T-TDCMAX/13TW5 INSTR_SKU# 011266
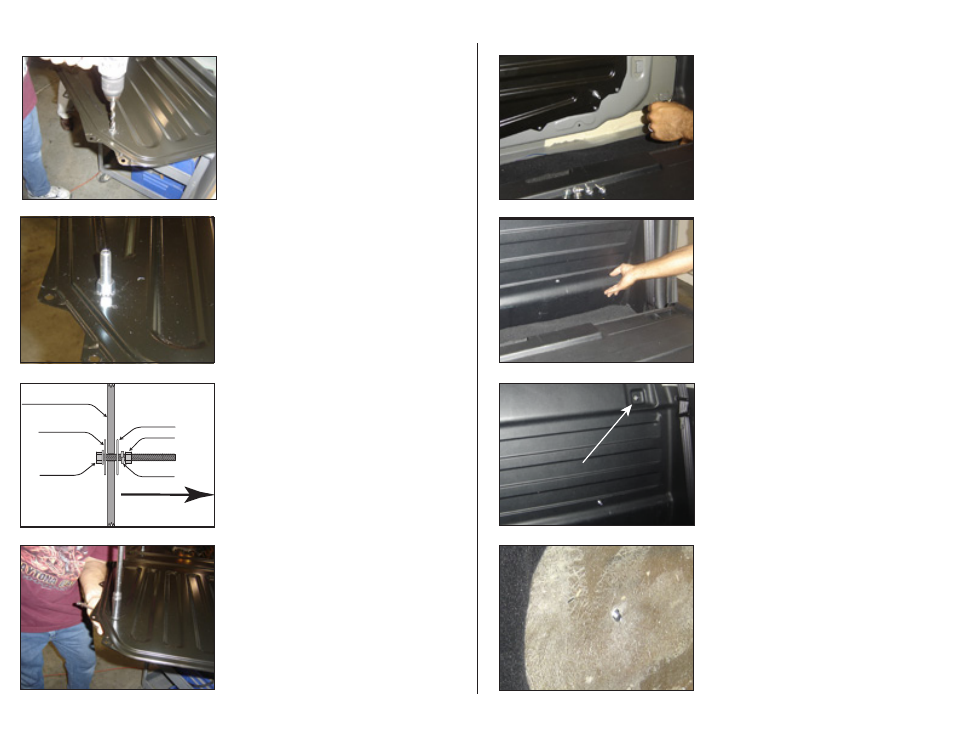
s t e P 1 1
Enlarge 1/8" hole drilled in step 5 through the metal panel
to 3/8" as was done on the plastic panel. Repeat this step if
installing second Stealthbox®.
Page 3 • JL Audio, Inc 2008
S T E P 1 4
Reinstall rear interior metal panel, making sure the the bolt(s)
that were installed in step 13 are facing forward. Use cau-
tion so that the cable that was un-plugged in step 8 does
not get pinched between the removeable panel and the
back of the cab. Plug the cable back in to where it was
unplugged.
S T E P 1 3
Tighten this hardware down using either a deep-well socket
and a wrench (as shown) or two wrenches. You want to
make sure that this hardware won’t move, as this will be
how the Stealthbox® is secured to the truck.
S T E P 1 2
Install included hardware as shown in the picture at left and
the illustration below. Repeat this step if installing second
Stealthbox®.
LOCK WASHER
HEX HEAD BOLT
FRONT OF TRUCK
FENDER WASHER
REMOVEABLE INTERIOR
REAR WALL
HEX NUT
FENDER WASHER
S T E P 1 2 ( d E T A I l )
s t e P 1 7
If installing two Stealthboxes®, install the driver side
enclosure first. Align the enclosure so that the stud goes
through the previously enlarged guide hole step 4.
Start the hardware on the stud using a large fender
washer close to the fiberglass, a split lock washer then
the nut (see step 18). Be cautious not to overtighten the
nut, it only needs to be snug.
s t e P 1 6
Re-install the two anchors that were removed in step 6.
s t e P 1 5
Re-install the rear plastic trim panel. We found that lining up
the recently installed stud with the hole previously drilled in
the panel to the outside (drivers side) made alignment easier.
Ensure that all of the plastic plugs line up with their correct
receptacles and press them in place. Continue towards the
center of the truck. The rear panel can be installed in two
pieces which may make alignment easier. Make sure that the
second stud (for the second Stealthbox® if installed) and the
rest of the plugs line up.