Edit to another video recorder, Editing, Remote a/b code switching – JVC HR-J255EE User Manual
Page 22: Make connections, Set recording deck’s input mode, Start source player, Start recording deck, Important
22
EN
1
2
3
4
5
6
7
8
9
0
2
4
1
EDITING
Edit To
Another Video
Recorder
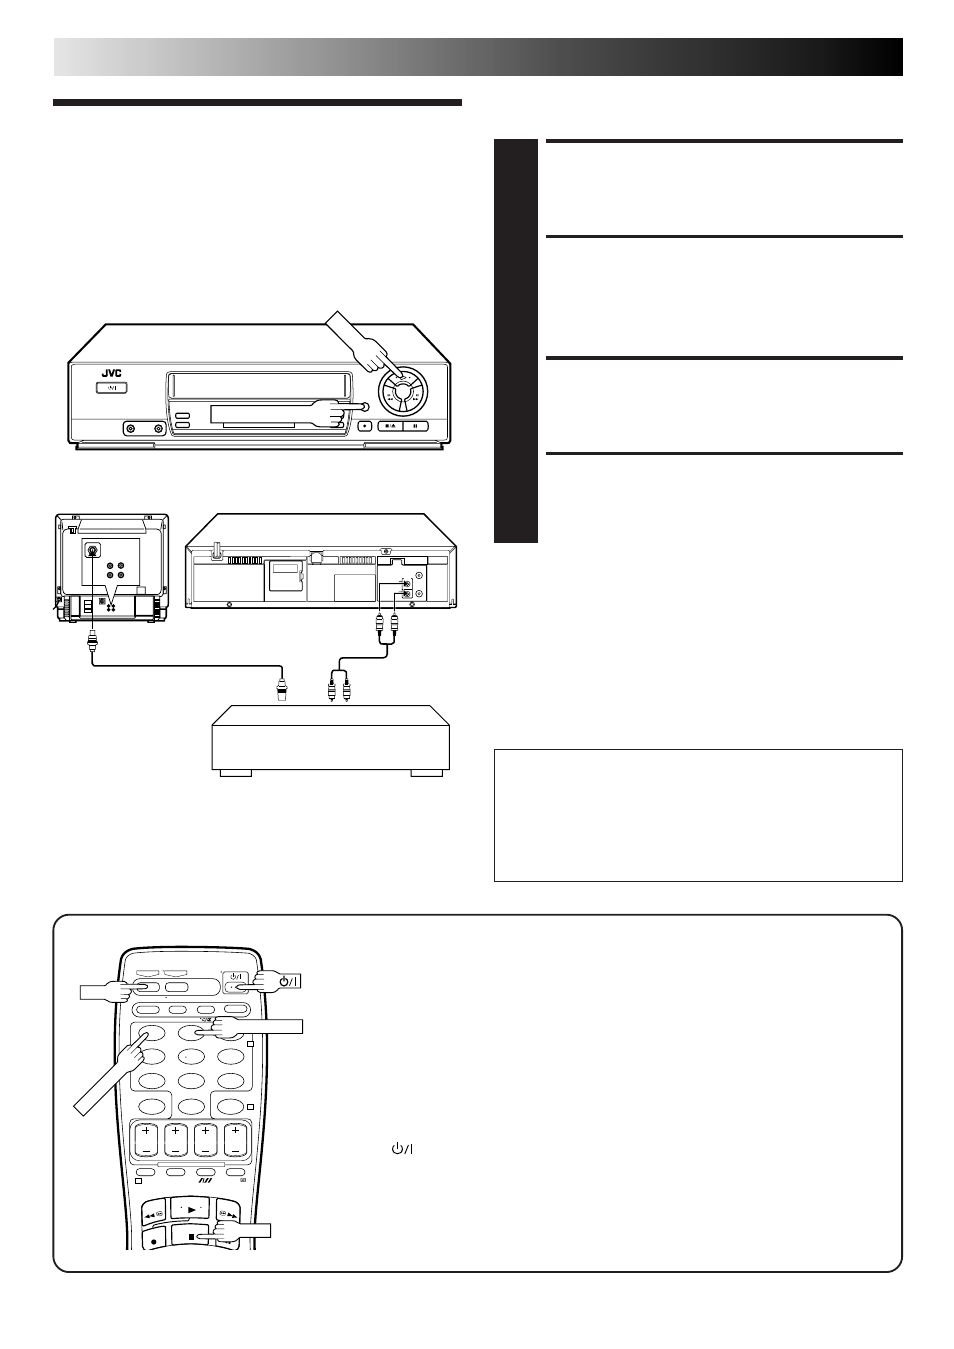
You can use your video recorder as the source player and
another video recorder as the recording deck.
MAKE CONNECTIONS
1
Connect the player’s AUDIO/VIDEO OUT connectors
to the recorder’s AUDIO/VIDEO IN connectors.
SET RECORDING DECK’S INPUT
MODE
2
Set the recording deck's external input mode.
START SOURCE PLAYER
3
Press PLAY on the source player.
START RECORDING DECK
4
Engage its Record mode.
NOTES:
●
All necessary cables can be obtained from your dealer.
●
NTSC tapes being played back in the NTSC
[
PAL mode
(
੬
p. 25) cannot be dubbed to another recorder.
●
When you dub an NTSC tape using your recorder as the
playback deck, select NTSC 3.58 (or NTSC 4.43) with the
COLOUR SYSTEM button. (
੬
p. 24)
●
If you do not want to record the superimposed indication on
the editied tape, be sure to set "O.S.D." to "OFF" before you
start editing (
੬
pg. 8).
Another recorder
Recording deck
RF Cable (provided)
VIDEO
CHANNEL
Your recorder
Source player
TV Receiver
IMPORTANT
● To edit, both the player and the recorder must be of the
same colour system. Press your recorder's COLOUR
SYSTEM button to select the appropriate colour system.
● For more information on multi-system compatibility,
੬
pg. 24.
AV Cable
(not provided)
COLOUR SYSTEM
Remote A/B Code Switching
The remote control is capable of controlling two JVC video recorders independently;
one set to respond to the remote control’s A code control signals and another set to
respond to B code control signals. The remote control is preset to send A code signals
because your video recorder is initially set to respond to A code signals. You can
easily modify your video recorder to respond to B code signals.
1
Unplug the mains power cord from the mains outlet.
2
While holding down VCR on the remote control, press the NUMBER key "2" and
then press STOP.
3
Plug the mains power cord back into the mains outlet.
4
Press
on the remote control. The recorder will now only respond to B code
signals.
NOTE:
To set the recorder back to respond to A code signals, repeat the same procedure as
shown above except pressing NUMBER key "1" instead of "2" in step 2.
NUMBER "2"
VCR
STOP
PLAY
NUMBER "1"