Playback (cont.), Inputting the date – JVC GC X 1 User Manual
Page 56
56
EN
Inputting the Date
You can display the date when playing back or printing pictures on the optional printer.
Perform steps 1 – 3 on the page 54 before the
following procedures.
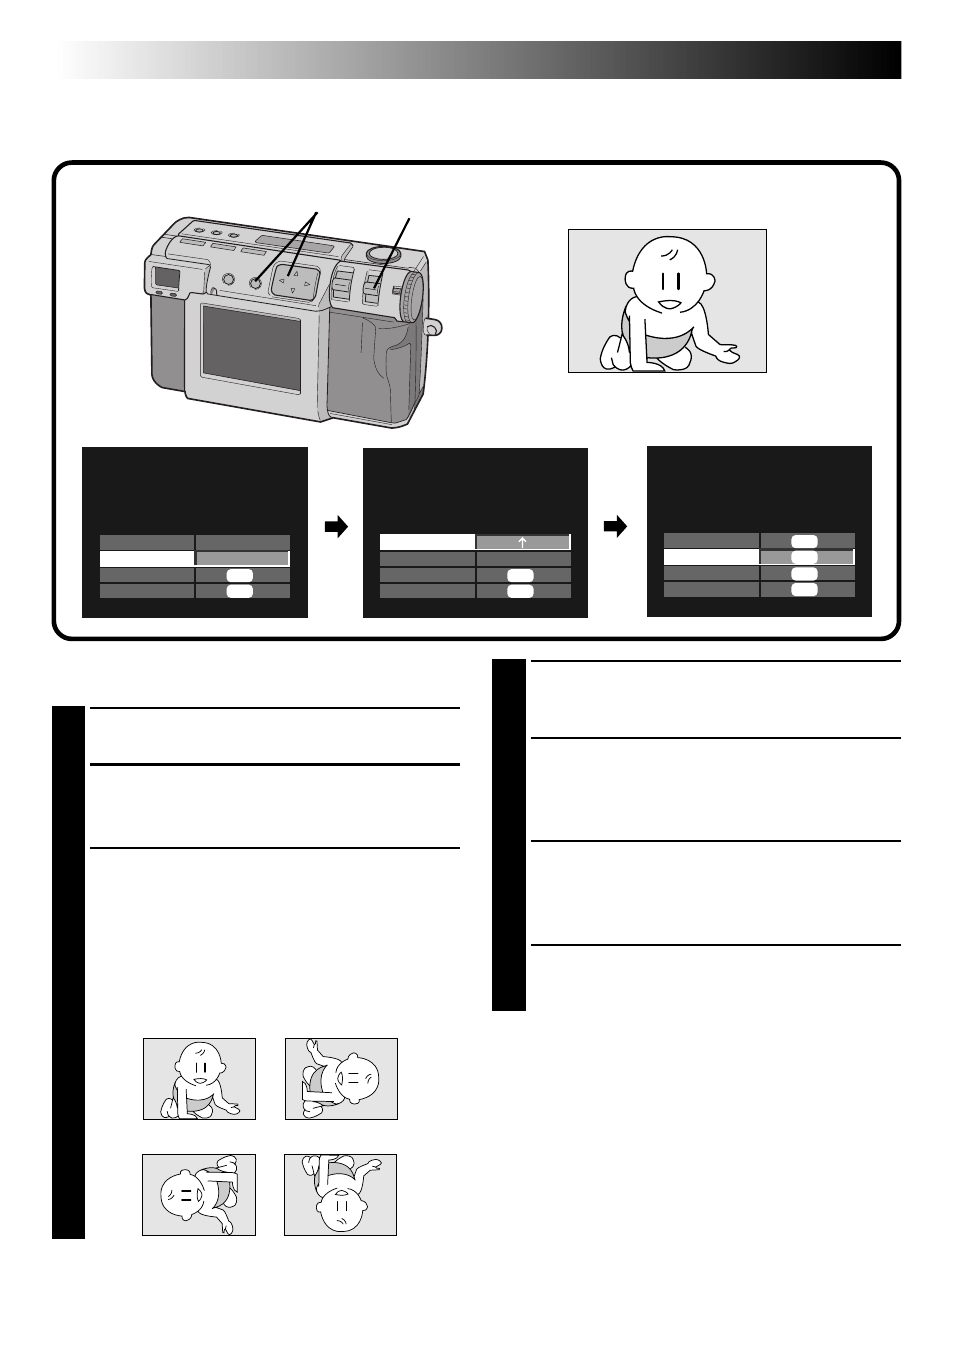
1
Press the r t button to select “DATE”, and
then press the w e button to select “ON”.
2
Press the r t button to select “NEXT”, and
then press the EXE button.
•The DATE screen appears.
3
Press the r t button to select “DIRECTION”,
and then press the w e button to select the
direction of the picture.
•Press the w e button repeatedly to cycle
through
↑
(up),
→
(right),
↓
(down) or
←
(left).
•Select the up side of the picture.
4
Press the r t button to select “STYLE”, and
then press the w e button to select “YMD”,
“MDY” or “DMY”.
5
Press the r t button to select “END”, and
then press the EXE button.
•“NOW EDITING” appears, then FILE screen
will appear.
6
Press the r t button to select “OVERWRITE”
or “SAVE”, and then press the EXE button.
•You can print the file that you have added
special effects. (
੬ pg. 60)
7
Select “STILL PB” with the MODE switch, and
then confirm that the file has been saved.
(
੬ pg. 31)
1–6
PLAYBACK (cont.)
EDIT
EFFECT
DATE
NEXT
RETURN
OFF
ON
EXE
EXE
DATE
DIRECTION
STYLE
END
RETURN
DMY
EXE
EXE
FILE
OVERWRITE
SAVE
CANCEL
EXE
EXE
EXE
EXE
↑
(up)
→
(right)
←
(left)
↓
(down)
7
2 4 . 5 . 2 0 0 0