For additional safety, Legs installation – Jacuzzi GA99 User Manual
Page 3
© Jacuzzi Luxury Bath • 14525 Monte Vista Ave • Chino • California • 91710 • www.jacuzzi.com
#GV64000 02/09
90 DAY (PARTS ONLY) LIMITED WARRANTY ON OPTIONS AND ACCESSORIES
Our warranty covers options and accessories manufactured for the company but not installed by the factory (e.g., fill spout kits, trim
kits, skirts, pillows, etc.) against defects in material or workmanship. Warranty coverage begins on the date the option or accessory was
originally purchased by the user. Contact our Warranty Department 1-800-288-4002 as to where to send the part to receive a warranty
replacement.
���������
�����������
�������������
������������������
���
������������������
����
����
���������
���
��������
��������
�������������
�������������
�������������������
���������
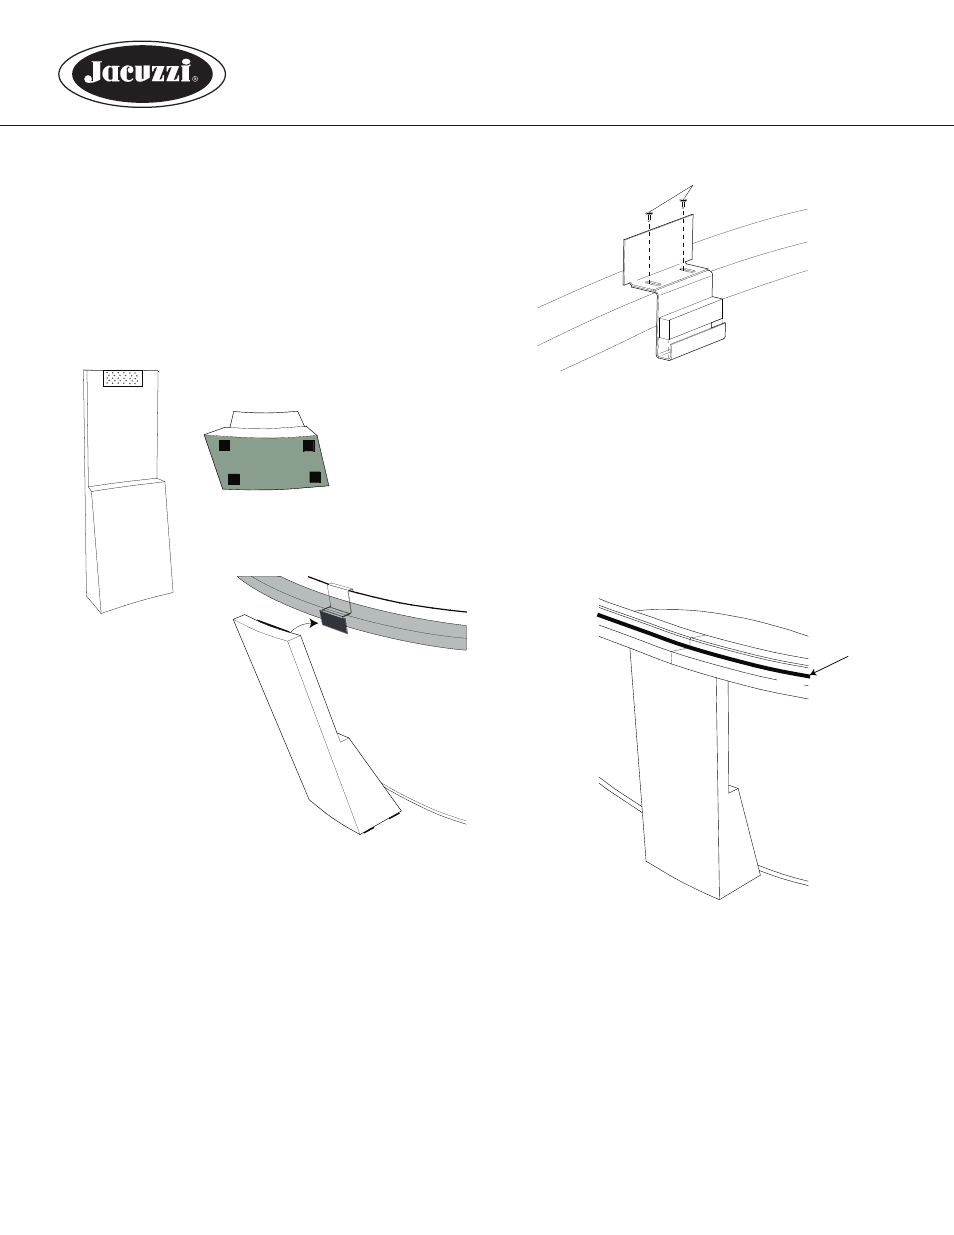
6. FOR ADDITIONAL SAFETY.
After the Ring /Legs have been installed place a bead of clear silicon
between the Ring and the Tub rim as shown in Fig. 8.
Dual lock and foam placement detail
Fig. 6
Clear Silicon Installation Detail
Fig. 8
Leg Installation Detail
Fig. 7
4.
• Place Ring upside down to identify the dimples as shown in
Fig. 1.
• Locate the Leg brackets and place them as shown in Fig. 5.
• Using a Flat head screwdriver, attatch the leg bracket as shown
in Fig. 5 and fasten to the ring using (2) pan head screws.
Ring & Legs Bracket Detail
Fig. 5
Legs Installation:
��������
���������
�������������
����
�������
��������������������
����������
�������
����������
�������
������
�������
5.
• Install the Dual Lock onto the top center of each Leg as shown
in Fig. 6.
• Install the Dual Lock onto each of the Leg Brackets as shown
in Fig. 7.
• Align the Legs to the center of the leg support bracket and
angle the bottom so it touches the freestanding skirt and
rotate forward until the Dual lock locks in place as shown in
Fig. 7.