Basic operation, Projecting image, Asic operation – JVC DLA-RS2 User Manual
Page 20: 1080 pixels. (p, P20), Ntrol. (p, And the focus. (p, Insert the power plug to the power outlet, Turn on the power, Project the image
20
3
Projecting Image
. . . . . . . . . . . . . . . . . . . . . . . . . . . . . . . . . . . . . . . . . . . . . . . . . . . . . . . . . . . . . . . . . . . . . . .
Preparation
z
Remove the lens cap.
A
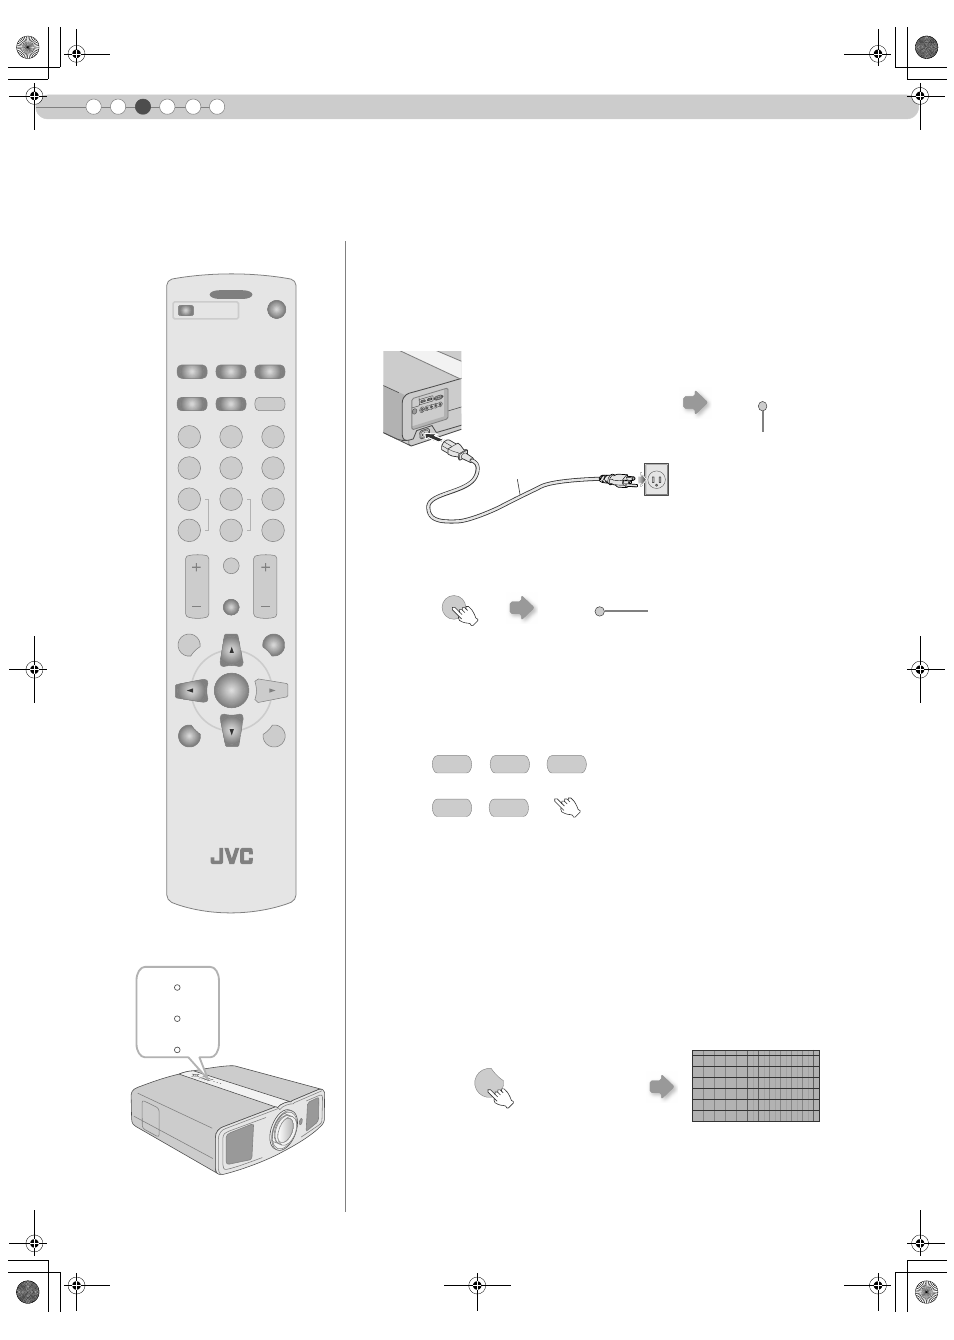
Insert the power plug to the power outlet
B
Turn on the power
C
Project the image
a
Select input mode
b
Play back the selected device
D
Adjust the position of the projection screen
E
Adjust the image size (zoom) and the focus
a
Display the test pattern (crosshatch)
This section describes the basic operations to project input images on the screen.
z
You can also press the [STANDBY/ON] button on the unit to turn on the
power. (p
z
You can also select the input mode by pressing the [INPUT] button on
the unit. (p
z
See “Installing the Projector and Screen” for procedures on adjusting the
position. (p
PROJECTOR
OPERATE
LIGHT
TEST
EXIT
SHARP
-
SHARP
+
USER
2
S-VIDEO
VIDEO
ASPECT
HDMI 2
OFF
........
........
HDMI 1
COMP.
N
NATURAL
CINEMA
DYNAMIC
COLOR
TEMP
GAMMA
USER
3
D
COLOR
-
COLOR
+
USER
1
C
CONTRAST
BRIGHT
HIDE
INFO
MENU
ENTER
ON
WARNING
LAMP
STANDBY/ON
A
B
Light on (Red)
Power Cord
(Supplied)
A Connect to this unit
B Connect to the power outlet
STANDBY/ON
ON
Light on (Green)
STANDBY/ON
COMP.
HDMI 2
HDMI 1
VIDEO
S-VIDEO
TEST
Press repeatedly
DLA-RS2U_EN.book Page 20 Monday, February 25, 2008 5:40 PM