Jensen JiSS-550 User Manual
Page 6
V IDE O OUT F R OM T HE iP od
Y ou are able to view videos and photos stored in your 5th G eneration iP od on a larger television screen
or monitor using the built-in V ideo Output jacks on the back of the Docking C radle.
T wo video output jacks are available on the back of the Docking Cradle unit.
(1) S -V IDE O S -V ideo signal.
(2) R C A V IDE O composite video signal (most common on standard televisions with video in).
V ideo Out (F or 5th G eneration iP ods with video ONL Y )
1. Y ou can connect this unit to a television or other video display that has S -video or composite
video inputs.
2. S ecurely dock the iP od with video in the cradle.
3. C onnect the S -video cable (included) into the rear S -video jack or yellow R C A cable (included) to rear
R C A video jack on the unit.
4. C onnect the other end of the S -video or yellow R C A cable to V IDE O IN on your television or video display.
5. S lide the Audio Input S elector switch on the back of the docking cradle to iP od position.
6. S elect a movie from your iP od menu.
7. iP od: On the main menu choose video then select video setting.
8. iP od: Make sure the T V Out section is set to “ON”.
9. iP od: S witch back to the movie library and play the movie of your choice.
F or P hoto view (F or iP od with color dis play ONL Y - excludes nano)
1. S lide the Audio Input S election switch on the back of the docking cradle to iP od position.
2. S ecurely dock the iP od with color display.
3. iP od: At T V Out section, make sure it is set to “ON”
4. iP od: G o to P hoto Library and then press play. T he slideshow will play on your device.
Note: 1. T he R C A V ideo input connector on a television is usually color coded yellow to match the
color on the AV cable.
2. When playing slideshows or videos, the audio will only playback through the speakers on this unit.
9
iPod DOCKING
10
T his model includes adaptors for adopting different iP od models. If the docking cradle will not be used for an
extended period of time, it is recommended to use the “Dock C over” insert to help protect the docking
connector.
1. S elect a suitable adaptor for your iP od and insert it into the docking cradle.
2. Y our iP od can now be docked by placing the connector on the bottom of
the iP od directly over the dock connector located in the docking cradle.
Seat the iPod on the dock connector to assure a proper connection.
F or docking an iP od nano, slide the dock connector to the left and
also see note on
of this instruction manual.
F or other iP od models, slide the dock connector to the right (center position)
and insert the iP od adaptor for the type of iPod you are using.
3. Insert your iP od with the c onnector facing down and positioned directly over the dock connector
" DOC K ING 1st AND 2nd G E NE R AT ION
iP od nanos " section
located in the docking cradle. Seat the iPod on the dock connector to assure a proper connection.
Note: When docking your iPod, p leas e be careful to avoid damaging the30-pin connectors
located on the iPod and in the docking cradle.
iP od playback control from remote control:
- P ress the P L A Y /PA US E button to pause or resume the iP od playback;
- P ress the iP od S kip/S earch F orward or B ackward button to skip to the next or previous song;
- P ress and hold the iP od S kip/S earch F orward or B ackward button for fast-forwarding or
fast-rewinding during playback.
4. S lide the A udio Input S elector switch on the back of the docking cradle to iP od position.
5. P ress the ON/S T A NDB Y button to turn On the main unit.
6. P ress the P L A Y / PA US E button to pause or resume iP od playback.
7. Adjust the sound level by pressing the V OL UME + / - buttons.
Note : T he V olume level cannot be adjus ted us ing the volume control on your iP od when
docked.
8. T he iP od charges even during playback.
9. To remove the iP od from the Docking Cradle,press and hold the P L A Y /PA US E button for three seconds
to switch off the iPod. You can now gently remove it from the docking cradle.
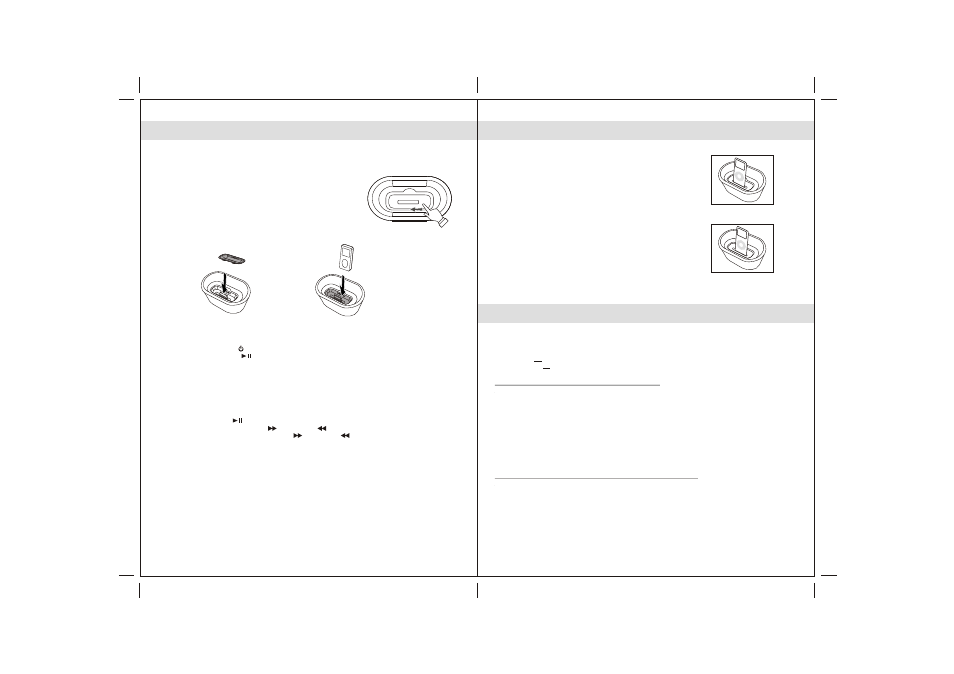
First install the iPod nano bracket
into the.
st
st
1 Generation iPod nano: Align your 1 generation iPod nano to the
LEFT side of the opening in the nano bracket (Figure 1). Make sure
the connector on the bottom of the nano is positioned over the
connector in the J
dock prior to seating the nano. Carefully
slide the nano down onto the connector in order to insure a secure
connection.
JiSS-550 Docking
Cradle
iSS-550
nd
nd
2
Generation iPod nano: Align your 2
generation iPod nano
to the
RIGHT
side of the opening in the nano bracket (Figure 2 ). Make sure
on the bottom of the nano is positioned over the
connector in the J
dock prior to seating the nano. Carefully
slide the nano down onto the connector in order to insure a secure
connection.
the connector
iSS-550
Note: Be careful not to damage the connector when docking the nano.
Never use force when docking the nano onto the connector.
st
nd
DOCKING 1 AND 2 GENERATION iPod nanos
Insert the iP od
adaptor into the
dock cradle
Doc your iP od
with the connector
in the cradle
Figure 2
Figure 1