Installation, Mounting on a tripod, Mounting the camera – JVC GY KA-HD250 User Manual
Page 10
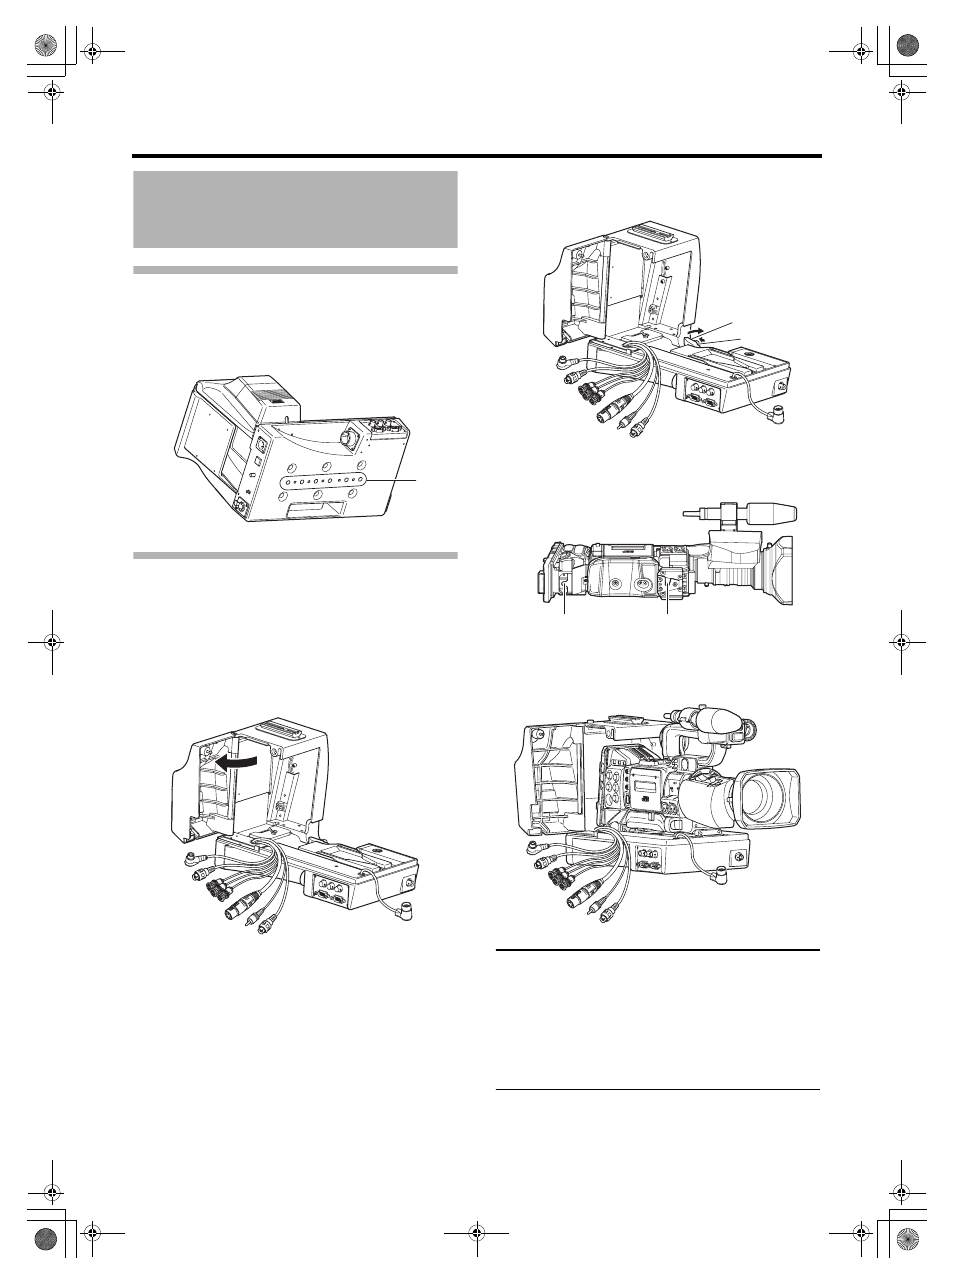
PREPARATIONS
10
Installation
Mounting on a Tripod
Use the screw holes on the bottom to mount on a tripod.
There are multiple screw holes. Use well-balanced holes to
mount to a tripod.
Mounting the Camera
Prepare the camera as follows before mounting.
• Attach the lens.
• Attach the microphone.
• Remove the viewfinder.
For details, refer to GY-HD250’s INSTRUCTION MANUAL.
1.
Open the side cover.
2.
Release the LOCK RELEASE LEVER.
Push the safety lever until the front attachment clip clicks,
and then pull the lock lever.
3.
Position the camera.
Position the camera so the rear base mount is aligned
with the pin on this device.
4.
Lock the camera.
Hold the camera on the top and slide forward. The front
base mount of the camera and the front attachment grip
of this device locks and clicks.
CAUTION
• The front base mount may lock even when the pin on this
device and the rear base mount attachment hole on the
camera is not attached. After attaching, confirm that the
camera has been firmly attached. The camera may fall
and cause injury or accident if it is not attached properly.
• When transporting with the camera attached to this
device, hold the bottom of this device. If transported with
the camera handle, the attachment may come off and
this device may fall and cause injury or accident.
Screw
holes
Safety lever
Lock lever
Rear base mount
Front base mount
e_ka250.book Page 10 Tuesday, September 5, 2006 4:10 PM