Delete a channel, Change station channel position, Set stations (a) – JVC DR-MH20B User Manual
Page 74: Set stations (b), Fine-tuning channels already stored, Pg. 74), Pg. 74, “delete a channel”), E “change station channel position, E “set stations (b), Subsidiary settings
Filename [DR-MH30EU_10Subsidiary.fm]
Masterpage:Left+
74
EN
SUBSIDIARY SETTINGS
Page 74
Thursday, 3 June 2004 10:46
Delete A Channel
1
Perform steps 1 – 4 of “Manual Channel Set” (
access the Confirmation screen before continuing.
2
Press rt w e to select the item you want to delete.
3
Press & to delete a channel. The item next to the cancelled one
moves up one line.
● Repeat steps 2 – 3 as necessary.
4
Press SET UP to close the Confirmation screen.
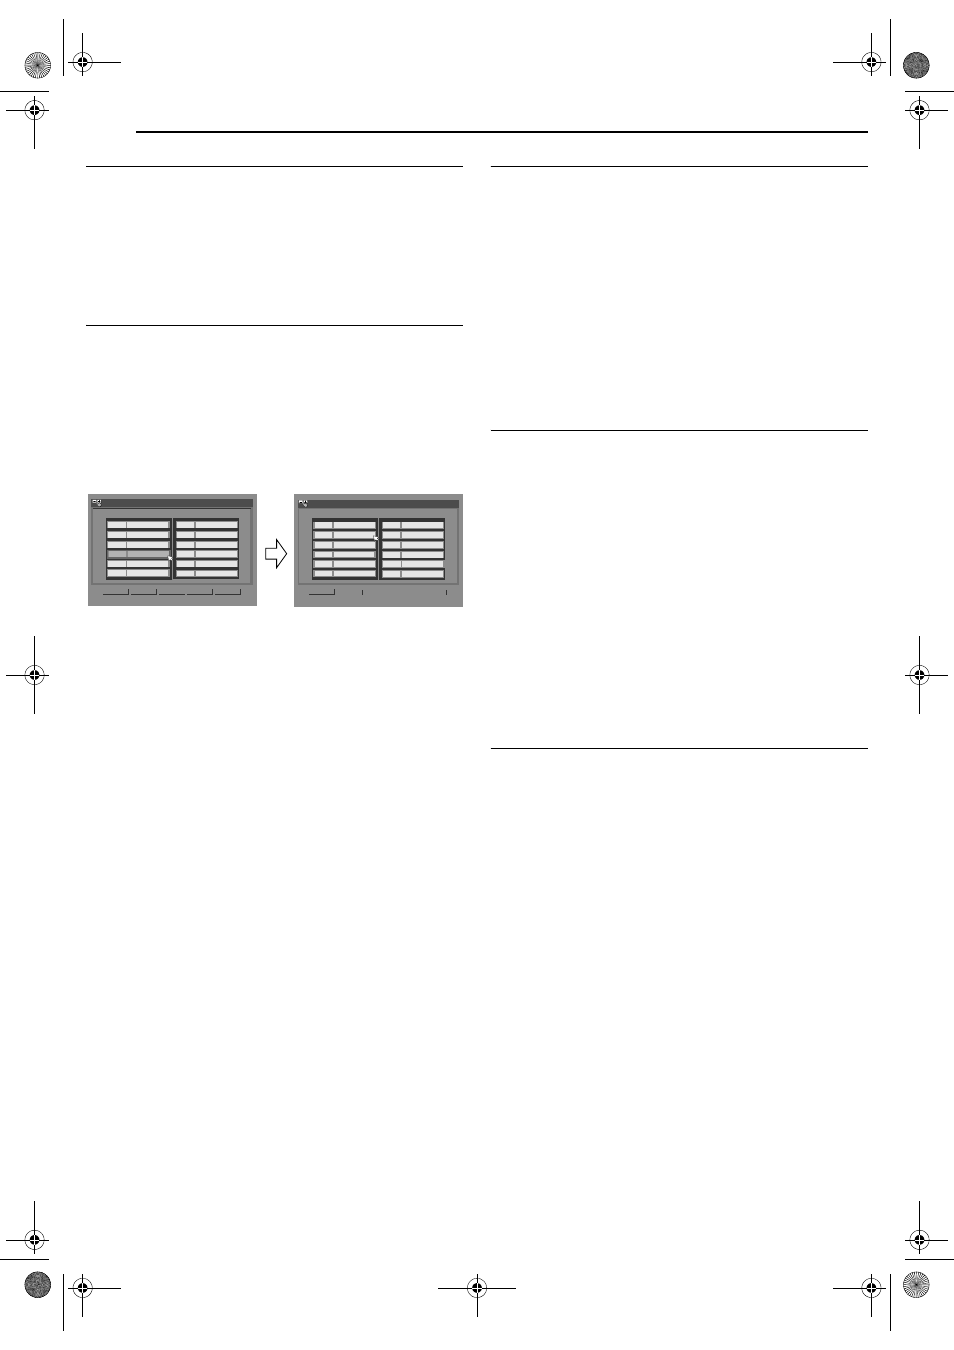
Change Station Channel Position
1
Perform steps 1 – 4 of “Manual Channel Set” (
access the Confirmation screen before continuing.
2
Press rt w e to select “MOVE”, then press ENTER.
3
Press rt w e to select the item you want to move, then press
ENTER.
4
Press rt w e to select the new channel position, then press
ENTER.
Example: If you moved the station in position 4 to position 2, the
stations originally in positions 2 and 3 each move down
one space.
● Repeat steps 3 – 4 as necessary.
5
Press SET UP twice to close the Confirmation screen.
Set Stations (A)
Set station names that are registered in your unit.
1
Perform steps 1 – 4 of “Manual Channel Set” (
access the Confirmation screen before continuing.
2
Press rt w e to select “EDIT”, then press ENTER.
3
Press rt w e to select the item you want to modify.
4
Press ENTER twice to access the Manual Channel Set screen.
5
Press rt to select “ID”, then press ENTER.
6
Press rt until the new station’s name (ID) you want to store
appears, then press ENTER. Registered station names (
appear as you press rt.
7
Press w e to select “OK”, then press ENTER.
● Repeat steps 3 – 7 as necessary.
8
Press SET UP twice to close the Confirmation screen.
Set Stations (B)
Set station names other than the ones registered in your unit.
1
Perform steps 1 – 4 of “Manual Channel Set” (
access the Confirmation screen and then perform steps 2 – 4 of
“Set Stations (A)” above before continuing.
2
Press rt to select “ID”, then press ENTER.
3
Press ENTER twice.
4
Press w e to locate the character insertion point.
5
Press rt to cycle through the characters (A–Z, 0–9, –, f, +, I
(space)) and stop when the desired character is indicated, then
press e to enter.
● Enter the remaining characters the same way (maximum of 4).
6
After entering all characters, press w e to select “OK”, then
press ENTER.
7
Press SET UP twice to close the Confirmation screen.
NOTE:
The characters available for the station name (ID) are A–Z, 0–9, –,
f, +, I (space) (maximum of 4).
Fine-Tuning Channels Already Stored
1
Perform steps 1 – 4 of “Manual Channel Set” (
access the Confirmation screen before continuing.
2
Press rt w e to select the channel you want to fine-tune, then
press ENTER.
3
Press ENTER twice.
4
Press ENTER to access the Manual Channel Set screen. The
Manual Channel Set screen appears.
5
Press rt to select “FINE”.
6
Press w e until the picture appears in its best quality.
● Repeat steps 2 – 6 as necessary.
7
Press SET UP three times to close the Confirmation screen.
CH
ID
CH
CH
ID
<
>
MOVE
EDIT
RETURN
INITIAL SET UP > MANUAL CH SET
PR
01
C01
----
02
02
CTEA
03
05
1000
12
----
05
01
9LIV
06
04
AB3
07
----
08
----
09
----
10
----
11
----
04
3SAT
CH
ID
CH
CH
ID
<
>
MOVE
EDIT
RETURN
INITIAL SET UP > MANUAL CH SET
PR
01
C01
----
02
C79
3SAT
03
02
CTEA
12
----
05
01
9LIV
06
04
AB3
07
----
08
----
09
----
10
----
11
----
05
C79
04
05
1000
DR-MH30EU_00.book Page 74 Thursday, June 3, 2004 11:00 AM