Installation, How to open the drive storage cover, How to install the dvd-r drive – JVC MC-R421U User Manual
Page 4
4
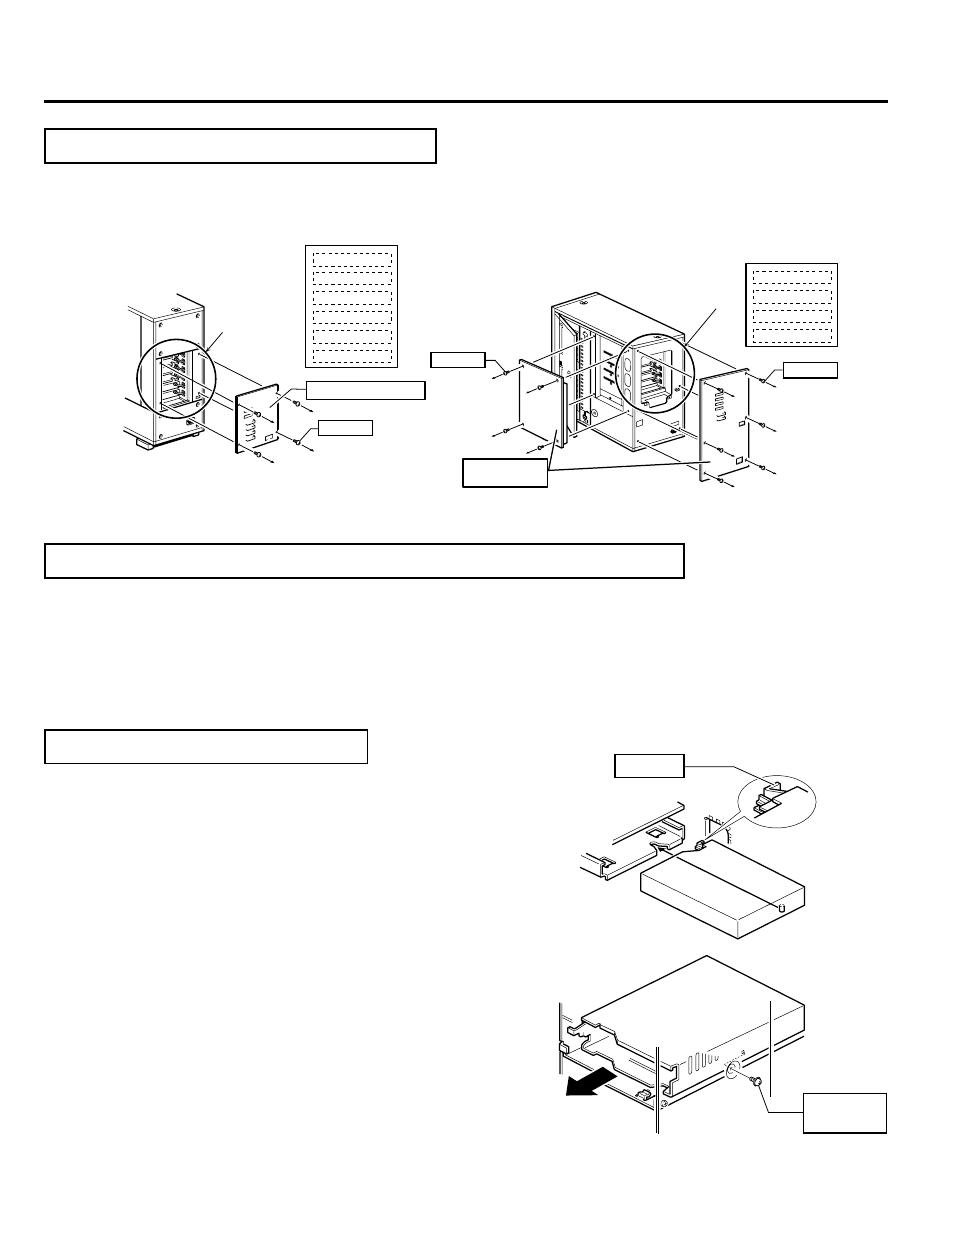
INSTALLATION
Sensor slit
•Beware of damage
Drive locking
screw
Drive storage
cover
Drive storage
section
Drive No.4
Drive No.3
Drive No.2
Drive No.1
Screws
Screws
Drive storage
section
• Figure shows the MC-8200U
Screws
Drive No.6
Drive No.5
Drive No.4
Drive No.3
Drive No.2
Drive No.1
Drive storage cover
• Figure shows the MC-8100U
2. How to Open the Drive Storage Cover
Ⅵ Also be sure to refer to the corresponding sections in the Library instructions.
1. Remove the screws from the drive storage cover that is located at the rear of the Library.
2. Remove the drive storage cover.
4. How to Install the DVD-R Drive
1. Install the drives from the No.1 to No.6 slots (No. 1 to No. 4 in the case of the MC-8100U) in that order without skipping any
drive slots.
ⅥBegin installing drives from the lowest position (No.1).
1. Insert the DVD-R drive from the rear of the JVC Library.
Ⅵ Pay attention not to damage the sensor slit.
Ⅵ Always insert the DVD-R Drive correctly.
Ⅵ Check that cables connected on the rear of the unit are not caught
or pinched when inserting the DVD-R Drive.
2. Insert the DVD-R Drive slowly until the screw installation hole located
on the side of the DVD-R Drive and the screw installation hole lo-
cated on the drive locking section are aligned.
3. Lock the DVD-R Drive in place by using the drive locking screw on
the door panel side of the drive.
Ⅵ Tighten the screw firmly.
Ⅵ If the drive locking screw is loose, the drive and/or Library could
suffer damage.
3. How to Determine the Installation Position of the DVD-R Drive
Drive storage section
Drive locking section