Basic operations, Rc l, Turning the power on and off (standby) – JVC RX-6010RBK EN User Manual
Page 11: S.wfr ls rs s lfe
8
Basic Operations
The following operations are commonly used when you play any sound source.
Turning the Power On and Off (Standby)
On the front panel:
To turn on the power, press
STANDBY/ON
.
The STANDBY lamp goes off. The name of
the current source (or station frequency)
appears on the display.
To turn off the power (into standby mode),
press STANDBY/ON
again.
The STANDBY lamp lights up. A small
amount of power is consumed in standby
mode. To turn the power off completely,
unplug the AC power cord.
From the remote control:
To turn on the power, press AUDIO in the
(standby/on) section.
The STANDBY lamp goes off. The name of the
current source (or station frequency) appears on
the display.
To turn off the power (into standby mode),
press AUDIO in the
(standby/on) section
again.
The STANDBY lamp lights up.
Selecting the Source to Play
Press one of the source selecting buttons.
On the front panel:
From the remote control:
Current source name appears
Current volume level is shown here
L
SPK
VOLUME
ANALOG
R
STANDBY
STANDBY/ON
AUDIO
DVD
VCR
TV SOUND
CD
TAPE/CDR
SOURCE NAME
FM/AM
TAPE/CDR
FM/AM
CD
TV SOUND
VCR
DVD
STANDBY
STANDBY/ON
Selected source name appears
DVD
Select the DVD player.
TV SOUND
Select the TV sound.
VCR
Select the video component connected to the
VCR jacks.
CD
*
Select the CD player.
TAPE/CDR
*
Select the cassette deck (or the CD recorder).
FM/AM
*
Select an FM or AM (MW/LW) broadcast.
• Each time you press the button, the band
alternates between FM and AM (MW/LW).
Notes:
• When connecting a CD recorder (to the TAPE/CDR jacks), change
the source name that appears on the display. See page 11 for
details.
• When you have connected some digital source components using
the digital terminals (see page 7), you need to select the digital
input mode.
• When you press one of the source selecting buttons on the remote
control marked above with an asterisk (
*
), the receiver
automatically turns on.
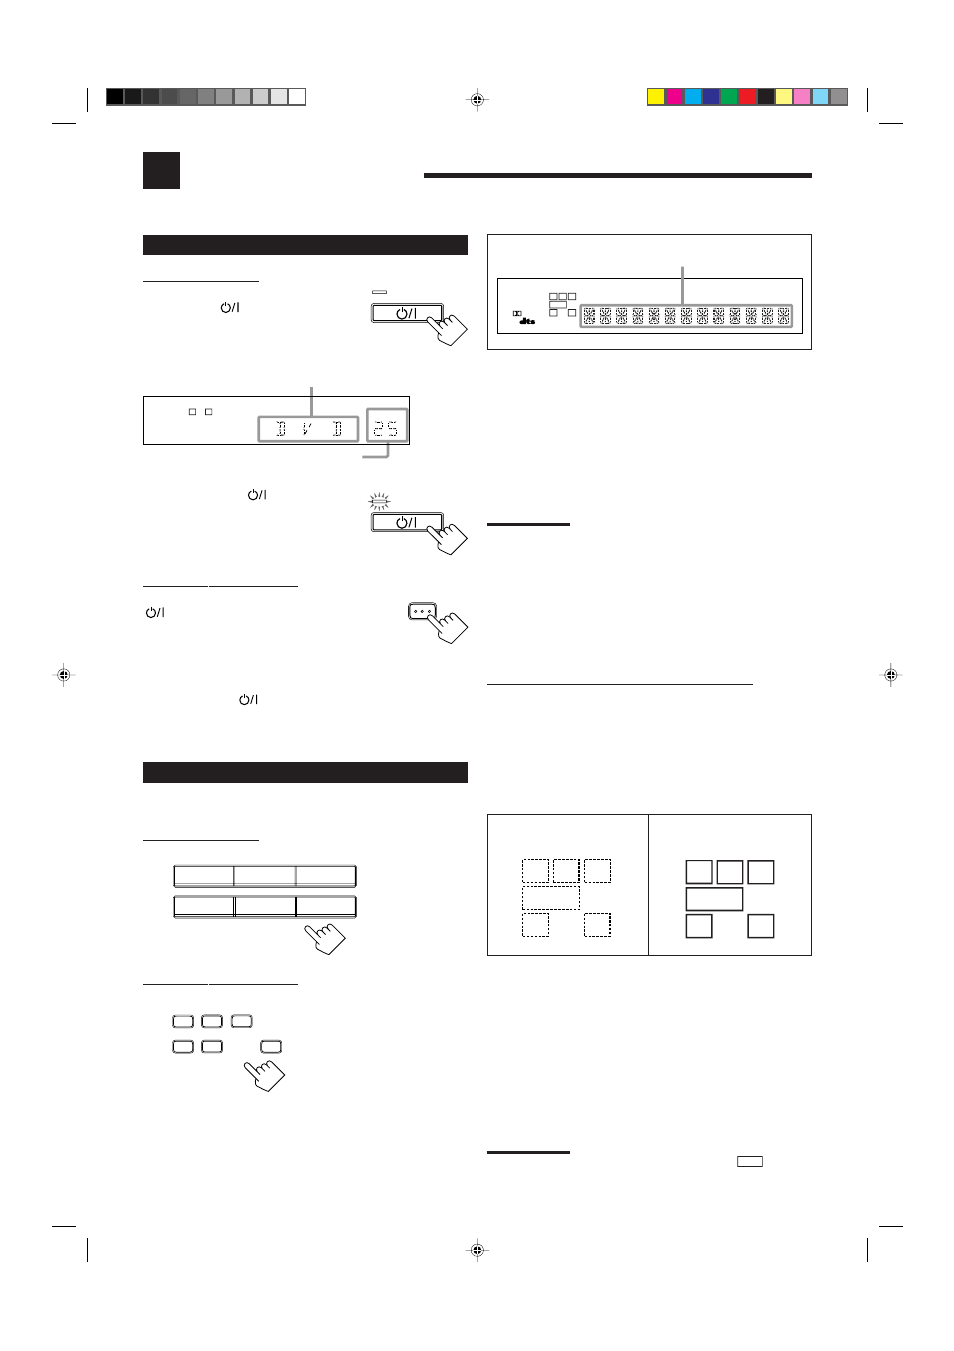
Signal and speaker indicators on the display
The signal indicators light up in the following cases:
• Only the indicators for the incoming signals light up.
• When analog input is selected, “L” and “R” always light up.
The speaker indicators light up only —:
• When the corresponding speaker is activated.
AND
• When the corresponding speaker is required for the DSP mode
selected currently.
L
:
• When digital input is selected: Lights up when the left
channel signal comes in.
• When analog input is selected: Always lights up.
R
:
• When digital input is selected: Lights up when the right
channel signal comes in.
• When analog input is selected: Always lights up.
C:
Lights up when the center channel signal comes in.
LS:
Lights up when the left rear channel signal comes in.
RS:
Lights up when the right rear channel signal comes in.
S:
Lights up when the monaural rear channel signal comes in.
LFE:
Lights up when the
LFE
channel signal comes in.
Note:
When “SUBWOOFER” is set to “YES” (see page 11),
S.WFR
lights up.
Speaker indicators light up
in white:
Signal indicators light up in
red:
S.WFR
LS
RS
S
LFE
R
C
L
S.WFR
LS
RS
S
LFE
R
C
L
L
C
S.WFR
LS
RS
CH-
S
LFE
SPK
PRO LOGIC DSP H.PHONE AUTO MUTING TUNED STEREO TA NEWS INFO
VOLUME
INPUT ATT
EON RDS
SLEEP
DIGITAL AUTO
ANALOG
DIGITAL
LINEAR PCM
R
EN08-20.RX-6010&6012R[B]_f
01.1.9, 6:38 PM
8