JL Audio Stealthbox SB-T-SEQ/10W3 User Manual
Page 2
➔
➔
➔
➔
➔
➔
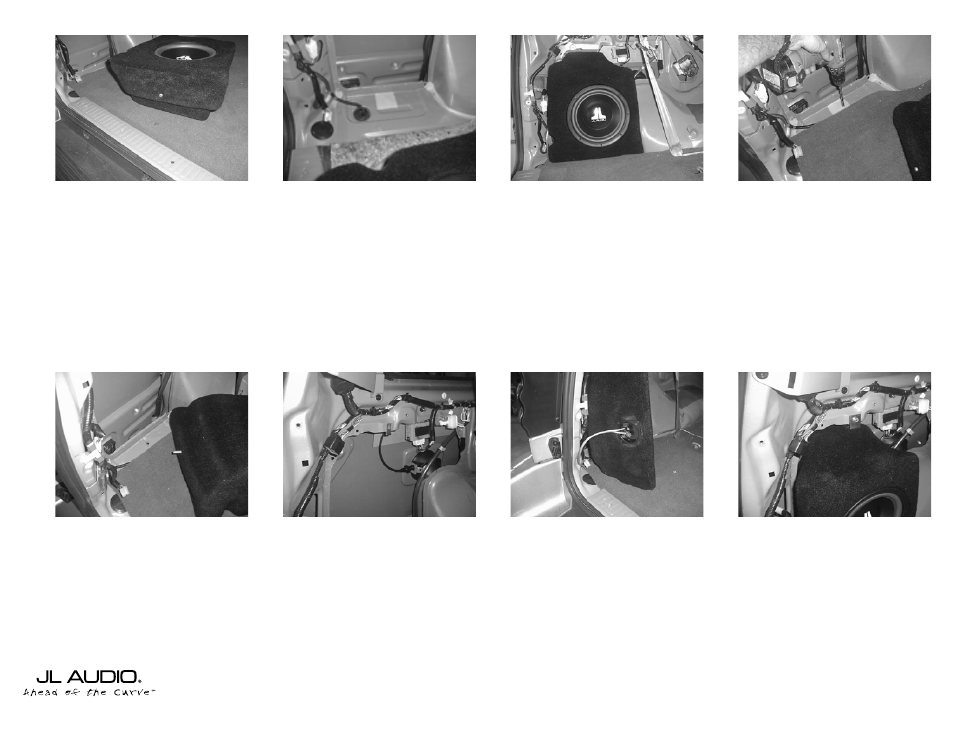
STEP 7: Insert supplied Socket Set Cup
Screw into the enclosure so the rod extends
approximately 1/4” out of the enclosure.
STEP 11: Adjust the Socket Cup Set Screw,
so that is extends 1 1/2” out of the enclosure.
Cont.
From
Page 1
Continued on Page 3
➔
➔
STEP 8: Roll the floor carpet back to expose
the metal floor in the location shown above.
Place the supplied wax square on the metal
floor as shown above.
STEP 12: Insert the supplied U-bolt in
factory hole.
(located at the top of the enclosure location
as shown above)
➔
STEP 13: Run speaker wires to the location
of the Stealthbox. Check the Stealthbox for
proper operation.
STEP14: Using the supplied 1/4”washer, 1/4”
lock washer and 1/4”x1”bolt. Mount the L-
bracker to top of the enclosure.The bottom
of the L-brackt needs to point towards the
driver’s side fender.
STEP 15: Place the Stealthbox in its proper
location, making sure to place the threaded
rod into the previously drilled hole in the
floor.
STEP16: Place the supplied 1/4’lock washer,
1/4” flat washer in that order onto the
1/4”x1” bolt. Pass the bolt through the
mounted L-bracker and thread into the U-
bolt installed in STEP 12. Do not fully tighten.
STEP 9: Place the Stealthbox into place so as
to allow the Socket Set Cup Screw to make
an impression in the wax square.
STEP 10: Using a 1/2” drill bit, drill a hole
through the metal floor in the location of the
impression in the wax square.
S B - T- S E Q / 1 0 W 3 v 2 - D 2 , J L AU D I O, I n c 2 0 0 2
S h e e t S K U # 0 1 1 1 1 1 R ev i s i o n 1 0 / 3 0 / 0 2
Pa g e 2
w w w . j l a u d i o . c o m
➔