Ac p, Dentification, Ower – Infinity BU-1 User Manual
Page 7: Ontrols, Efore, Onnecting, Ubwoofer
4
◆
Powered Subwoofer BU-1 – Owner’s Manual
C
ONTROLS
...
B
EFORE
C
ONNECTING
Y
OUR
S
UBWOOFER
...
Figure 2.
I
DENTIFICATION
O
F
C
ONTROLS
A
ND
C
ONNECTING
AC P
OWER
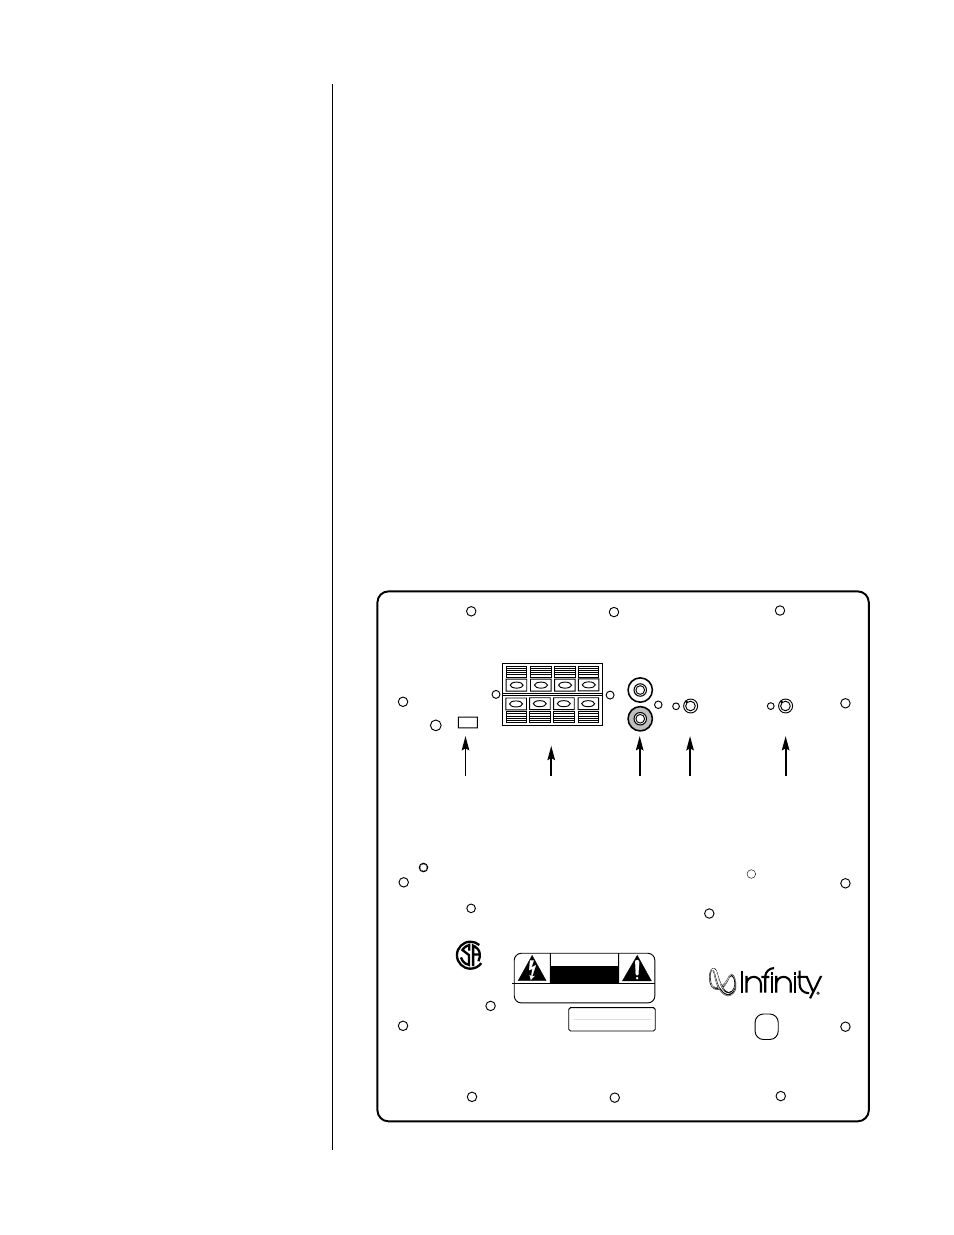
Refer to Figure 2 to identify the controls of your subwoofer’s internal amplifier:
❶
AC Power: on/off switch for AC power to amplifier
❷
High-Level Input and Output Terminal Strips
❸
Low-Level Input Jacks: connect to preamplifier outputs
❹
Volume Control: controls volume of subwoofer
❺
Frequency: controls upper corner roll-off point
Turn off your entire audio system prior to connecting your subwoofer. Make sure the
subwoofer’s ON/OFF switch is in the “OFF” position.
If using an unswitched AC outlet on your receiver or amplifier is not possible, connect your
subwoofer to an unswitched AC wall outlet. The BU-1 includes an “Auto-Sensing” circuit that
automatically turns the subwoofer on when detecting music or voice signals. The absence of an
audio signal for approximately six minutes will cause the auto-sensing circuit to shut down
the system.
POWER
AUTO
POWER
ON
OFF
HIGH LEVEL INPUT
+
R
–
L
+
HIGH LEVEL OUTPUT
–
+
R
–
L
+
–
LOW LEVEL
INPUT
L
R
VOLUME
CONTROL
MIN
MAX
FREQUENCY
Hz
180˚
120˚
80˚
60˚
200˚
50˚
120V ~, 60Hz
130W
CAUTION
RISK OF ELECTRIC SHOCK
DO NOT OPEN
WARNING: SHOCK HAZARD-DO NOT OPEN.
AVIS: RISQUE DE CHOC ELECTRIQUE-NE PAS OUVRIR.
WARNING:
TO REDUCE THE RISK OF FIRE OR ELECTRIC
SHOCK, DO NOT EXPOSE THIS APPLIANCE TO RAIN OR MOISTURE.
NOT SUITABLE FOR ALL IN-WALL MOUNTING
MODEL BU1
120V~ 60Hz 130W
HCM
®
NRTL/C
UL-1492
❹
❸
❷
❶
❺