Onnecting, Ubwoofer, Cont – Infinity BU-1 User Manual
Page 10: Powered subwoofer bu-1 – owner’s manual, Amplifier outputs
Powered Subwoofer BU-1 – Owner’s Manual
◆
7
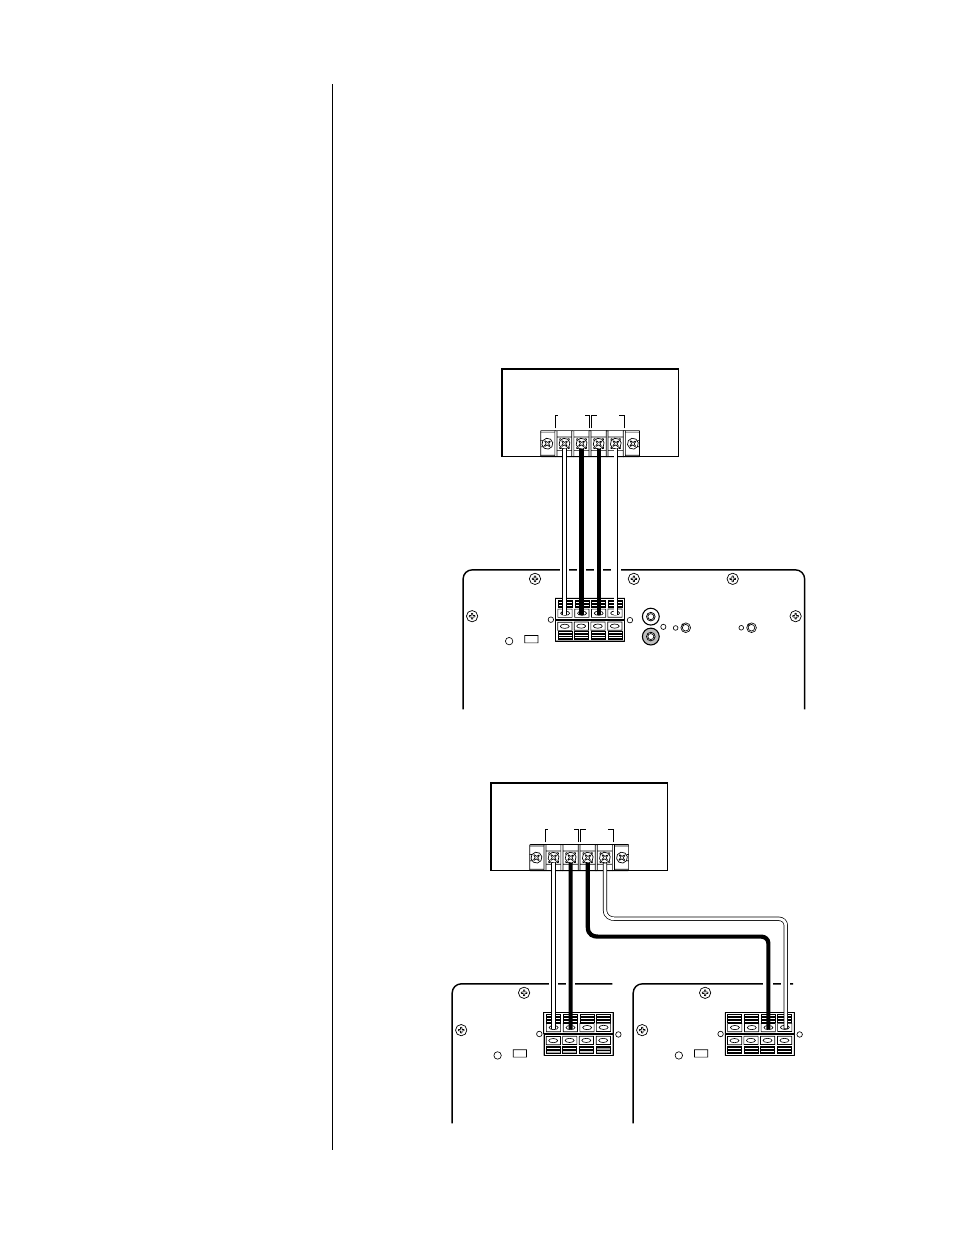
Figure 5. Method when
using single subwoofer.
Figure 6. Method when
using two subwoofers.
C
ONNECTING
Y
OUR
S
UBWOOFER
(
CONT
’
D
)
The BU-1 subwoofer may be connected to your system using the HIGH-LEVEL INPUTS (4) on
the plate located on the rear panel of the subwoofer. Use ordinary lamp cord maintaining
proper polarity (+ to + and – to –). Attach the lamp cord to the left and right HIGH-LEVEL
INPUTS on the subwoofer and the other ends to the proper left and right OUTPUTS on your
amplifier or receiver (see Figure 5).
If you plan to use two subwoofers (one for the left and the other for the right channel) connect
wires from the left and right OUTPUT on your power amplifier or receiver and attach the other
ends to the corresponding HIGH-LEVEL INPUTS on each subwoofer. Observe polarity
(see Figure 6).
POWER
AUTO
POWER
ON
OFF
+
R
–
L
+
HIGH LEVEL OUTPUT
–
+
R
–
L
+
–
LOW LEVEL
INPUT
L
R
VOLUME
CONTROL
MIN
MAX
FREQUENCY
Hz
180˚
120˚
80˚
60˚
200˚
50˚
HIGH LEVEL INPUT
AMPLIFIER
OUTPUTS
+ – – +
LEFT
RIGHT
BU-1
SUBWOOFER
PLATE
RIGHT BU-1
SUBWOOFER
PLATE
LEFT BU-1
SUBWOOFER
PLATE
POWER
AUTO
POWER
ON
OFF
R
–
L
+
HIGH LEVEL OUTPUT
+
R
–
L
+
–
POWER
AUTO
POWER
ON
OFF
+
R
L
+
HIGH LEVEL OUTPUT
–
+
R
–
L
+
–
HIGH
L
EVEL INPUT
–
+
HIGH LEVEL
IN
PUT
–
AMPLIFIER
OUTPUTS
+ – – +
LEFT
RIGHT