Ows-1, Lacement, Npacking the – Infinity OWS-1 User Manual
Page 2: Peakers, Ounting the
Infinity OWS-1
The OWS-1 loudspeaker reinforces Infinity’s long-standing commitment to
accurate sound reproduction. Our proprietary Ceramic Metal Matrix
Diaphragm
™
(C.M.M.D.
™
) drivers allow the OWS-1 to deliver uncompromising
performance in any stereo or multichannel home theater application.
If you suspect damage from transit, report it immediately to your dealer. Keep
the shipping carton and packing materials for future use.
Before deciding where to place your OWS-1 speakers, carefully survey your
room. Use Figure 1 as a guide for stereo placement, and use Figure 2 as a
guide for home theater applications.
NOTE: An Infinity powered subwoofer will add impact and realism to both
music and film soundtracks. Contact your local Infinity dealer for
recommendations on subwoofer models for your application.
Couch
Left
Front
Channel
Left
Surround
Channel
Right
Surround
Channel
Right
Front
Channel
Center
Channel
Subwoofer
Listening Position
Left
Channel
Right
Channel
P
LACEMENT
U
NPACKING THE
S
PEAKERS
F
IGURE
1
– This overhead view shows a typical stereo placement.
F
IGURE
2
– This overhead view shows the OWS-1 as a surround
speaker in a typical home theater plan.
2
OWS-1
W
ALL
-M
OUNTING THE
OWS-1
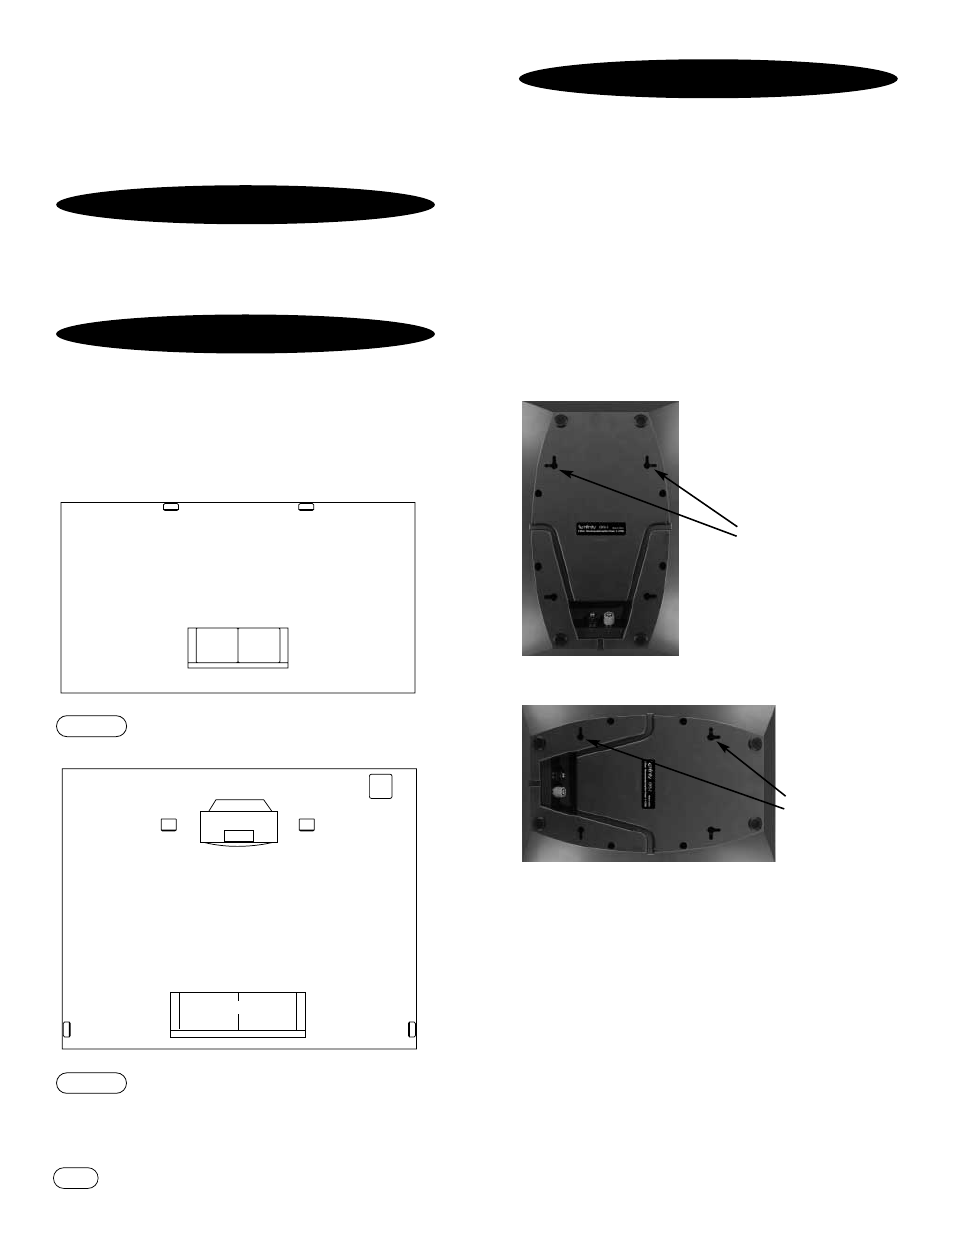
The OWS-1 speaker is designed to mount directly to a wall. Each OWS-1
speaker has (4) keyholes on its rear to allow either a vertical or horizontal
placement. Each speaker will require (2) 1-1/2," #8 wood screws fastened
to a wall stud. If a wall stud is unavailable, install an anchor appropriate for
a 1-1/2," #8 screw. Use the supplied template to accurately position the
screws on the wall and refer to the diagrams for more assistance.
NOTE: The customer is responsible for the correct selection and use of
mounting hardware (available through hardware stores) that will ensure the
proper and safe wall-mounting of the speakers.
Step 1.
Position the supplied wall-mount template on the wall in the desired speaker
location. You may choose a vertical or horizontal position. Make two
markings per speaker.
Vertical position
Horizontal position
NOTE: For horizontal placement in a surround application, position the
speaker so that the tweeter is closest to the main listening area.
Step 2.
Fasten (2) 1-1/2," #8 wood screws to the wall using the markings placed in
Step 1 as your guide. Leave a 3/8" space between the wall and screwhead.
If a wall stud is not available, use an appropriate anchor.
Step 3.
Place the speaker on the wall by aligning the upper two keyholes on the
back of the speaker to the screwheads on the wall. Once positioned properly,
the speaker should slide down slightly and become secure.
Use these holes
Use these holes