Iring, Ystem – Infinity OVTR 2 User Manual
Page 7
Compositions Overture OVTR 2/OVTR 3 – Owner’s Manual
◆
5
W
IRING
T
HE
S
YSTEM
After placing the speakers, you are ready to connect your system. First
turn off all audio system power. Use high-quality speaker wire to make
your connections. For speaker connections, use #18 gauge speaker wire
(or #16 for runs over 25 feet) with polarity coding. The side of the wire
with a ridge or other coding is usually considered negative polarity
(i.e., – ). Also, consult the owner’s manuals that were included with
your amplifier, receiver, or television to confirm connection procedures.
If your system includes a Dolby
®
Surround Pro Logic preamplifier or
A/V receiver, set the center-channel mode to NORMAL. This will route
the low frequencies (below 100 Hz) away from the center-channel
speaker to the front left and right speakers.
Compositions Overture OVTR 2 and OVTR 3 speakers have integrated
powered subwoofers and only require one set of output leads for the left
and right channels. Observe polarities when making speaker
connections, as shown in Figures 4 (below) and 5 (on next page). Connect
each + terminal on the back of the amplifier, receiver, or television to
the respective + (red) terminal on each Compositions Overture speaker.
Similarly, connect the (black) terminals in the same way.
Do not reverse polarities (i.e., + to - or - to +) when making connections.
Doing so will cause poor imaging and diminished bass response.
T
URN
O
FF
A
LL
P
OWER
...
I
MPORTANT
!
I
MPORTANT
!
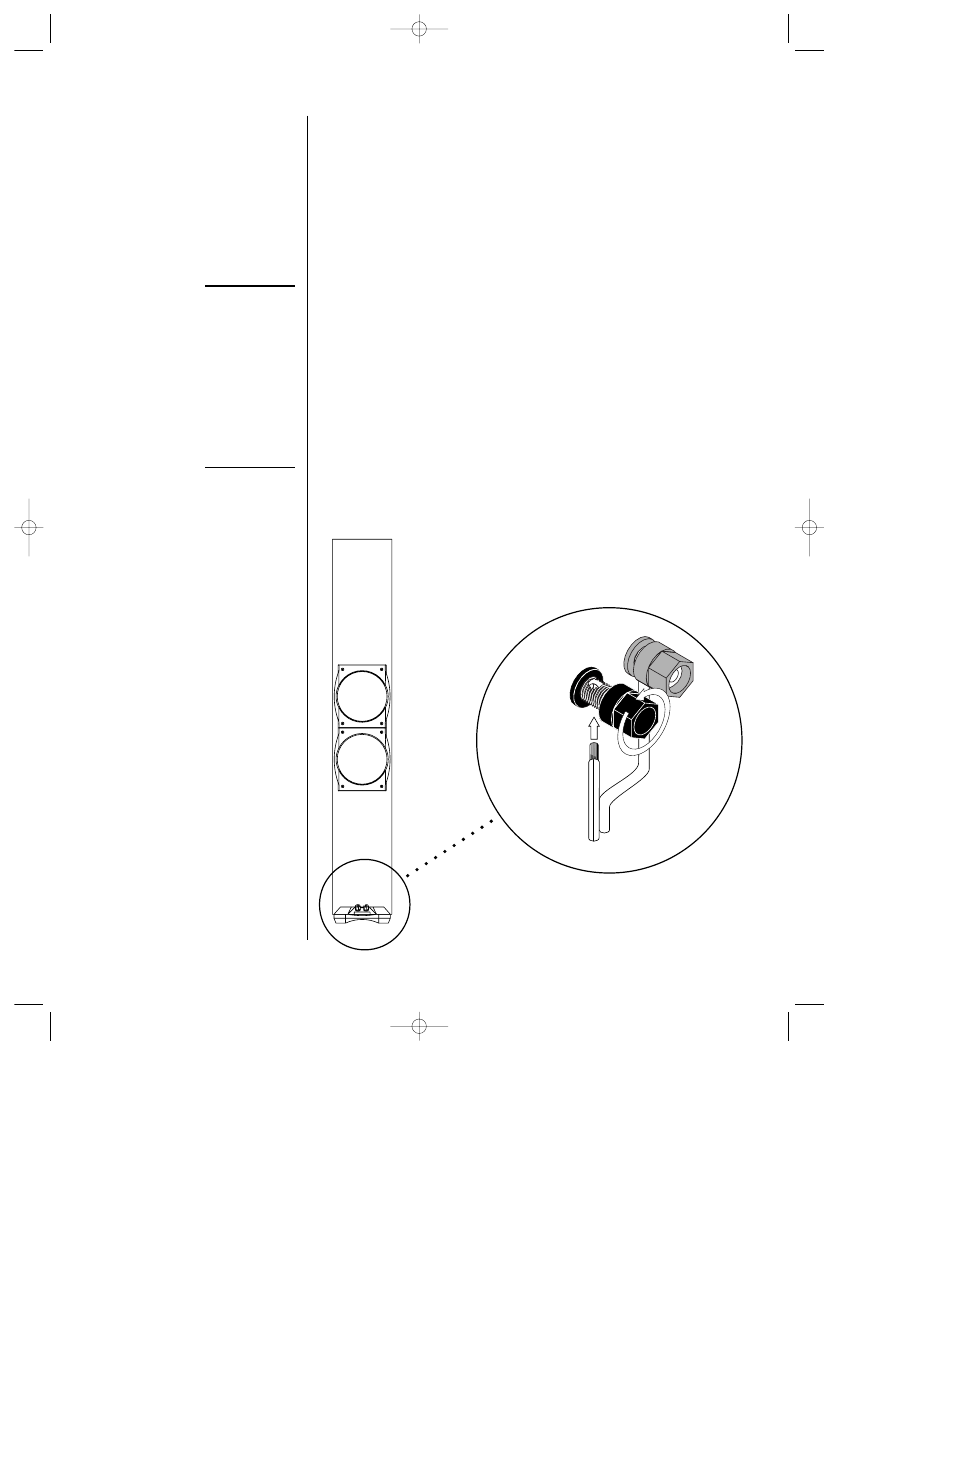
Figure 4. Compositions Overture
OVTR 2 (not shown) and OVTR 3
speakers feature gold-plated
terminals that can be connected in
several different ways; e.g., banana
plugs, spade terminals, and direct
wiring (as shown here).
OVTR 3
(rear view)
CONNECTING SPEAKERS DIRECTLY TO WIRES
Red =
+
Black =
–
❷
Insert Bare End
End; Tighten
Terminal
❶
Loosen
Terminal.
Speaker Wire
No Stripe =
+
Stripe =
–
Overture 2/3 Ins 9/11/98 4:23 PM Page 5