Ab c, Ounting the, Atellites – Infinity TSS-SAT1200 User Manual
Page 4
4
TSS-SAT1200
W
ALL
-M
OUNTING THE
S
ATELLITES
TSS-SAT1200 satellites are designed to also be mounted on the
wall. There is a fixed-mount wall bracket and an adjustable wall
bracket provided for each satellite. Each speaker bracket will
require up to four 1-1/2" #10 wood screws; each screw should
be fastened to a wall stud. If a wall stud is unavailable, install an
anchor appropriate for a 1-1/2" #10 screw.
IMPORTANT SAFETY NOTE:
The customer is solely responsible
for proper selection of mounting hardware not included with the
speakers, and for proper assembly and installation of the wall
brackets, including but not limited to the selection of appropriate
weight-bearing supports and proper use of the bracket. Infinity
disclaims any liability for the selection of mounting hardware and/or
bracket installation. Be sure to follow these bracket assembly and
installation instructions carefully. If you have any questions or
doubts about your ability to correctly wall-mount the speakers,
consult with your authorized Infinity dealer or custom installer.
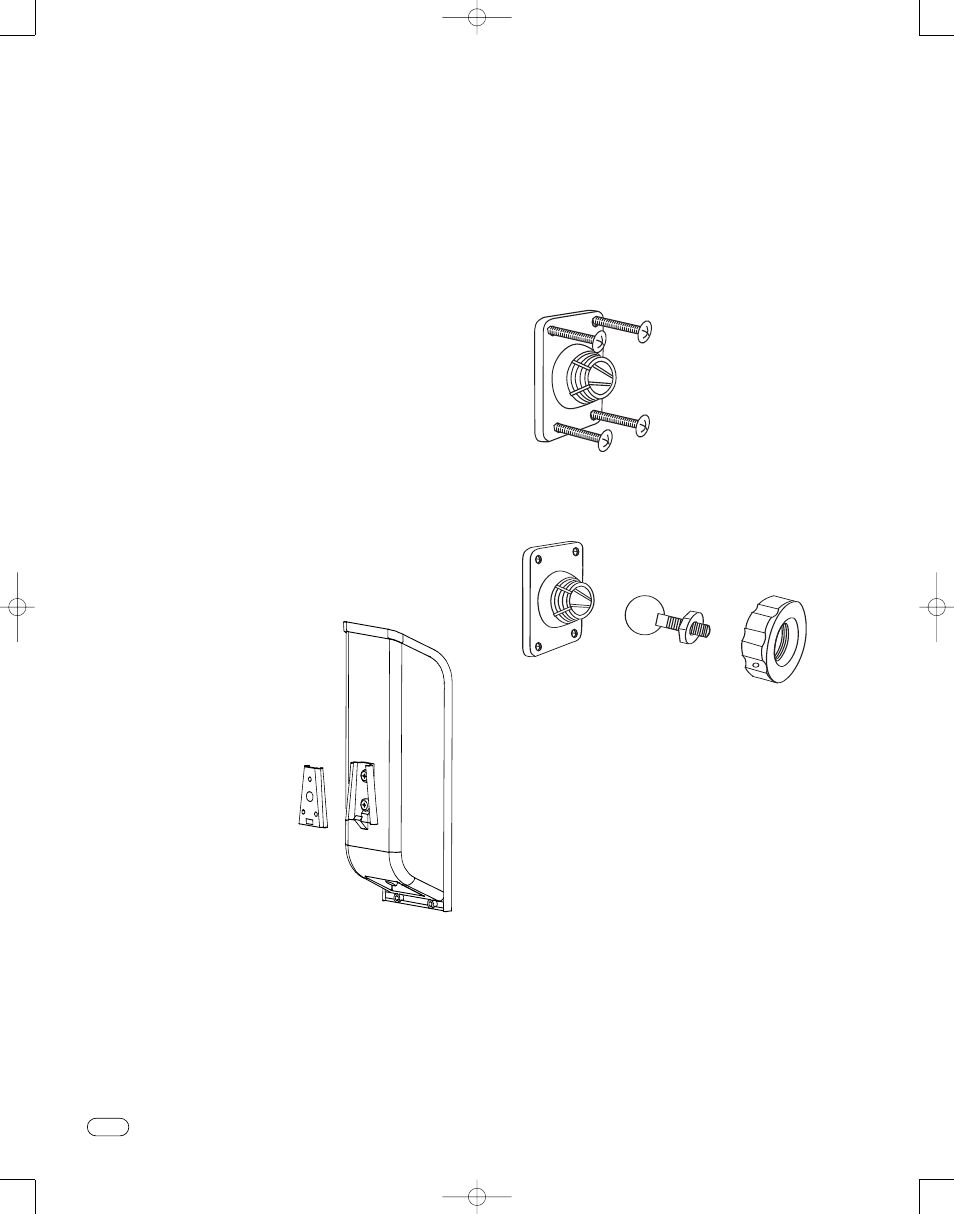
Fixed-Mount Wall Bracket
Step 1.
Remove the rear foot by loosening the screw on the
bottom of the satellite.
ole
Step 2.
Mark the positions on the wall where you would like to
place the mounting screws.
Step 3.
Attach the back plate of the bracket to the wall using
three screws (not included).
Step 4.
Attach the front plate
(with the spring tab) of the bracket to
the satellite, using the provided screws.
Step 5.
Slide the satellite speaker
with attached bracket front plate
onto the back plate of the
bracket until the tab locks
into place.
To remove the speaker from
the wall, simply push in
the locking tab and slide
the speaker up.
back of the speaker to the screwhead on the wall. Once
positioned properly, the speaker should slide down slightly and
become secure.
®
Adjustable Wall Bracket
Step 1.
Remove the rear foot by loosening the screw on the
bottom of the satellite.
Step 2.
Mark the positions on the wall where you would like to
place the mounting screws.
Step 3.
Place bracket against the wall and fasten four 1-1/2"
#10 wood screws through the bracket’s screw holes into the
wall. If a wall stud is not available, use an appropriate anchor.
Step 4.
Unscrew round collar (C) from bracket (A).
A
B
C
TSS-SAT1200 OM 7/27/06 4:44 PM Page 4