Iring the, Ystem, Inal – Infinity Interlude IL 25c/36c OM IL25c User Manual
Page 3: Djustments, Are of, Peaker
3
INTERLUDE IL25c, IL36c
IMPORTANT: Make sure all equipment is turned off before
making any connections.
For speaker connections, use a minimum #16-gauge speaker
wire with polarity coding. The side of the wire with a ridge or
other coding is usually considered positive polarity (i.e., +).
NOTE: If desired, consult your local Infinity dealer about speaker
wire and connection options.
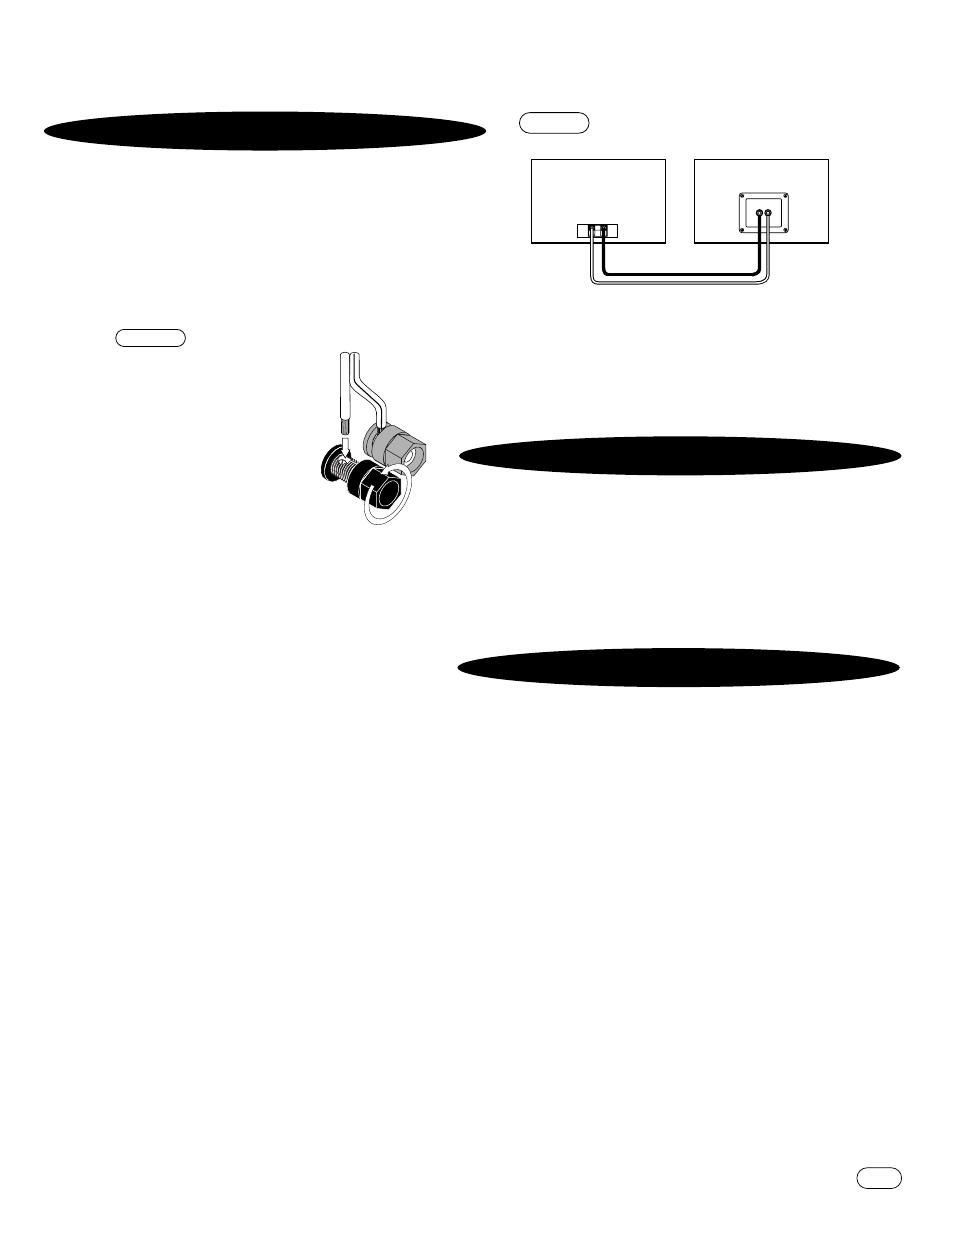
To ensure proper polarity, connect each + terminal on the back
of the amplifier, receiver or television to the respective + (red)
terminal on each speaker, as shown in Figure 3. Similarly,
connect the – (black) terminals in the same way. Also, see the
owner’s guides that were included with your amplifier or
receiver to confirm connection procedures.
W
IRING THE
S
YSTEM
Red =
+
Black =
–
❶
Loosen Terminal
❷
Insert
Bare End;
Tighten Terminal
Speaker Wire
Marking =
+
No Marking =
–
Receiver or
Amplifier
(rear view)
Interlude Center
red
black
(one channel shown)
+
–
-
+
F
INAL
A
DJUSTMENTS
C
ARE OF
Y
OUR
S
PEAKER
S
YSTEM
F
IGURE
3
–
Interlude series
speakers feature
color-coded
terminals.This
example shows the
most common way
of connecting
speaker wire by
directly inserting
into terminals.
F
IGURE
4
– Wiring diagram shows polarity connections for
one channel of a stereo or home-theater system.
IMPORTANT: Do not reverse polarities (i.e., + to – or – to +)
when making connections. Doing so will cause poor imaging and
diminished bass response.
Check the speakers for playback first by setting the system
volume control to a minimum level, and then by applying power to
your audio system. Following the directions provided with your
receiver/processor, adjust the center-channel volume so that it
matches the output of the left and right speakers.
Each Interlude series cabinet has a wood-vinyl finish that
does not require any routine maintenance. When needed, use
a soft cloth, dampened with water only, to remove any
fingerprints or dust.
Clean the grille by gentle vacuuming.
NOTE: Do not use any cleaning products or polishes on the
cabinet or grille.