Using the ch+ and ch- buttons, Using the previous channel button, Information about usa channel numbering – Insignia NS-LCD26A User Manual
Page 16: Channel numbering example, Customizing the picture, Adjusting the video features
14
Insignia NS-LCD26A LCD TV
www.insignia-products.com
Using the CH+ and CH- buttons
To browse through the channels:
•
Press:
•
CH+ to browse up the channels.
•
CH- to browse down the channels.
Using the previous channel button
To switch between two channels:
•
Press the previous channel
button to
switch between the current channel and the
previous channel.
Information about USA channel numbering
•
The ATSC PSIP channel uses a two part
channel number which includes:
•
a major channel number
•
a minor channel number
•
In the US, in most locations the major
channel number is the same for both analog
and digital channels (It is equal to the NTSC
channel number for existing broadcasters.)
•
In the US, a minor channel number of zero is
used for a broadcaster's analog channel.
Channel Numbering Example
•
Original NTSC channels for Des Moines, IA:
5, 8, 11, 13, and 17.
•
Possible NTSC + ATSC channels for Des
Moines, IA: 5-0, 8-0, 11-0, 13-0, and 17-0
(channel numbers for existing analog
channels) and 5-1, 5-2, 8-1, 8-2, 8-3, 8-4,
and 13-1 (channel numbers for digital
channels).
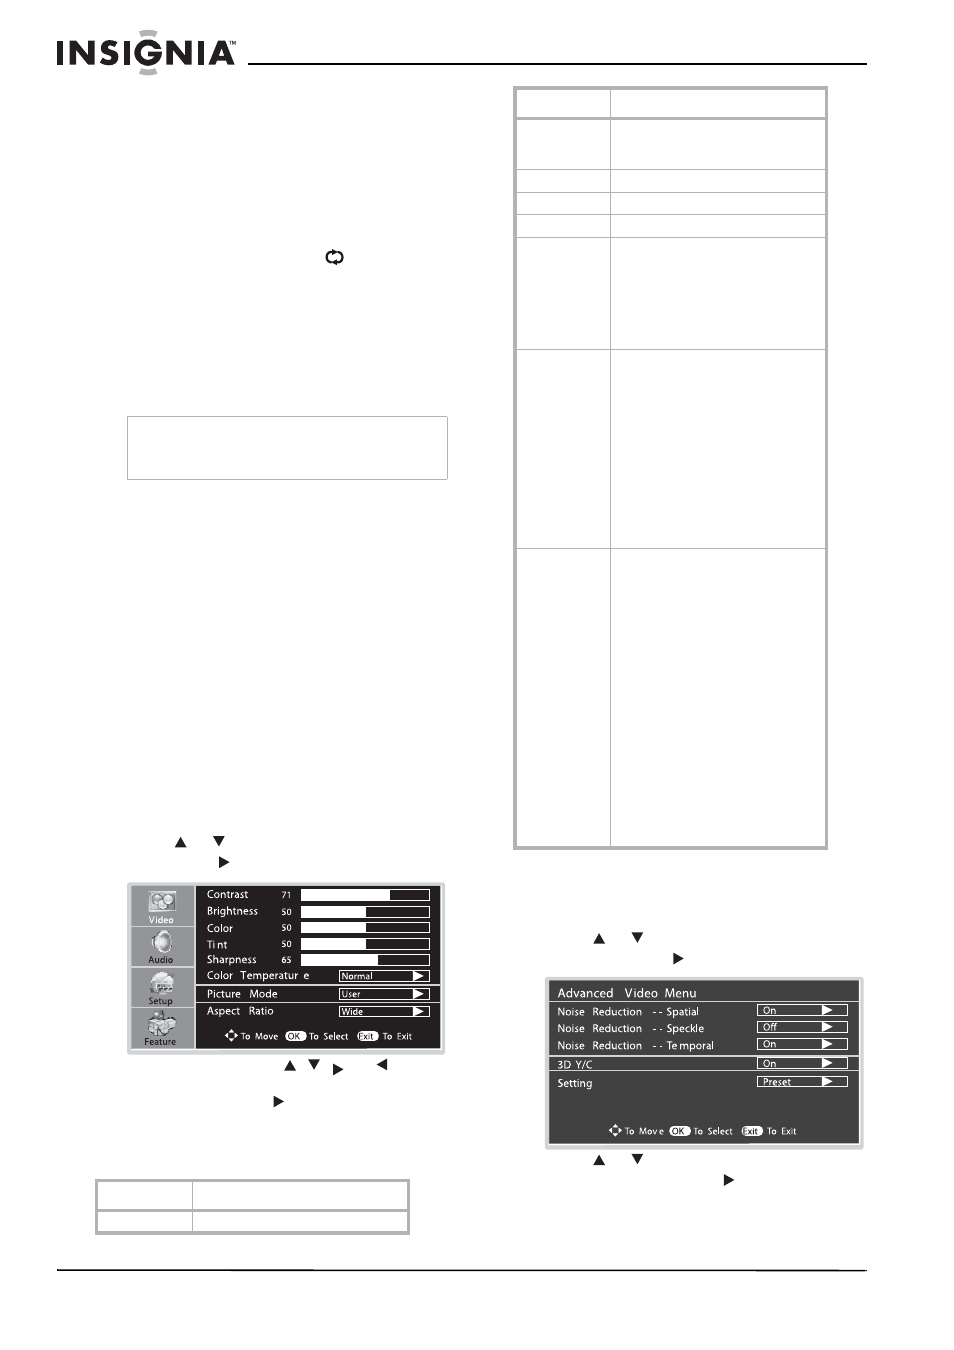
Customizing the picture
To customize the picture:
1 Press MENU.
2 Press
or
to select Video menu, then
press OK or to access the submenu.
3 Within the menu, use
,
, , or
to
navigate through the options or adjust an
option. Press OK or to confirm a setting,
enter a sub-menu, or toggle the settings of
the selected menu item.
Options include:
Adjusting the video features
To adjust the video features:
1 Press MENU.
2 Press
or
to select the Feature menu,
then press OK or to access the submenu.
3 Press
or
to select Advanced Video
Menu, then press OK or to access the
menu.
Note
Example: Channel 5-1. The “5” is the major
channel number and the “1” is the minor channel
number.
Options
Description
Contrast
Adjust the image contrast.
Brightness
Adjust the screen brightness for
easier viewing of dark picture such
as night scenes and black hair.
Color
Adjust the color saturation.
Tint
Adjust the image tint.
Sharpness
Adjust the image sharpness.
Color
Temperature
Select from one of three automatic
color temperatures.:
• Cool—Less intense colors
with more blue.
• Warm—More hot colors,
such as red.
• Normal—Average colors.
Picture Mode
Select from one of four picture
modes:
• Nature—Displays a normal
picture.
• Soft—Displays a finely
detailed picture.
• Bright—Display a bright
picture.
• User—Create your own
picture quality.
Note: To quickly change the picture
mode, press the PICTURE button on
the remote control repeatedly.
Aspect Ratio
Select from one of four aspect ratios
(display proportions) according to
your video signal type or personal
preference. You can select from:
• Wide—Displays a full-screen
picture.
• Cinema—Stretches the
picture at the edges while
maintaining a good aspect
ratio at the center of the
screen.
• Normal—Selects the correct
aspect ratio to match the
source’s image (4:3 or 16:9)
• Zoom—Magnifies the picture
while maintaining correct
screen proportions.
Note: To quickly change the aspect
ratio, press the ZOOM button on the
remote control repeatedly.
Options
Description