Milwaukee angle grinder User Manual
Page 6
page 6
Removing Welds or Hammer Marks
When removing welds or hammer marks, limit coarse sanding to the
immediate area. Use successively finer grits to smooth surface.
Cross Sanding
When finishing a surface that has been prepared by a coarse disc or
wheel, sand at right angles to the strokes made by the coarser disc.
Finishing marks left from previous sanding are easily seen and removed
for a uniform finish. Failure to cross sand when changing from a coarse
disc to a finishing disc may result in deep scratches and circular marks.
Finishing Metal
Constantly move across the surface. Work faster on curved surfaces
where contact areas are smaller and pressure is greater. Flat areas may
appear at the end of the stroke when pressure is too heavy. Ease up on
pressure at end of each stroke and when reversing strokes.
Troubleshooting
Deep scratches and circular marks can result from:
Using too coarse a grit
Using a partially glazed disc
Dirt or loose metal on the workpiece
Failure to sand across the grain when changing from coarse
to finishing discs
Failure to use closed coated discs to reduce the problem
of grains working loose and scratching the workpiece
Bluish discoloration of metal surface indicates:
Excessive heat caused by circular motion in a small area
Excessive pressure
Use of worn out or glazed discs
Inspecting Wheels
Always handle wheels carefully to avoid damage. Before installing any
wheel, always inspect it for cracks. If wheel is cracked, discard it to
prevent others from using it.
Care of Grinding & Cut-Off Wheels
Grinding and cut-off wheels should be protected from:
wetness and extreme humidity.
any type of solvent.
extreme changes in temperature.
dropping and bumping.
Grinding and cut-off wheels should be stored:
in an organized way so wheels can be removed without dis-
turbing or damaging other wheels.
with their safety information.
Grinding and cut-off wheels should NOT be:
dropped.
rolled.
bumped.
If any wheel is dropped, rolled, bumped, subjected to extreme changes
in temperature, or has come into contact with solvents or wetness,
discard wheel immediately.
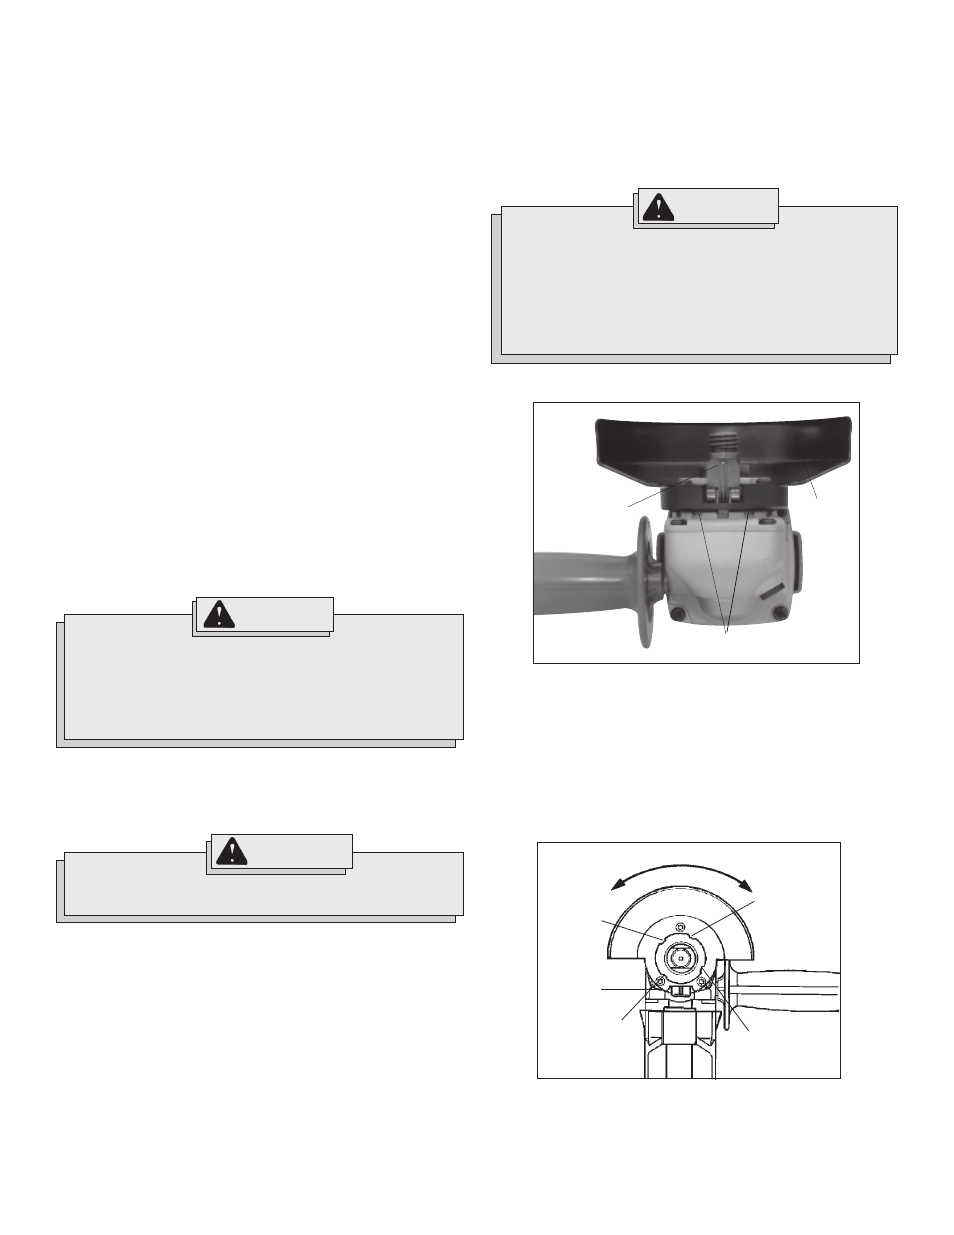
Installing, Removing and Adjusting the Guard (Fig. 3 & 4)
The guard must be used when using the tool as a grinder. The guard
should be removed when using tool as a sander.
1. To install the guard, unplug the tool and place it upside down on a
level surface.
2. Remove any accessories from the spindle.
3. Line up the four tabs with the four slots (Fig. 4) and then press the
guard down onto the tool.
4. Press in the lock lever and rotate the guard to one of the five detent
slots. The lock lever must engage with one of the detents. (Fig. 3)
To reduce the risk of injury:
ALWAYS use the proper guard.
ALWAYS properly install the guard.
ALWAYS hold the tool firmly with both hands before
beginning grinding.
NEVER use a wheel that has been dropped.
NEVER bang grinding disc onto work.
NEVER grind without proper safety equipment.
WARNING!
Only use wheels with Maximum Safe Operating Speed rated
at or above the RPM listed on the WARNING section of the
tool's nameplate. This speed is based on the strength of the
wheel, allowing for a reasonable measure of safety. It is not
meant to imply a best or most efficient operating speed. Do
not exceed the Maximum Safe Operating Speed.
WARNING!
To reduce the risk of injury, the operator should be in-
structed in the use, care and protection of grinding wheels.
WARNING!
Fig. 3
Lock lever
Fig. 4
Tab slot
Tab slot
Tab slot
Tab slot
Lock lever
Guard
Lock lever must engage
one of five detents