Electrical wiring (milli-volt), Connecting remote receiver, Installing t-stat sensor (option sold separately) – Monessen Hearth DEB20 User Manual
Page 23
44D0060
23
HIGH
LOW
26D3
317
THER
MOST
AT
SETTIN
G
HIGH
LOW
26D33
17
THER
MOS
TAT
SE
TTIN
G
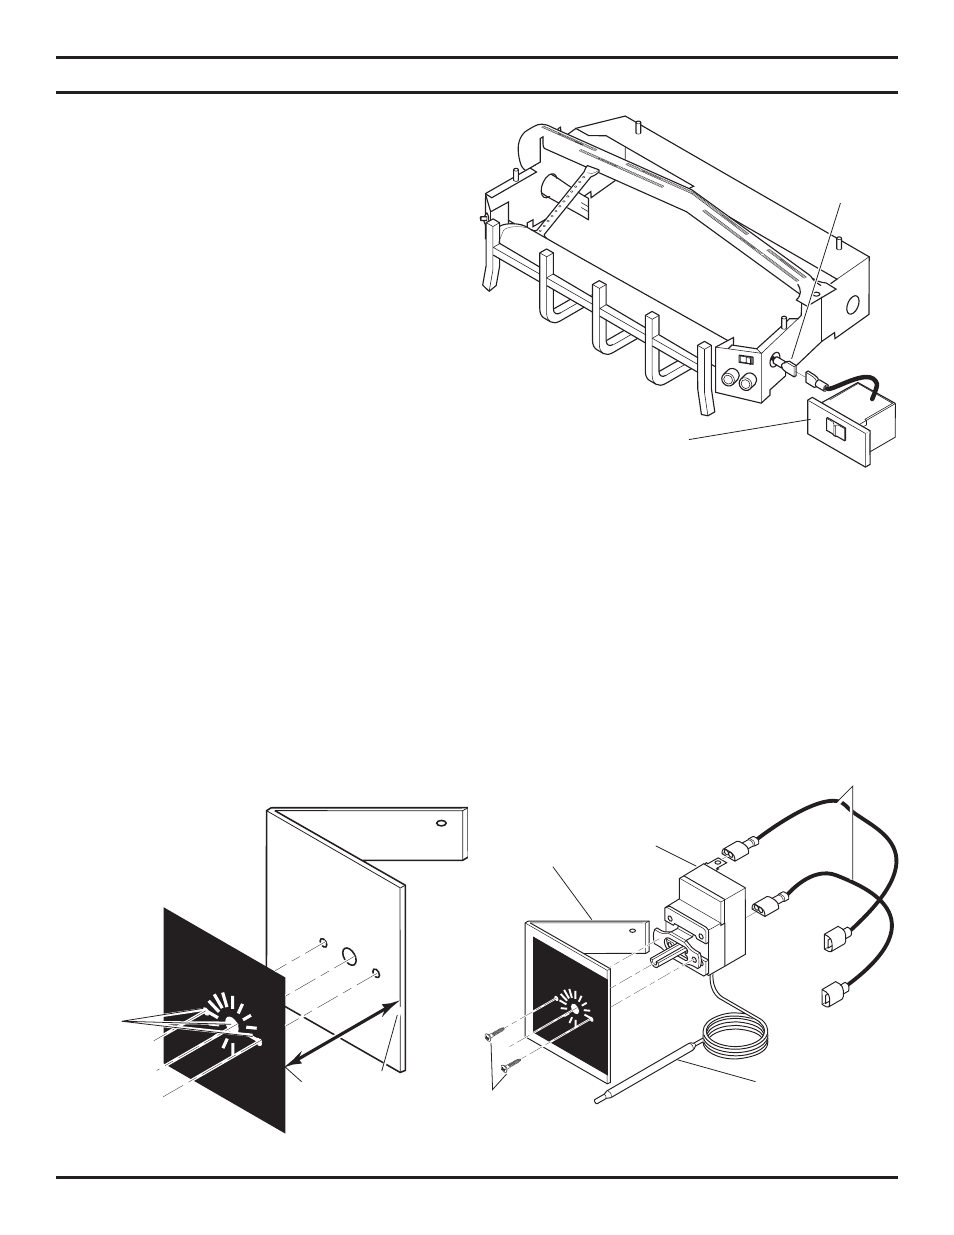
ELECTRICAL WIRING (MILLI-VOLT)
CONNECTING REMOTE RECEIVER
1. Connect the connectors to the two .25" male con-
nectors located on the right side when facing the
unit (Figure 19). Do not let the wire touch the grate
or burners.
NOTE: Heat reduces battery life. You can
protect the receiver and extend battery life
by mounting the receiver in a wall or other
location outside the fi replace.
Remote
Receiver
Remote
Wire
Connectors
Figure 20 - Applying Label to Bracket
Flush edge of label to
right side of bracket
Line Up
Holes
INSTALLING T-STAT SENSOR (OPTION SOLD SEPARATELY)
1. Remove metal bracket and label from box.
2. Peel away the paper backing on the label. Line up holes in label with holes on the bracket. Right side of label should
flush with right side of bracket. See Figure 20. Press label firmly and smoothly to bracket.
3. Using Phillips screwdriver, install t-stat sensor to bracket with two screws provided. See Figure 21. Make sure the
thermo bulb wire is at the bottom of t-stat sensor.
4. Plug in wiring harnesses to back of t-stat sensor. See Figure 21.
Figure 21 - Installing T-Stat Sensors
and Wiring Harnesses
Wiring
Harnesses
T-Stat
Sensor
Bracket
Screws
Thermo Bulb
Figure 19 - Installing Remote Receiver