Setting up your snow thrower – MTD 769-01275C User Manual
Page 7
7
5
Setting Up
Your Snow
Thrower
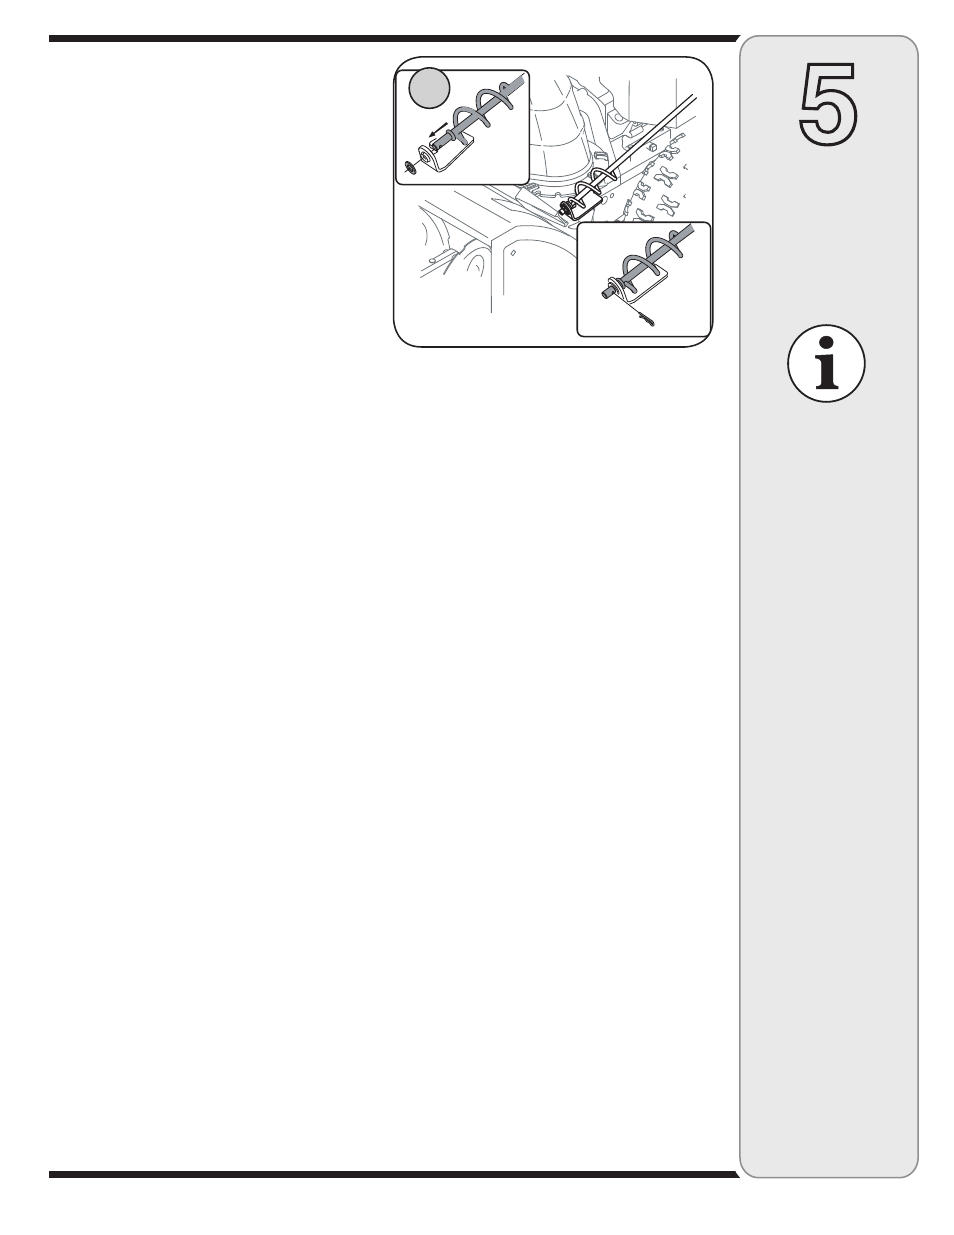
5. Remove the flat washer and hairpin clip from the end
of the chute directional control.
Insert the end of the chute directional control into the
lower bracket and secure with the flat washer and hair-
pin clip just removed. If necessary, the lower bracket
can be adjusted. Refer to Chute Bracket Adjustment.
on Page 13.
Adjustments
Auger Control
IMPORTANT: Prior to operating your snow thrower, refer
to Auger Control Test on page 11. Read and follow all
instructions carefully and perform all adjustments to verify
your snow thrower is operating safely and properly.
Skid Shoes
IMPORTANT: It is not recommended that you operate
this snow thrower on gravel as loose gravel can be easily
picked up and thrown by the auger causing personal
injury or damage to the snow thrower.
The snow thrower skid shoes are adjusted upward at the
factory for shipping purposes. Adjust them downward, if
desired, prior to operating the snow thrower. Refer to Skid
Shoes on page 13.
NOTE: If you choose to operate the snow thrower on
a gravel surface, keep the skid shoes in position for
maximum clearance between the ground and the shave
plate.
Tire Pressure
Before operating, check tire pressure and reduce pres-
sure in both tires to between 15 psi and 20 psi.
NOTE: If the tire pressure is not equal in both tires, the
unit may not travel in a straight path and the shave plate
may wear unevenly.
IMPORTANT
Prior to operating your
snow thrower, refer
to Auger Control Test
on page 11. Read and
follow all instructions
carefully and perform
all adjustments to verify
your snow thrower is
operating safely and
properly.
5