McIntosh MCC406M User Manual
Page 18
18
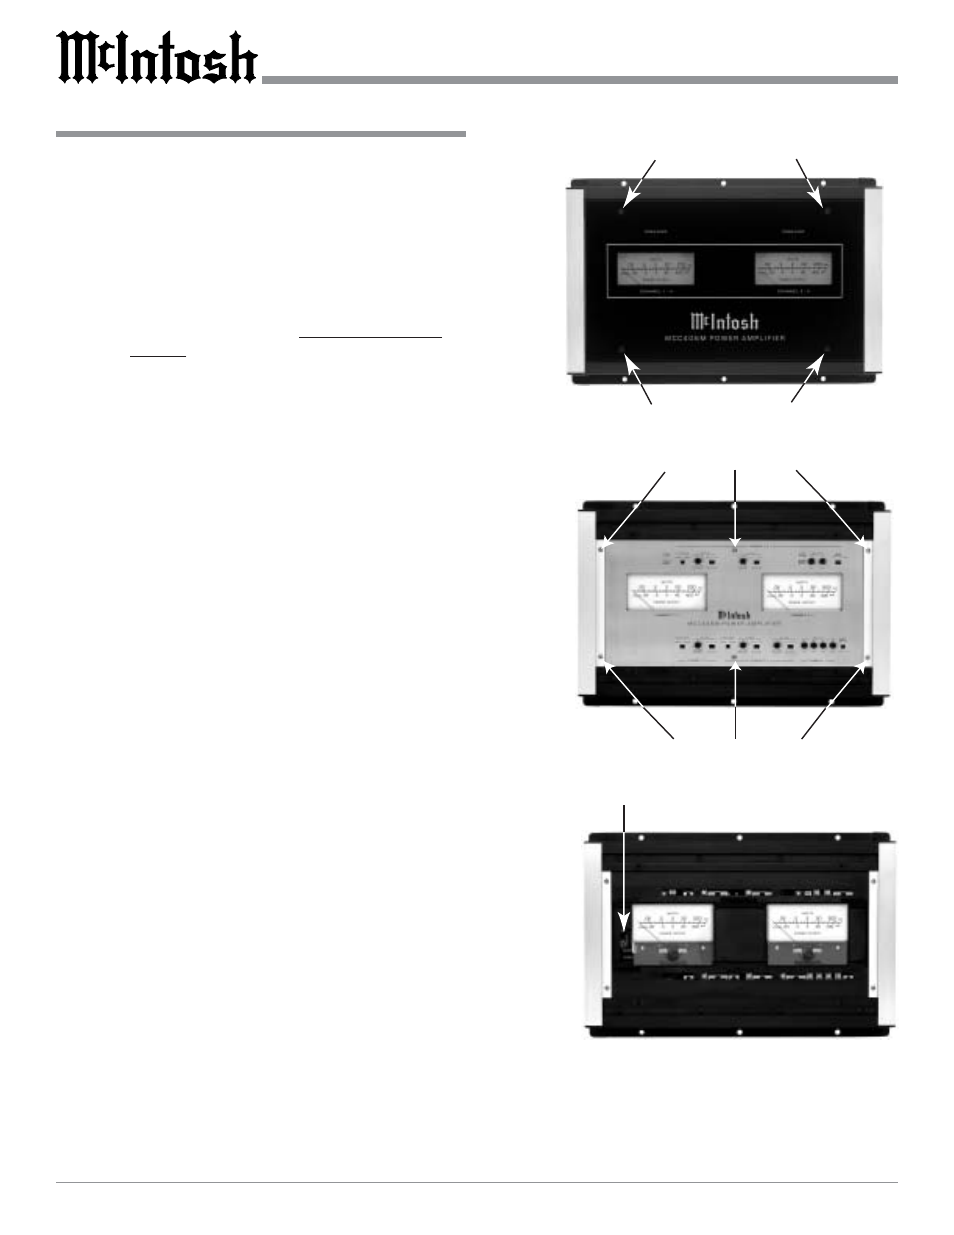
How to Replace the Fuses
How to Replace the Fuses
If the MCC406M produces no sound, there is no
Illumination of the Nomenclature on the Top Glass Panel,
and the power connections seem secure, one or more of the
Amplifier Fuse(s) may have failed. Under normal operating
conditions your amplifier’s fuses should not fail. Failure of
a fuse is usually an indication of a problem. Replacing the
fuse, if there is problem in the amplifier, may incur a risk
of further damage. Refer to figures 10, 11 and 12.
Caution: Disconnect the Amplifier from the Vehicle Battery
( or DC Power Supply) as Potentially Dangerous
Currents exist inside the amplifier.
1. Before accessing fuses, disconnect both the
positive and negative power cables from the DC
input terminals on the left side of the amplifier
using a 5/32” hex key.
2. Remove the Top Glass Panel by first removing the
four hex bolts with the supplied 3/32” hex key.
3. To remove the Top Glass Panel, attach the supplied
suction cup to the top center of the glass panel and
carefully raise it high enough to put your hand
under. Temporarily place the removed glass panel
in a safe place, remove the suction cup and save it
for future use.
4. Remove the Phillips Screws holding the End Caps
on both sides of the amplifier and lift the end caps
off.
5. Remove the two Phillips screws located between
the low and high pass filter controls.
6. Remove all 12 crossover, equalizer and sensitivity
knobs.
7. Remove the Gold Faceplate Control Panel.
8. Remove the fuses with needle nose pliers, taking
care to avoid hitting the wattmeter during removal.
Do not lever the pliers against the wattmeter.
Note: To determine if the fuse has failed, examine the
link between the two fuse legs to see if it has a
break in it.
9. Replace the fuse with one of the same type and
rating as unauthorized substitutions may prove
hazardous to you and the amplifier.
10. When reinserting the fuse, set it in place with the
pliers, then push it the rest of the way in with your
finger to avoid having the pliers slip and hit the
circuit board.
11. Re-install the Gold Faceplate Control Panel and all
12 crossover, equalizer and sensitivity knobs.
12. Re-connect the power cables to the vehicle battery.
If the replacement fuse(s) fails again, have the amplifier
repaired at a McIntosh Service Center.
Remove Top Cover Screws
Remove Top Cover Screws
Figure 10
Remove Three Screws
Figure 11
Remove Three Screws
Figure 12
Location of the four fuses