Monte Carlo Fan Company 5MQ60XX User Manual
Page 4
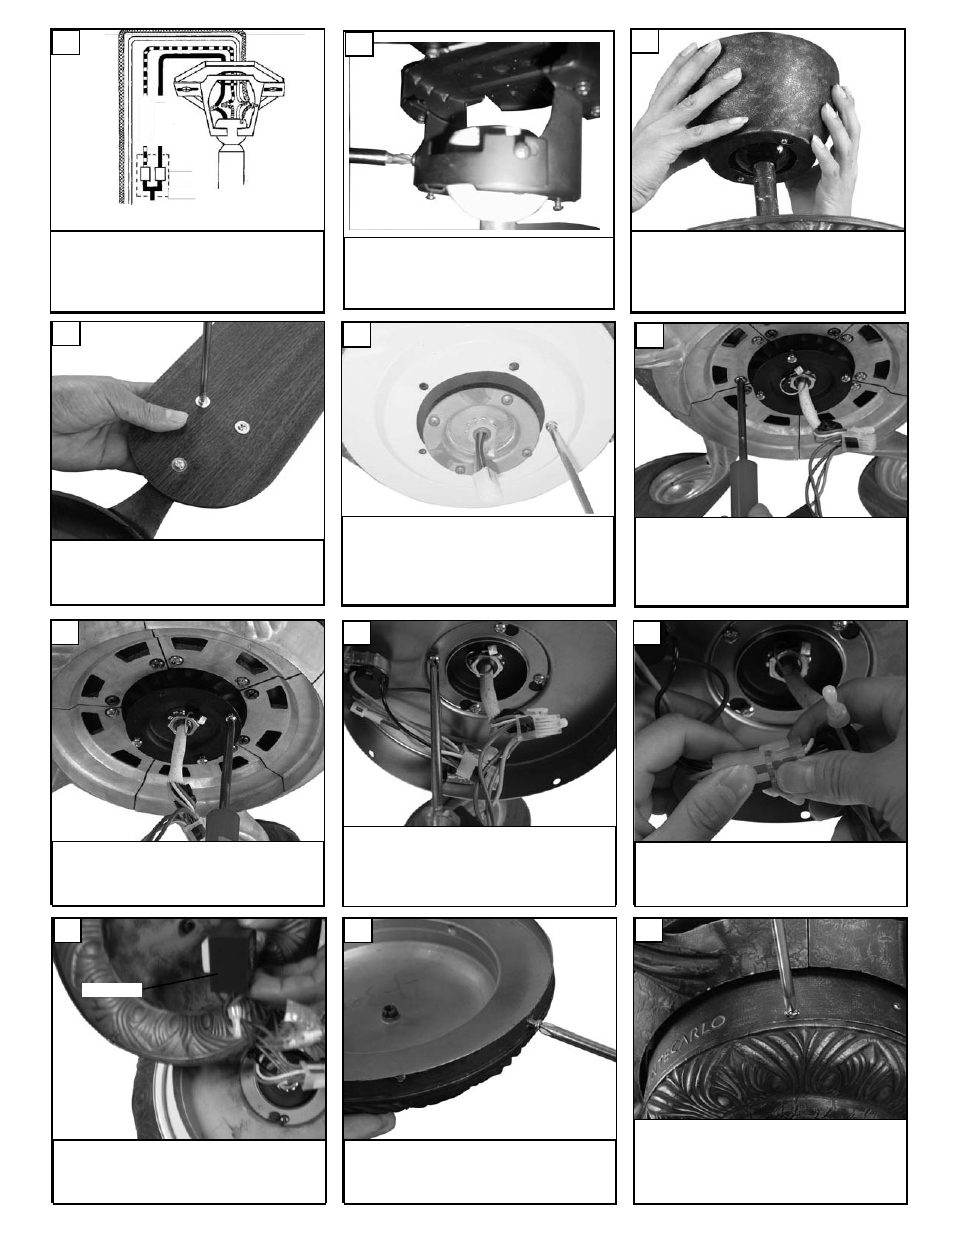
Install the switch housing using the 4
screws previously removed.
30
Remove 4 screws and save to install
switch housing.
29
Install switch housing plate by twist-
ing plate with key hole slots into
place. Replace screw removed and
tighten the 4 screws securely.
26
Connect plug from fan to switch
house plug.
27
For control of fan and optional light from wall
location, follow diagram above. NOTE: A profes-
sional electrician is recommended for this type
of installation.
19
Raise the canopy up and align the
two holes in the canopy with the two
holes in the hanger bracket. Secure
with two screws provided.
21
Li
gh
t
Sw
it
ch
Fa
n
Sw
it
ch
Wall
Control
Re-install safety bar removed in
step. 3 by placing safety bar on
screws, sliding into place, and tight-
ening the 2 screws.
20
Loosen 3 screws with key slots and
remove 1 screw without slot from
motor plate and save screw.
25
Install 3 screws and washers per
blade and tighten securely. Repeat
for all 5 blades
22
The screws, washers, and motor
pads are pre-installed to the blade
holders. Attach blade assembly to
motor and tighten screws securely.
24
Remove the steel motor stabilizing
plate and discard.
23
Remove the double sided tape from
capacitor and stick capacitor to
switch housing.
28
capacitor