Mr. Coffee AR Series User Manual
Page 4
7
6
F
IGURE
A-1
F
IGURE
B-1
Coffeemaker Features
5
6
11
10
7
2
1
8
4
M
ODELS
AR10, AR11,
AR12
AND
AR13
M
ODELS
ARX10, ARX11, ARX20
AND
ARX23
1. ON/OFF Switch
(Models AR10, AR11,
AR12 and AR13 Only)
2. Control Panel
(Models ARX10, ARX11, ARX20
and ARX23 only)
a. Hour Button
b. Minute Button
c. Brew Button
d. On-Off Indicator
e. Auto Indicator
f. PM Indicator
g. Clock Display
3. Removable Brew Basket
4. Brew Basket Lid
5. Water Reservoir
6. Water Window
7. Power Cord
8. MR. COFFEE
®
Brand
8-12 Cup Basket
Style Coffee Filters
(not included)
9. MR. COFFEE
®
Brand
Permanent Filter
(not included)
10. Warming Plate
11. Decanter
9
3
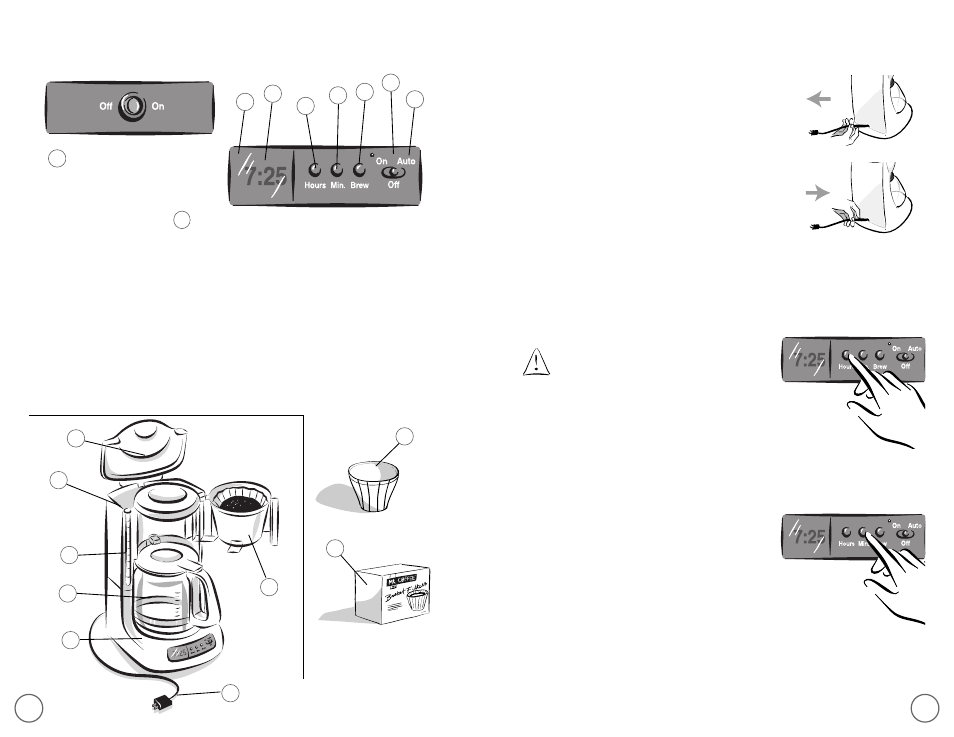
Adjusting the Power Cord Length
You can customize the length of the power cord
so that it is the exact length you desire.
To increase the length of the power cord:
Grasp the power cord (not the power plug)
and gently pull it away from the coffeemaker.
To decrease the length of the power cord:
Grasp the power cord and feed
into the coffeemaker.
Setting the Clock
(Models ARX10, ARX11, ARX20 and ARX23 only)
The clock flashes on the control panel to indicate
that it has not been set.
You must set the clock if you want to use
the timer feature.
To set the clock:
1)
Press and hold the HOUR button until the clock
displays the correct hour. See Figure A-1
(for Models ARX10, ARX11, ARX20 and ARX23).
The PM indicator will light to indicate a PM time;
if the PM indicator is not lit, the time is AM.
2)
Press and hold the MIN. button until the clock
displays the correct minute. See Figure B-1
(for Models ARX10, ARX11, ARX20 and ARX23).
The clock is now set.
a
c
f
g
d
e
b